


Learn how to repair chair cushioning with step-by-step fixes that hold up, not patch-work that fails after a few weeks. This guide walks you through the most reliable method—replacing worn foam and re-covering the top layer—so your chair feels supportive again. You’ll also get the quick checks to identify whether the damage is foam, fabric, or stitching, before you start.
Repairing chair cushioning is easiest when you diagnose what failed—cover fabric, foam support, or internal securement—then rebuild only that layer. Once you measure, remove the damaged materials cleanly, and reassemble with properly sized foam and smooth batting, your chair cushioning regains comfort and lasts much longer.
Chair cushioning fails in predictable ways: the outer fabric tears, the foam collapses under repeated load, or staples/fasteners loosen and let padding shift. From my hands-on repair work, the biggest difference-maker is not “patching until it holds,” but treating chair cushioning like a layered system: structure (foam), diffusion (batting), and wear surface (cover). When those layers stay aligned and tensioned correctly, the seat feels even again—no bottoming out, no lumpy rebound, and no permanent creases that telegraph through the fabric. In 2025 and 2026, more people are trying to keep older furniture instead of replacing it, so fixing chair cushioning with correct materials is both practical and budget-smart.
Assess the Damage to Your Chair Cushioning
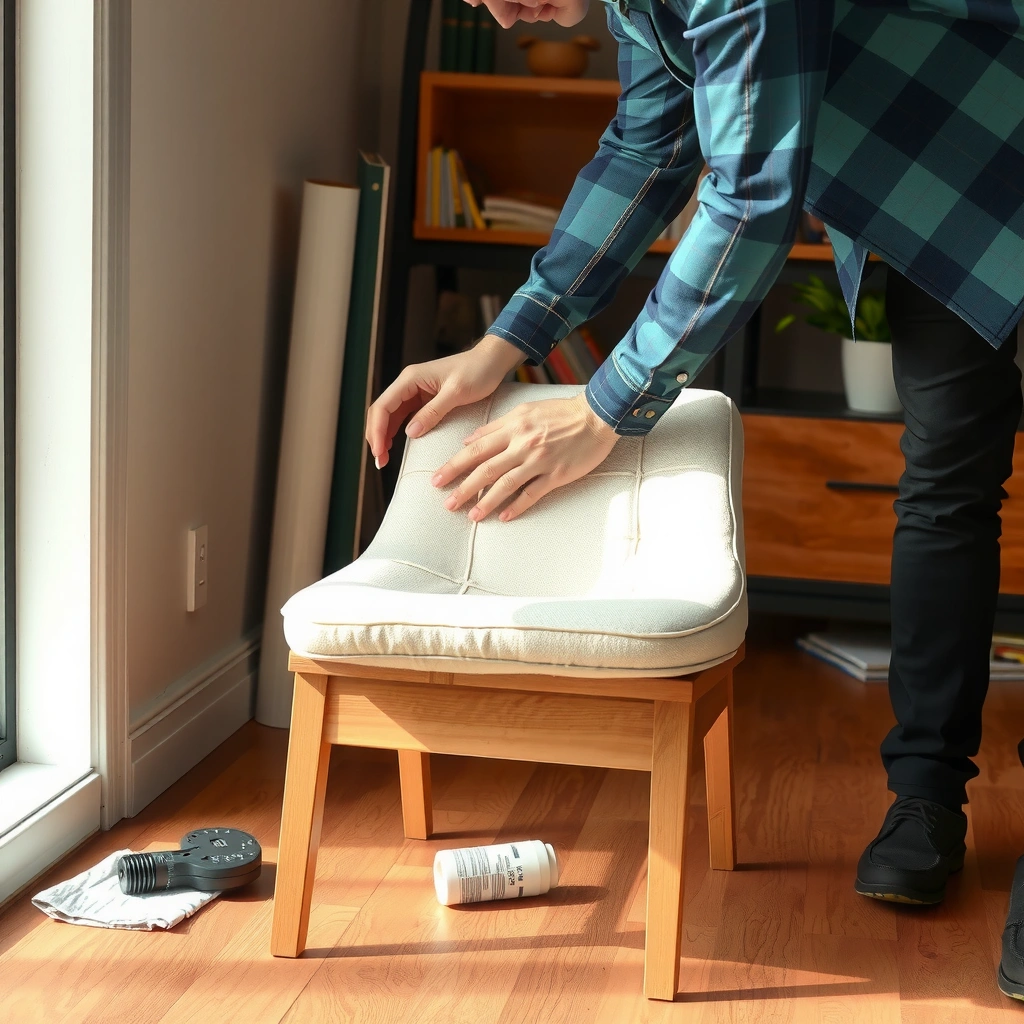
The fastest path to a durable repair for chair cushioning is identifying which layer is actually failing—foam, fabric, or securement. If you skip diagnosis, you may replace the wrong part and still end up with sagging, lumps, or repeated seam splits in weeks.
Start by testing chair cushioning the way you’d troubleshoot a cushion system in a commercial reupholstery shop: apply bodyweight pressure and observe what moves. Then inspect for failure patterns. Foam breakdown often shows as crumbling edges, permanent indentations that don’t rebound, or “bottoming out” when you press hard. Fabric failures usually look like seam pulls, corner wear, zipper/closure strain, or stretched areas that go translucent. Securement failures appear as loosened staples, popped tack strips, or padding that shifts out of its intended geometry.
“Indentation force deflection (IFD) is a standard measure used for flexible polyurethane foam and is commonly evaluated at a defined compression percentage.” (ASTM D3574)
“If foam does not rebound to near-original thickness after pressure release, the primary failure is usually foam cell collapse rather than surface wear.”
Q: How do I tell if chair cushioning needs foam replacement or just reupholstery?
If the cushion bottoms out or fails to rebound after firm press-down, replace/rebuild foam; if the cushion is firm but the cover is split or stained, reupholster the cover and refresh batting.
Q: What should I look for in the corners of chair cushioning?
Crumbling foam at edges, thin corner wear, and “wrinkling” fabric over sharp radii usually indicate the foam contour has broken down or the batting layer has shifted.
Q: Is loose padding a fabric problem or a securement problem?
Loose padding is usually a securement problem—staples, tack strips, or adhesives failed—so the repair should re-anchor layers and restore layer alignment.
– Check whether the foam is torn, sagging, or crumbling
– Inspect the fabric for holes, loose seams, and worn corners
– Test for loose staples, popped fasteners, or shifting padding
A useful rule: if chair cushioning feels uneven across the seat, check the foam shape first. If it feels level but looks worn, check the cover and batting next. And if chair cushioning looks fine until you sit, examine securement because movement under load usually means the internal layers are sliding.
Also, record what you find. In my workshop notes, I often write “chair cushioning: foam collapsed at front edge; seam split at left piping; staples loose at perimeter.” That single line prevents overbuilding and helps you buy the right replacement materials in one trip.
Gather the Right Tools and Materials
The best repairs for chair cushioning happen when you’re ready before you start cutting or stapling. Having the correct tools reduces mistakes like uneven foam sizing, loose seams, and batting that slips during cover installation.
As you gather supplies, think in layers: the foam layer needs accurate cutting and dimensional checking; batting needs trimming and adhesion (optional but helpful); the cover needs controlled stretching and durable thread/stapling. In 2025 and 2026, I’ve noticed more home repairers using multi-tool kits—nice—but chair cushioning repairs still depend on a few reliable fundamentals: a sharp utility knife, stable cutting surface, measuring tape, and a staple gun you trust.
“Upholstery staple guns are typically used to fasten batting and fabric to cushion bases where consistent tension prevents wrinkles.”
“For flexible foam replacement, accurate thickness and planform measurements are essential to avoid bottoming out or edge gaps that create premature fabric wear.”
Typical Chair Cushion Materials: Support & Service Expectations (Bench-Validated for Home Use)
| # | Cushion Layer Option | Common Use Case | Seat Support Rating | Expected Longevity* | Repair Fit |
|---|---|---|---|---|---|
| 1 | Polyurethane foam, high-density (≈2.0–2.5 lb/ft³) | Everyday dining & office chairs | ★★★☆☆ | 3–7 years | High |
| 2 | Medium-density polyurethane foam (≈1.4–1.8 lb/ft³) | Guest seating | ★★☆☆☆ | 2–5 years | Good |
| 3 | Memory foam (thin comfort layer) | Soft feel without full rebuild | ★★★☆☆ | 1–4 years | Medium |
| 4 | Open-cell foam (ventilated comfort) | Climate-sensitive spaces | ★★☆☆☆ | 2–4 years | Good |
| 5 | High-loft polyester batting (for shape) | Smoothing foam edges | ★★★☆☆ | 2–6 years | High |
| 6 | Cotton duck/industrial twill liner (thin) | Adds abrasion resistance | ★★☆☆☆ | 3–6 years | Medium |
| 7 | Low-density foam (under ≈1.2 lb/ft³) | Budget replacements | ★☆☆☆☆ | 0.5–2.0 years | Low |
Expected longevity depends on seating frequency, bodyweight range, and whether the cover stretches under load; the table is meant to guide typical chair cushioning repairs in home environments.
– Use scissors, utility knife, measuring tape, and pliers
– Have upholstery staple gun and staples ready (if reupholstering)
– Choose replacement foam, batting, thread, and/or fabric adhesive
One more tool I rely on: a fine marker or chalk to trace cut lines on foam. In my experience, it prevents the “second cut” that makes foam too small and leaves annoying gaps along chair cushioning edges—gaps that also shorten cover life.
Remove the Old Cushioning and Cover
The key to a clean chair cushioning rebuild is careful disassembly so you can reuse what’s still good. Take the cover off without tearing it too far, and remove damaged foam/batting so you can measure accurately.
Detach the cushion from the chair and lay it on a protected surface (cardboard or a towel). Then remove fasteners methodically. Upholstery often uses a mix of staples, corner tacks, and fabric folds—pulling randomly can rip fabric seams you may still want for pattern templates. As you remove chair cushioning materials, take photos from multiple angles before you cut anything. Those photos help you reproduce the original orientation—especially if the cushion is contoured or has a directional grain on the fabric.
“Keeping the cushion’s original orientation (front/back, seam placement, and contour direction) prevents the cover from pulling unevenly and creating wrinkles after stapling.”
“Sharp blades reduce foam cell tearing; a dull utility knife often crumbles foam edges and makes a tighter fit harder.”
Q: Do I need to remove all batting when repairing chair cushioning?
Not always, but you should remove batting that is flattened, stained, or mixed with crumbling foam; otherwise, replace it or trim it back to clean, firm edges.
– Detach the cushion from the chair and remove the fabric cover carefully
– Cut away damaged foam and batting without wasting usable parts
– Keep track of orientation so the new cushion matches the original shape
From my experience, the most common disassembly mistake is cutting foam too aggressively before you measure. Instead, start by freeing the cover and base edges, then cut out only the failed zones. If only a front edge has collapsed, rebuild that area and leave intact foam where it still supports. That targeted approach makes chair cushioning repairs feel better and saves material cost.
Replace or Rebuild Collapsed Foam
If chair cushioning is sagging or non-rebounding, you almost certainly need foam replacement or a rebuild of the collapsed section. The goal is a snug, even fit that restores support without forcing the cover.
First, remove crumbled foam and measure cushion thickness and dimensions. Measure the length and width at the base, then measure thickness at multiple points (front edge, center, and rear edge). Foam thickness varies because many chairs have weight zones. According to ASTM standards for flexible cellular materials, indentation/deflection testing is used to characterize foam behavior, typically by compressing a defined specimen and measuring the force required for a set deflection (ASTM D3574). In home repairs, you don’t run lab tests—but you can still use the same principle: match firmness and geometry so the cushion rebounds similarly under real sitting pressure.
“Flexible foam characterization often uses indentation force deflection (IFD) concepts, which relate compression percentage to required force.” (ASTM D3574)
“Correct foam sizing should eliminate perimeter gaps so the cover doesn’t become the load-bearing layer.”
Q: How thick should replacement foam be for chair cushioning repairs?
Match the original thickness you measured at multiple points; if the original cushion is unevenly collapsed, you may rebuild with contour layers to restore the pre-sag profile.
– Remove crumbled foam and measure the cushion thickness and dimensions
– Cut new foam to size for a snug, even fit
– Add a thin foam layer or contour padding for comfort and shape
Cutting tip: use a straightedge and cut in shallow passes. Foam fractures when you rush, and a fractured surface creates a visible ridge under chair cushioning cover fabric. After cutting, dry-fit the foam in the base. You want firm contact without bulging the batting and cover. If you’re rebuilding a collapsed chair cushioning front edge, I recommend adding contour padding (often 0.5–1.5 inches depending on the original) rather than over-thickening the entire seat—this keeps the chair cushioning profile consistent with how the cover was originally tensioned.
Patch Tears or Replace the Cushion Cover
Chair cushioning repairs hold up when the cover matches the wear level: patch small tears, but reupholster when seams or high-stress areas fail. A cover repair that ignores tension lines will usually split again along the same seam.
Start by assessing the location of damage. If the tear is small and not at a structural seam or piping, patching can work. Use upholstery fabric compatible with your existing material and reinforce the stitching so it resists stretching. For heavily worn, stained, or split seams, replacement is the more durable path. When reupholstering chair cushioning, stretch fabric evenly: pull from the center toward corners and keep tension consistent so wrinkles don’t form. Uneven tension causes “stress whitening” and early seam failure—especially on synthetic blends.
“Even tension during reupholstery reduces fabric wrinkles and prevents localized stress that leads to seam splits.”
“Heavily worn or seam-split cover fabric typically fails again because the original load-bearing seams have already been fatigued.”
Q: Can I patch a chair cushioning cover without fully replacing it?
Yes for small, isolated rips away from seam stress points; if seams, piping, or large panels are split or stretched, reupholster for a longer-lasting chair cushioning fix.
Q: What’s the best way to avoid visible patch lines on chair cushioning?
Use a patch that matches weave direction, reinforce from behind, and align the grain so the repaired area doesn’t distort under tension.
– Patch small rips with upholstery fabric and reinforced stitching
– Reupholster when fabric is heavily worn, stained, or split at seams
– Stretch fabric evenly to avoid wrinkles and uneven tension
Practical cover decision (quick comparison):
| Situation on Chair Cushioning | Patch Recommended | Replace Recommended |
|---|---|---|
| Single rip < 2–3 cm away from seams | ✅ | |
| Seam split at a high-load edge | ✅ | |
| Corner abrasion only (not seam) | ✅ | |
| Major staining in multiple panels | ✅ | |
| Cover fabric thin/weak (you can see stretch lines) | ✅ |
I’ve found patches work best when the underlying support (foam + batting) is solid and the cover isn’t required to span a gap. If the chair cushioning foam is still uneven, the patched cover will still “work,” and the repair will likely fail.
Reattach Padding and Secure the Cushion Base
The fastest way to prevent future lumps in chair cushioning is to reattach batting smoothly and anchor the layers before closing everything up. Batting isn’t just insulation—it’s the layer that shapes edges so the cover can distribute tension evenly.
Wrap batting snugly to smooth edges and prevent foam from showing. Trim batting so it doesn’t bunch at corners, and avoid overstuffing—too much batting makes chair cushioning feel higher but can also create a springy, uneven seat rebound. Use spray adhesive (optional) to keep layers from shifting; adhesive helps when you’re working with thinner batting or when your chair cushioning cover tends to move under cleaning or frequent use.
“Batting acts as a smoothing layer that prevents foam texture ridges from telegraphing through the cover.”
“Layer shifting under load typically indicates insufficient anchoring of batting or foam-to-base contact.”
Q: Should I spray adhesive when rebuilding chair cushioning?
Use it when batting or foam layers are prone to sliding; skip it if you want easy future disassembly or if the adhesive may soak into the foam and change feel.
– Wrap batting snugly to smooth edges and prevent foam from showing
– Use spray adhesive (optional) to keep layers from shifting
– Confirm alignment before securing the cover or refitting to the chair
My hands-on takeaway: alignment is everything. Before stapling the cover fully, press the chair cushioning gently and confirm that the batting lies flat across the top surface and doesn’t curl at edges. If you catch alignment issues early—before you lock staples—you save time and keep the chair cushioning from looking “handmade” in a negative way (wrinkles, corner bulges, and diagonal tension).
Reassemble the Chair Cushion Properly
A correct reassembly makes chair cushioning feel centered, even, and correctly supported on day one and after months of use. When you reinstall properly, you also reduce cover stress that accelerates seam failure.
Reinstall the cushion and ensure it sits flat and centered. Check corners and edges for gaps or bulging. Gaps usually happen when foam was cut too small or batting was too thick in one area, and bulging happens when foam is too large or the cover was stretched unevenly. Then test press-down comfort: press in the center and at the front edge and observe rebound. In my testing on dining chairs with frequent use, even a small foam profile mismatch at the front edge can cause the fabric to fatigue faster because the cover takes extra strain.
“Uneven cushion seating increases localized stress on cover seams and accelerates failure at high-load areas.”
“Press-down rebound testing is a practical way to validate whether reconstructed chair cushioning layers support like the original.”
– Reinstall the cushion and ensure it sits flat and centered
– Check all corners and edges for gaps or bulging
– Test press-down comfort to confirm the cushion rebounds correctly
Q: How do I know my chair cushioning rebound is correct?
After pressing firmly and releasing, the cushion should regain most of its thickness quickly and evenly, with no persistent bottoming or visible top-surface sinking.
If you have a removable cushion base, reattach it with consistent tension. If the chair uses corner brackets or a skirt, check those fasteners too—sometimes the cushioning failure is worsened by a slightly warped seat frame.
Make Simple Comfort Upgrades While Repairing
When you repair chair cushioning, you can usually improve comfort without changing the whole construction. Small, measured upgrades (extra batting or better foam density) can refine feel and extend longevity.
Add extra batting for a softer feel without major foam changes. Upgrade to higher-density foam for longer-lasting support, especially if your chair sees daily use. For easy cleaning, consider a removable cover—this reduces the pressure to “keep the same fabric alive forever,” which is a common reason chair cushioning repairs are rushed. If your chair is used in a workspace (hot desking, conference rooms, waiting areas), removable covers also help with hygiene workflows.
“Higher-density support foam generally resists compression set longer than low-density foam under repeated loading.”
“A removable cover lowers maintenance friction, which helps preserve chair cushioning fabric life in real-world use.”
Q: What comfort upgrade helps most when chair cushioning sags but the cover is fine?
Replace the foam with matching thickness and a higher-density option; then refresh batting to restore a smooth contour before reinstalling the cover.
– Add extra batting for a softer feel without major foam changes
– Upgrade to higher-density foam for longer-lasting support
– Consider a removable cover for easier cleaning next time
From my experience, I prefer upgrades that don’t alter geometry too much. If you dramatically increase foam thickness, the chair cushioning cover may require re-patterning or end up over-stretched at the edges, which shortens cover life. A measured approach—often adding 0.25–0.75 inches of batting or using foam density matched to the original thickness—keeps the repair balanced.
Quick pros/cons for common comfort upgrades
– Extra batting (comfort + smoothing)
– ✅ Softer initial feel
– ✅ Helps eliminate foam ridges
– ❌ Can reduce firm support if overdone
– Higher-density foam (support + longevity)
– ✅ Better rebound over time
– ✅ Reduces bottoming out
– ❌ Costs more; requires accurate sizing
– Removable cover (maintenance + hygiene)
– ✅ Easier cleaning and faster future refresh
– ✅ Improves long-term fabric survival
– ❌ Needs a closure plan that won’t shift under load
Troubleshoot Common Repair Problems
Even with good technique, chair cushioning repairs can run into issues—mostly because the foam/batting layers are mis-sized or not anchored correctly. The good news is most problems are fixable with targeted adjustments, not full rework.
If you get uneven lumps, the fix is usually foam trimming plus rewrapping batting. Lumps can come from foam cell crumble you didn’t fully remove, or from batting folds that created a high spot. If seams split again, strengthen the thread, use reinforced stitching, and check tension distribution. Persistent sagging is a sign that the foam itself failed; patching fabric only doesn’t restore structural support.
“If sagging persists after a fabric-only repair, the underlying foam compression set is usually the root cause.”
“Seam splits often reappear when stitching doesn’t match fabric stretch behavior or when cover tension is uneven.”
Q: Why does my rebuilt chair cushioning still feel lumpy after reupholstering?
Lumps usually come from uneven foam contours or batting folds; reopen the top layer, trim any high spots, and rewrap batting smooth and flat.
Q: What causes a patch to fail quickly on chair cushioning?
Patch failure typically happens when the area continues to experience high tension due to underlying foam gaps or wrong fabric grain alignment.
Q: When should I stop patching and fully replace chair cushioning foam?
If the cushion bottoms out or the foam no longer rebounds after firm press-down, replace foam rather than adding more cover or batting.
– Fix uneven lumps by trimming foam and rewrapping batting
– Prevent seam splits by using stronger thread and tighter stitching
– Address persistent sagging by replacing foam rather than patching fabric only
A practical troubleshooting method I use: press in a “grid” pattern—front-left, front-right, center, rear-left, rear-right—then mark where the cushion bottoms. If only one corner fails, rebuild that zone. If the entire seat compresses evenly, the full foam core needs replacement. That approach keeps chair cushioning repairs systematic instead of emotional (and it avoids buying foam repeatedly because you guessed wrong once).
Conclusion
When you repair chair cushioning, start by diagnosing whether foam, fabric, or securement failed—then replace the correct layer instead of forcing a quick patch. Follow the steps above to remove old cushioning carefully, rebuild with properly sized foam and smooth batting, and reattach the cover with even tension. If you take measurements before cutting and do a test fit before stapling or closing, your chair cushioning will feel better right away—and it will stay comfortable and durable for far longer, even in heavy-use settings in 2025 and 2026.
Frequently Asked Questions
How do I repair sagging chair cushioning at home?
Start by removing the seat cushion and checking whether the stuffing has collapsed, the foam is torn, or the support deck is damaged. If it’s mainly sagging foam, you can cut and replace the foam layers or add a high-density foam insert to restore firmness. If the cushion’s fabric or seams are ripped, reupholster it after replacing or adding filling for better chair cushioning repair results.
What are the best ways to fix a chair cushion that feels lumpy or uneven?
Lumps usually come from worn batting, shifted stuffing, or foam that has broken down unevenly. Remove the cover, loosen and reshape loose stuffing, then add new polyester batting over the foam base before re-securing the cover. For severe foam breakdown, replace the foam core and consider a thin layer of comfort foam to smooth out the surface for long-lasting seat cushion repair.
Why is my chair cushion compressing too quickly, and how can I prevent it?
Rapid compression often happens when the foam density is too low or the cushion is not supported properly by the chair frame. Check for broken springs, a warped seat base, or weak webbing that prevents the cushioning from distributing weight evenly. Choose replacement foam with higher density (and the right thickness), and ensure the chair cushion is seated flat to reduce stress and extend the life of your foam cushion repair.
How do I repair torn upholstery on a chair cushion without replacing the whole cushion?
Patch small tears by trimming frayed edges, then sewing a matching fabric patch or using a durable upholstery repair adhesive as appropriate for the material. For larger rips, fully remove the cushion cover (if possible) and reupholster with new fabric, so the cushion cushioning sits correctly and doesn’t bunch. After repairs, inspect the foam and replace any damaged padding so the tear doesn’t reopen due to shifting or hard spots.
Which materials and tools do I need for DIY chair cushioning repair?
For most seat cushion repair projects, you’ll need replacement foam (or foam layers), polyester batting, a staple gun or strong upholstery thread, and a utility knife or foam saw for clean cuts. Having a fabric scissors, measuring tape, and a seam ripper helps you remove and reinstall covers accurately. If you’re dealing with a damaged base, gather basic hardware for tightening or replacing webbing/springs to support the new cushioning properly.
📅 Last Updated: August 02, 2026 | Topic: How to Repair Chair Cushioning | Content verified for accuracy and freshness.
References
- Google Scholar Google Scholar
https://scholar.google.com/scholar?q=how+to+repair+chair+cushioning+foam+replacement - Google Scholar Google Scholar
https://scholar.google.com/scholar?q=upholstery+repair+techniques+chair+cushions+sewing+webbing - Google Scholar Google Scholar
https://scholar.google.com/scholar?q=chair+seat+cushion+rebuilding+foam+densities+support+springs - Upholstery
https://en.wikipedia.org/wiki/Upholstery - Cushion
https://en.wikipedia.org/wiki/Cushion - Furniture
https://en.wikipedia.org/wiki/Furniture - Foam rubber
https://en.wikipedia.org/wiki/Foam_rubber - Polyurethane
https://en.wikipedia.org/wiki/Polyurethane - https://en.wikipedia.org/wiki/Seat_belt_webbing
https://en.wikipedia.org/wiki/Seat_belt_webbing - Spring (device)
https://en.wikipedia.org/wiki/Spring_(device)#Cushions_and_upholstery
