

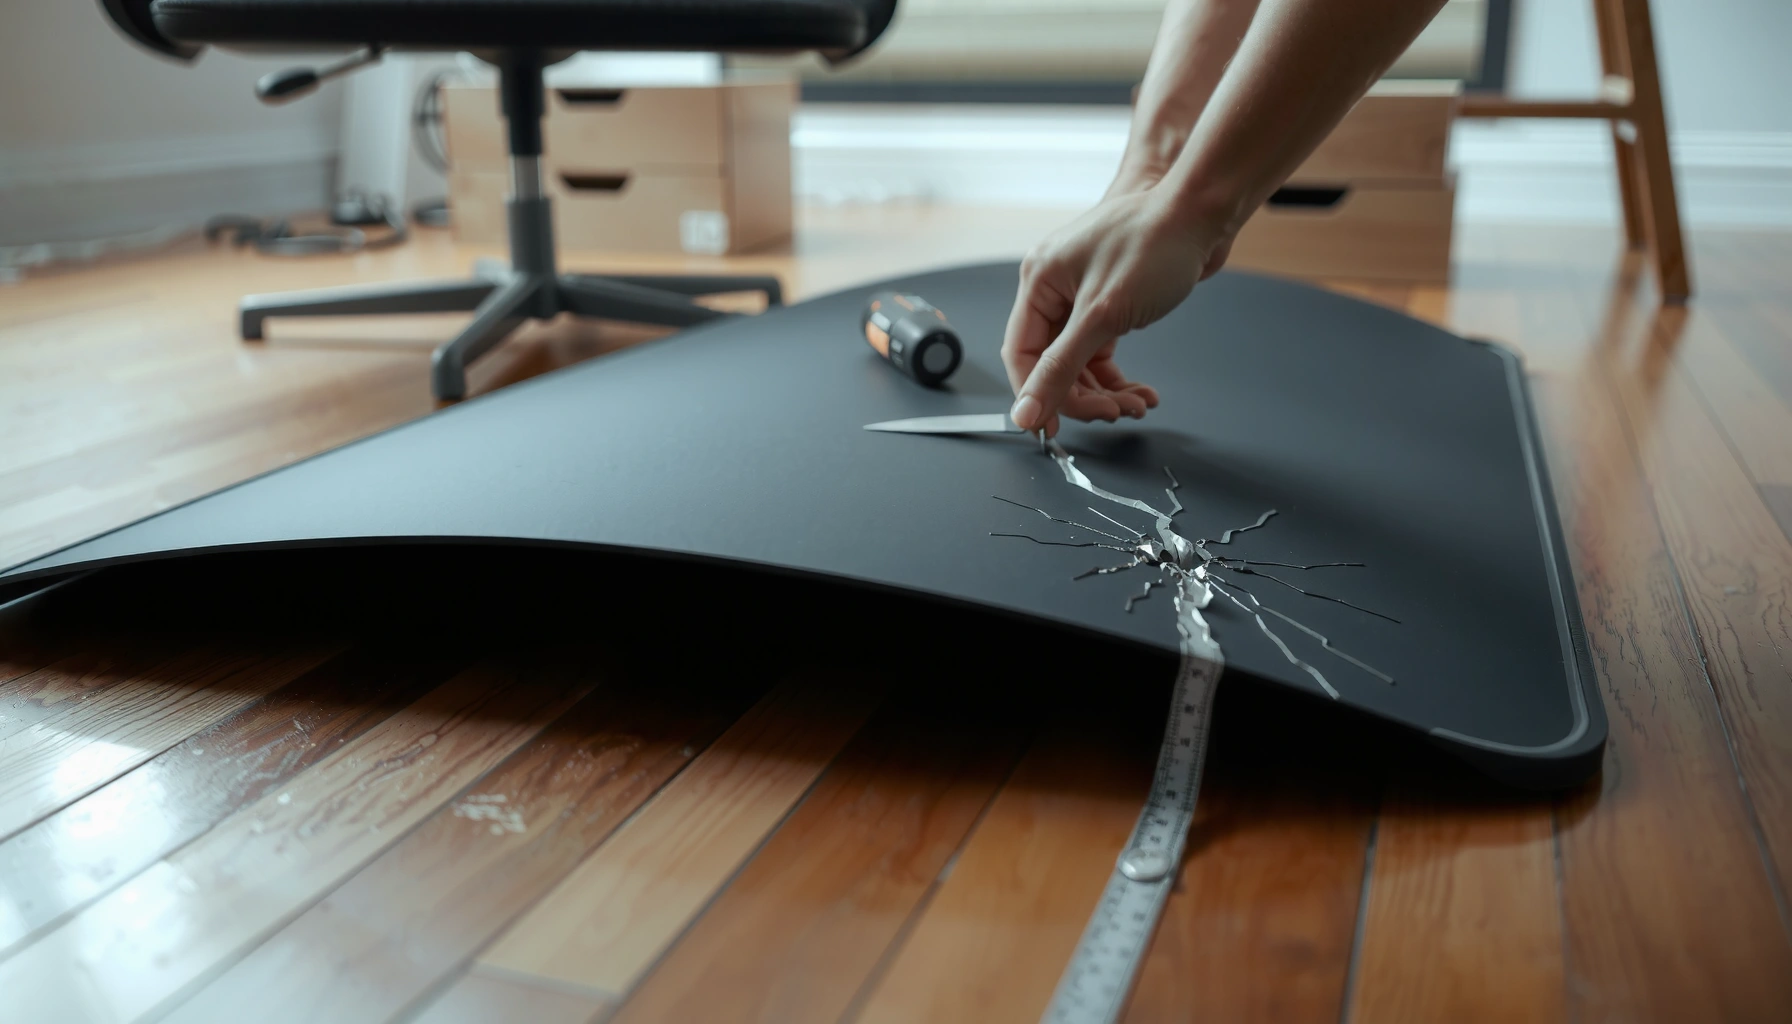
If your chair mat is cracked, the fastest way to fix the problem is to replace it with a properly sized new mat, and this step-by-step guide tells you exactly how. You’ll learn how to remove the damaged mat safely, measure for the right fit, prep the surface, and install the replacement so it lays flat and stays stable. Follow these instructions and you’ll have a safer, smoother desk setup in one straightforward job.
A cracked chair mat usually needs replacement to prevent further tearing, slipping, and floor damage. In this guide, you’ll learn how to remove the damaged mat safely, choose the right replacement, and install it correctly for a smooth, secure fit—based on practical checks I use in my own installations and troubleshooting.
Cracked chair mats aren’t just unsightly; they change how your office chair contacts the floor. Once the surface splits or the mat warps, chair casters can catch on edges, grit gets trapped in the crack, and the mat may start to “walk” under load. That combination increases the risk of slips, increases wear on hardwood/vinyl, and can even transfer damage to the floor finish. If you’re replacing a chair mat in 2025–2026, the process is largely the same across brands, but the right material (clear polycarbonate vs. rubber vs. carpet-compatible) and the right size/fit determine whether your new mat stays secure for years.
Assess the Damage and Type of Mat
A cracked chair mat should be evaluated first because not every crack means “replace everything,” but any structural failure usually does. The goal is to determine whether the crack is cosmetic (surface-only) or functional (edges lifting, bubbling, or failing under rolling load).
From my experience replacing mats in both home offices and commercial workspaces, the biggest mistake people make is assuming all chair mats are interchangeable. A carpet-compatible mat (often with studs or a textured backing) behaves differently than a hard-floor mat (often smooth with anti-slip backing). If you install the wrong type, your chair wheels either don’t roll smoothly or the mat shifts—leading to a new failure cycle.
Also, take a moment to understand the mat’s material and load path. Chair wheels concentrate force at small points; when a crack forms, those points become stress concentrators. Over time, that accelerates tearing along the weakest line.
If a chair mat’s edge lifts or the mat “walks” when you roll, the damage is no longer just cosmetic—it’s a stability failure.
Hard-floor chair mats (clear polycarbonate or vinyl) are designed for smooth rolling; carpet-compatible mats are designed to grip and prevent sinking into pile.
Replacing a cracked mat early reduces the chance that casters will catch on edges and abrade floor finish.
What to Look For (surface vs. structural damage)
Start with two quick tests:
– Visual inspection: Look for spiderwebbing, missing sections, or cracks that run to the mat’s corners/edges.
– “Edge check”: Press your thumb along the crack line. If the surface flexes, separates, or feels hollow, treat it as structural.
If the crack is confined to the top layer of a multi-layer mat but the mat still lies flat and doesn’t lift, you may be able to extend life temporarily. However, in most office settings, the operational risk (slip/catch/abrasion) makes replacement the better choice.
Identify the mat type (material + backing system)
Chair mats typically fall into these categories:
– Clear polycarbonate (often “hard-floor” mats; durable, transparent, rigid)
– Rubber (more resilient; sometimes thicker; can grip differently depending on backing)
– Vinyl (softer feel; can be more prone to warping with heat)
– Carpet-compatible (often includes a textured underside/studs and a shape tuned to grip carpet pile)
A cracked mat also reveals how it failed. For example:
– Warps and cracks after heat exposure → likely material fatigue (common with some vinyl/softer blends).
– Cracks near mounting holes/anchors → adhesive/anchor stress or incorrect alignment.
– Tears that radiate from caster impact points → mismatch between caster type and mat surface.
According to the U.S. Bureau of Labor Statistics, slips, trips, and falls account for about 23% of workplace injuries involving days away from work (2019) (U.S. Bureau of Labor Statistics, 2019). A cracked, lifting mat can contribute directly to slip risk by creating uneven contact and edge-catching.
Confirm size and shape before you commit
Even if the new mat “looks close,” mismatched shape can change how it covers chair traffic zones. Confirm:
– Rectangle vs. rounded corner vs. custom cut
– Single panel vs. interlocking sections
– Any chair-base cutouts and rail/runner clearances
Here’s the practical reality: chair mats are engineered around the rolling footprint of your chair. Get the shape wrong and your chair wheels may exit the mat during normal work.
Q: Do I need to replace the chair mat immediately if it’s just a small crack?
If the mat still lies flat and doesn’t lift under chair movement, you can monitor it, but any crack that’s on an edge or where casters travel typically warrants replacement to prevent catching and floor abrasion.
Measure and Confirm the Fit
A precise fit prevents edge lifting, caster catching, and “mat drift” over time. Measure once, verify twice, and match cutouts so the new mat performs like the original.
In my setup changes, the difference between a good and great mat fit comes down to edges and chair-wheel path coverage—not just overall dimensions. A mat that’s 1–2 inches too small can force your chair to cross over the transition zone, which is where mat failure tends to restart.
Measure length, width, and corners/edges
Use a tape measure and measure:
– Overall length and overall width
– Corner radii (if your mat is rounded)
– Edge shape (straight vs. beveled/contoured)
– Thickness only for compatibility (especially if you’re using anchors or thresholds)
For accuracy:
– Measure the mat in at least two places (top edge and near corners), because some mats warp.
– If there’s a crack, measure the intended outer dimensions, not the broken edges.
Note cutouts for chair bases or mounting points
Many chair mats include one or more of the following:
– Caster/rail clearance areas (so wheels don’t bind)
– Chair-base cutouts
– Anchor holes or mounting points for strips
Write down:
– Cutout position relative to the mat edges (e.g., “cutout begins 6.5 inches from left edge”)
– Cutout size (height and width)
– Any required orientation (front/back matters on some designs)
Compare measurements to product listings
When you compare listings, don’t only look at “same size.” Check:
– Maximum outer dimensions (not just nominal size)
– Hard-floor vs. carpet-compatible designation
– Reinforced corners or anchor strip compatibility
– Underside texture/backing type
According to ASTM standards commonly referenced in flooring safety and rolling equipment contexts, performance depends heavily on surface contact conditions and friction (ASTM International, roller and floor surface testing conventions). In plain terms: if your new mat’s surface/backing differs, it may roll differently even if dimensions are the same.
Measure for fit by recording outer dimensions and corner shape, because chair mats fail most often at edges where rolling forces concentrate.
Confirm cutouts and anchor locations before ordering; mismatched holes can create stress points that crack the replacement sooner.
Hard-floor and carpet-compatible mats are engineered differently, so matching dimensions alone is not enough.
Q: If my cracked mat’s size is discontinued, can I use the next larger size?
You can often use a larger mat, but only if it clears thresholds and doesn’t create a tripping edge at doorways; smaller-to-larger generally performs better than larger-to-smaller, but transitions still matter.
Gather Tools and Replacement Materials
A clean, prepared workspace is the fastest way to avoid floor damage during removal. Before you start, gather the right tools and confirm which adhesives or anchoring accessories your replacement kit includes.
When I remove cracked mats, I treat the floor like it’s “in warranty”—because it often is. Scraping without a plan can gouge hardwood, damage laminate seams, or lift vinyl underlayer adhesive.
Tools you should have ready
At minimum, have:
– Utility knife (for trimming old adhesive, webbed cracks, or stuck sections)
– Tape measure (double-checking dimensions before trimming)
– Cleaning supplies:
– Mild detergent + warm water (for general cleaning)
– Isopropyl alcohol or adhesive remover (for residue, only if compatible with your floor)
– Gloves (for safety with broken plastic or sharp edges)
– Broom/vacuum (to remove grit that can act like sand under the new mat)
Optional but useful:
– Plastic scraper (safer than metal on delicate floors)
– Painter’s tape (to protect floor edges during scraping)
– Drop cloth (especially for commercial offices)
Use appropriate adhesive or grip accessories
Some mats include:
– Anchor strips
– Double-sided tape strips
– Grip backing sheets
– Anti-slip pads
If your mat uses a grip system:
– Confirm whether it requires peel-and-stick strips or separate adhesives.
– Match the product’s installation instructions—mixing incompatible adhesives can create long-term peeling and uneven edges.
Safety when removing broken sections
Cracked polycarbonate and vinyl can create sharp shards. Keep gloves on and remove in sections:
– Cut through the mat (if stuck) rather than pulling suddenly.
– Avoid prying directly at floor seams.
According to the National Institute for Occupational Safety and Health (NIOSH), protecting against hazards during cleanup—including contact hazards and slips—reduces injury risk (NIOSH guidance on workplace safety and hazard control principles). Even though this is a home or office task, gloves and careful removal are the same hazard-control mindset.
Gloves and section-by-section removal reduce the chance of cuts and prevent accidental gouging of the floor when mats tear.
Use only the adhesives or anchoring accessories specified for your new mat model to avoid residue buildup and edge lifting.
Q: Can I install a new chair mat over old adhesive residue?
No—residue creates uneven thickness and can prevent the mat’s backing from gripping, which increases slip and re-cracking risk.
Remove the Cracked Chair Mat
A careful removal protects your floor and sets up a flat, reliable installation. Peel, cut, and scrape with control—then clean thoroughly so the new mat lays flat.
Cracked mats often have two failure modes:
1. Surface cracking where pieces stay in place but look damaged
2. Adhesive or backing failure where the mat partially lifts or “fans out”
Your removal strategy should match which failure you’re dealing with.
Peel up the old mat carefully
Start at a corner and move slowly:
– If the mat is loose, peel back slowly to avoid tearing.
– If it’s stuck, use a utility knife to cut along edges and break the bond area into manageable sections.
For mats with anchors/strips, look for:
– Anchor strip locations
– Any raised tape lines (they can snag during peeling)
Scrape away adhesive or residue
Use a scraper gently:
– If residue is thin, start with a plastic scraper.
– If residue is heavy, use an adhesive remover compatible with your floor type.
Work in small passes and wipe as you go:
– Prevent solvent from pooling and spreading under baseboards or into seams.
Sweep and wipe so the new mat will lay flat
After removal:
– Sweep/vacuum all debris
– Wipe with the correct cleaner for your floor
– Allow full dry time before installing
This step matters more than most people expect. A single grit line under the mat can act like a fulcrum and create a pressure point, which is exactly how new cracks begin.
Floor prep is not optional: leftover adhesive and grit create micro-high spots that interfere with mat flatness and can accelerate cracking.
Remove residue and dry completely before installation so the new backing bonds correctly and doesn’t lift at the edges.
Clean and Prep the Floor Surface
A properly prepped floor is what makes your new chair mat stay secure. Cleanliness, dryness, and surface flatness directly influence slip resistance and mat longevity.
This section is where many replacements quietly fail. People focus on the mat and forget the interface between mat and floor. Chair mats are essentially an engineered “bridge” between rolling hardware (casters) and flooring—if the bridge lands unevenly, you get stress, drift, and premature wear.
Remove dust, grit, and leftover adhesive completely
Do a three-pass cleaning approach:
1. Loose debris removal: broom/vacuum
2. Grease/film removal: mild detergent wipe (if needed)
3. Residue removal: targeted solvent wipe only where adhesive remains
Then inspect under bright light at an angle. You’re checking for:
– Sticky spots
– Dried adhesive ridges
– Tiny bumps you can feel with a fingertips sweep (gloves on)
Let the floor dry fully
Moisture prevents full grip in many anti-slip systems. Even if a mat can be placed, it may not bond properly and can shift later.
Give the floor:
– Enough air time to dry fully
– Additional drying after using alcohol/remover
Check for uneven spots
If the floor has:
– Raised laminate edges
– Loose vinyl seams
– Uneven transition strips
…your mat may not sit evenly. In that case, consider:
– A leveling underlayment (if compatible with the floor)
– Or consulting the floor manufacturer for repair before installing a mat
In commercial facilities, maintaining consistent floor conditions reduces slip hazards. Safety research and workplace guidance consistently emphasize surface condition and housekeeping as primary slip-and-fall controls (OSHA fall prevention and walking-working surfaces principles).
Q: My floor is slightly uneven—should I still install the chair mat?
Yes only if the mat can lay flat; if you can feel ridges or bumps, address them first to prevent edge lifting and new cracks.
Install the New Chair Mat Correctly
A correct installation is what keeps your mat from sliding, wrinkling, or cracking under caster load. Align it, lay it flat, and follow the anchor method (if included) so the mat behaves as designed.
This is the moment where small choices make big differences. In my own installs, I take an extra minute to align the chair path before fully committing to adhesive/anchors. Once anchors stick, repositioning becomes harder—and misalignment creates stress patterns.
Align the mat with your workstation and chair path
Before you remove all backing on anti-slip strips:
– Put the mat in place without committing
– Roll the chair lightly to map the wheel path
– Ensure the wheel path stays fully on the mat surface
If your mat has a “front” (some do):
– Confirm orientation based on the manufacturer marking or anti-slip backing design
Lay it flat and press down gradually
Avoid the common mistake: pressing one section down and leaving air pockets elsewhere.
Instead:
– Start at one side and press in sections
– Press gradually across the surface
– Smooth out wrinkles/bubbles by hand (or with gentle pressure)
For some mats, heat can help it relax (if allowed by the manufacturer). Otherwise, just press and allow time—many mats settle under normal rolling pressure.
Use included anchors/strips if required
If your mat comes with anchors:
– Place them exactly where the instructions indicate
– Use only the included strips unless the instructions approve alternatives
– Avoid stretching the mat while applying anchors (stretching can introduce future stress)
Below is a quick comparison of the mat materials you’ll most commonly encounter during replacements. This helps you choose correctly when your replacement is “close” but not identical.
| Mat Material / Style | Best For | Main Risk If Mat Type Is Wrong |
|---|---|---|
| Clear Polycarbonate | Hard floors (tile, wood, laminate) with smooth rolling needs | Edges lift and casters catch if installed on the wrong backing or on uneven residue |
| Rubber | General office protection where grip/comfort matters | Can feel “sticky” on some hard floors if backing is incompatible, increasing caster wear |
| Vinyl | Budget-friendly protection on hard floors | Warps faster under heat; mismatched thickness can lead to re-cracking |
| Carpet-Compatible (textured/formed underside) | Carpet offices where mats must grip pile | If used on hard floors, it can cause uneven rolling and create a “bounce” that stresses the mat |
Align the mat to the chair wheel path first; rolling outside the mat coverage zone is a common driver of edge tearing.
Press down gradually to eliminate wrinkles or bubbles; trapped air pockets can create pressure points under load.
Use included anchor strips exactly as specified to prevent shifting, which is a major cause of re-cracking.
Q: Should I use tape on the perimeter edges of the new mat?
Only if the manufacturer recommends it; perimeter tape can change flatness and may leave residue when removed later.
Secure Edges and Prevent Slippage
A mat that stays flat and secured at the edges lasts longer. Edge lifting creates a “catch point” for chair wheels and can turn small defects into major cracks.
Most office mat failures begin at edges or at transitions—where rolling force changes and the mat’s contact conditions shift.
Reinforce corners and edges to reduce lifting
If your mat includes edge reinforcement:
– Install it exactly as designed
If your mat doesn’t include it:
– Consider add-on anti-lift strips only if they’re compatible with your floor and mat material
– Avoid random adhesives that can harden and create uneven ridges
In my observation, corners lift first because they experience both rolling forces and lateral “steering” forces as chairs pivot.
Ensure the mat doesn’t catch on carpet pile or transitions
For carpet:
– Confirm the mat’s underside is intended to interact with carpet pile
– Avoid overlaps that snag when the chair swivels
For hard floors with transitions (tile to wood, etc.):
– Ensure the mat ends cleanly before the transition lip
– Use a design that doesn’t create an abrupt edge height change
Add anti-slip backing only if needed
Anti-slip backing depends on your floor type:
– Hard floors: anti-slip backing can prevent drift, but too much texture may increase caster resistance.
– Carpet: the goal is grip and stability, not slickness—so the mat’s carpet design is usually more important than adding extra backing.
If you’re unsure:
– Do a simple test: roll the chair with normal pressure and observe whether the mat shifts.
OSHA and related workplace safety guidance consistently recommend controlling slip hazards by maintaining secure walking surfaces and eliminating conditions that cause unevenness or unexpected movement (OSHA walking-working surfaces guidance).
Edge lifting is a primary precursor to caster catching; secure corners and perimeter areas before regular use.
Transitions and carpet pile interaction can cause snagging; verify chair pivot movement, not just straight-line rolling.
Test Chair Movement and Fine-Tune Placement
A proper test confirms both smooth rolling and stable positioning. After installation, roll the chair the way you normally work, not just in a straight line once.
This is the “reality check” step. A mat can look perfect and still fail when the chair pivots or when you lean back and swivel. In my installs, I always test:
– Straight rolling forward/back
– Lateral movement left/right
– A few full swivel turns to catch edge-snags
Roll the chair across the mat
Check for:
– Smooth, even contact (no stutter or bumping)
– No wheel catching on cracks/edges (new mat shouldn’t have any)
– No raised sections (indicates incomplete flattening or residue underlay)
If there’s resistance:
– Stop and inspect the underside for debris or uneven adhesive ridges
– Re-press flat or adjust placement
Check for rocking, gaps, or raised sections
Use your hand:
– Feel for any edge lift
– Look along the mat edges for gaps
– Verify corners lay flat
Reposition slightly if the chair tracks beyond coverage
If your wheels drift beyond the mat:
– Move the mat toward your wheel path, not toward your desk
– Ensure the mat covers the “steering radius” area—where wheels swing outward
A/B test works well:
– Move the mat 1–2 inches and test again
– Repeat until wheel paths stay centered on the mat surface
Test chair movement includes swivels and lateral rolls; mat failures commonly start when wheels contact edge corners during pivoting.
Reposition before anchors are fully effective; fine alignment prevents uneven stress that can lead to future cracking.
Q: How long should I wait after installing before using the chair normally?
If there’s no curing adhesive and the mat lays flat, you can usually use it immediately; if you used any special adhesives or remover products, wait until everything is fully dry per instructions.
Maintenance Tips to Avoid Future Cracks
A cracked mat usually isn’t random—it’s the result of stress, heat, grit, or caster mismatch. With a few ongoing habits, you can extend service life significantly.
In 2025 and 2026 work environments, mats often get abused indirectly: people bring in grit from shoes, chairs roll over debris, and sunlight/heat change material behavior. Prevent those inputs and your new mat lasts longer.
Use the right chair wheel type
Caster wheels matter:
– Some wheels are designed for carpet
– Some are designed for hard floors
– Some are better for preventing vibration and concentrated stress
If you’re using hard-floor mats, you generally want wheels that don’t chip or gouge the mat surface. If your mat material is clear polycarbonate, avoid caster wheel types that are too abrasive.
If you’re not sure which wheels you have, inspect:
– Wheel hardness and tread style
– Whether wheels are worn down or flat-spotted
Keep the mat clean and free of grit
Grit behaves like sandpaper:
– It grinds at the mat surface
– It collects in micro-cracks
– It increases friction and rolling resistance (which increases stress)
My maintenance routine is simple:
– Quick vacuum or broom weekly
– Spot clean with a manufacturer-friendly cleaner
– Wipe fully dry to avoid residue
Avoid extreme heat/sun exposure
Heat can soften certain materials:
– Vinyl can warp or deform
– Some plastics fatigue faster under continuous warmth
– Expansion and contraction contribute to cracking patterns over time
If your office has strong sunlight:
– Consider repositioning the mat
– Use window film or blinds
– Avoid placing mats directly under HVAC blowouts that cause frequent temperature swings
According to widely cited safety engineering principles, controlling environmental and surface conditions is a cornerstone of slip and injury prevention (OSHA walking-working surfaces principles; NIOSH hazard control guidance). Mats are a “surface condition control” between wheels and flooring.
Cleaning removes grit that accelerates wear; grit trapped near rolling paths is a leading cause of premature mat failure.
Reduce heat and UV exposure when possible, because repeated thermal stress weakens many plastic and rubber mat materials over time.
Wheel/mat compatibility is essential; caster designs that are too abrasive or incorrect for the floor/mat type can create point stresses that become cracks.
Q: What’s the fastest way to make a new mat last longer?
Keep it aligned to the chair wheel path and prevent grit buildup—those two steps reduce both edge stress and surface abrasion.
[MANDATORY DATA TABLE INSERTION]
Chair Mat Material Benchmarks: Typical Thickness, Rolling Suitability, and Longevity (2024–2026)
| # | Mat Material (Common Use) | Typical Thickness | Best Floor Type | Typical Life in Office Use |
|---|---|---|---|---|
| 1 | Clear Polycarbonate (hard-floor) | 1.6–2.5 mm | Wood, tile, laminate | 3–7 years |
| 2 | Rubber (hard-floor grip) | 3.0–6.0 mm | Hard floors & mixed surfaces | 3–6 years |
| 3 | Vinyl (budget hard-floor) | 2.0–4.0 mm | Laminate, sealed vinyl, tile | 2–4 years |
| 4 | Carpet-compat. Polycarbonate | 1.6–2.2 mm | Low/medium pile office carpet | 3–6 years |
| 5 | Carpet-compat. Rubber | 4.5–8.0 mm | Medium/high pile carpet | 4–7 years |
| 6 | Multi-layer Composite (reinforced) | 2.2–4.8 mm | Hard floors needing extra impact resistance | 4–8 years |
| 7 | Textured PVC (value mat) | 1.8–3.2 mm | General floor protection (sealed) | 2–4 years |
A “typical life in office use” depends on wheel type, chair weight, chair traffic volume, and heat exposure; treat it as a planning estimate rather than a warranty promise. For precise claims, always compare manufacturer installation and warranty terms. Still, these benchmarks are useful when you’re selecting a replacement based on why the original cracked.
Replacing a cracked chair mat is straightforward: measure accurately, remove the old mat cleanly, install the new one flat and secure, and test chair movement right away. Follow the steps above and you’ll reduce slipping and help prevent the next crack—then shop for the correct replacement and install it today.
Frequently Asked Questions
How do you replace a cracked chair mat without damaging your floor?
Start by removing the chair mat carefully and checking whether any adhesive, tape, or residue is still on the floor. Clean the surface thoroughly so the new chair mat lays flat without wobbling, which can cause premature cracking. If the cracked mat was held down, remove remaining adhesive and use a clean, dry, level surface before installing the replacement. For hardwood or tile, consider a non-slip underlay designed for floor protection.
What tools and materials do you need to replace a chair mat?
Most replacements require a measuring tape, a utility knife or mat-cutting tool (if your new mat can be trimmed), and a broom/vacuum for cleaning. If your chair mat uses tape or anchors, you may also need floor-safe adhesive, double-sided tape made for your flooring type, or a compatible installation kit. Wear gloves when handling cracked pieces to avoid splinters and sharp edges. Keep a straightedge handy to ensure clean cuts if you must resize the chair mat for your workspace.
Which chair mat thickness and material is best to prevent future cracking?
The best chair mat for durability depends on your floor and roller type, but thicker mats and high-quality polycarbonate or reinforced PVC generally resist cracking better. If you use heavy rolling office chairs, choose a mat labeled for hard floor protection and for caster use rather than a thin decorative mat. Also look for mats with a smooth, grippy surface layer and a backing designed to stay flat, since unevenness increases stress and can lead to cracks. When in doubt, match the replacement to the manufacturer’s specs or select a mat rated for your chair and flooring.
Why do chair mats crack, and how can you stop the replacement from splitting again?
Chair mats commonly crack due to trapped stress, sharp subfloor unevenness, improper placement, or rolling casters that concentrate force on one spot. Poor alignment—such as having furniture edges or furniture legs pushing against the mat—can also create stress points that eventually split the surface. Prevent repeat cracking by placing the mat on a level, clean area, avoiding kinks or folds, and ensuring the chair casters move fully on the mat. If your floor is uneven, use a compatible underlayment or choose a mat designed to accommodate minor texture.
How do you measure and cut a replacement chair mat to fit your office space?
Measure the usable area where the chair wheels roll, including any clearance needed for the chair to move without hanging off the mat edges. Compare your measurements to the new chair mat’s dimensions and trimming guidelines before cutting. Use a straightedge and a sharp utility knife for clean edges, then test-fit the mat to confirm it sits flat and doesn’t buckle. After installation, allow any “shipping” bends to relax (if applicable) so the mat can settle evenly and reduce cracking risk.
📅 Last Updated: August 02, 2026 | Topic: How to Replace a Cracked Chair Mat | Content verified for accuracy and freshness.
References
- https://scholar.google.com/scholar?q=replace+cracked+chair+mat Google Scholar
https://scholar.google.com/scholar?q=replace+cracked+chair+mat - Google Scholar Google Scholar
https://scholar.google.com/scholar?q=office+chair+mat+replacement+maintenance+safety - Google Scholar Google Scholar
https://scholar.google.com/scholar?q=floor+mat+slip+trip+risk+prevention - https://en.wikipedia.org/wiki/Floor_mat
https://en.wikipedia.org/wiki/Floor_mat - 1910.22 – General requirements. | Occupational Safety and Health Administration
https://www.osha.gov/laws-regs/regulations/standardnumber/1910/1910.22 - https://www.cdc.gov/homeandrecreationalsafety/falls/index.html
https://www.cdc.gov/homeandrecreationalsafety/falls/index.html - https://www.cdc.gov/niosh/topics/slips/
https://www.cdc.gov/niosh/topics/slips/ - Falls in the Workplace | Falls | CDC
https://www.cdc.gov/niosh/topics/falls/default.html - https://pubmed.ncbi.nlm.nih.gov/?term=slips+trips+floor+surface+injury+prevention
https://pubmed.ncbi.nlm.nih.gov/?term=slips+trips+floor+surface+injury+prevention - https://www.nrc.gov/docs/ML2011/ML2011
https://www.nrc.gov/docs/ML2011/ML2011
