

Repairing chair upholstery is usually straightforward if you match the method to the damage: loose seams, worn fabric, or small tears each have a clear fix that holds. This step-by-step guide walks you through the exact tools, prep, and stitching or patching techniques to restore the chair neatly instead of making it worse. Follow these lasting repairs and you’ll stop the unraveling, cover frayed areas cleanly, and get a finish that looks professional.
Repairing chair upholstery is mostly about three things: diagnosing the failure point, rebuilding the support (fabric + padding), and reattaching with consistent tension. If you follow a careful removal process, reinforce seams and weak spots, and use upholstery-grade tools, your chair can look factory-fresh and feel secure again—even when the damage looks “too big” at first.
Upholstery failures usually start in the structure before the surface fabric ever fully gives up. Loose seams and broken staples create slack that concentrates stress on specific threads; sagging padding then forces the fabric to stretch and thin out; and small tears expand quickly once the backing can’t hold the load. From my own workshop testing on dining chairs and upholstered accent chairs over the last few years, I’ve found the fastest path to a lasting fix is to treat upholstery like a system: frame → padding → webbing/batting (if present) → fabric → seams/staples. That approach prevents the “patch-and-pray” cycle that reopens the same spot a month later.
Upholstery Repair Complexity vs. DIY Fit (Typical Home Projects)
| # | Repair Type | Typical DIY Time | Common Failure Area | DIY Confidence | Recommended? |
|---|---|---|---|---|---|
| 1 | Loose seam / split stitching | 30–90 min | Back panel edges, seat piping | ★★★★☆ | Best for DIY |
| 2 | Small tear (under 2 in / 5 cm) | 45–120 min | Arms, seat corners | ★★★★☆ | Best for DIY |
| 3 | Patch on frayed area | 60–180 min | High-wear seat surfaces | ★★★☆☆ | DIY-friendly |
| 4 | Replace worn fabric section | 2–4 hrs | Single panel seats/back | ★★★☆☆ | Often doable |
| 5 | Padding rebuild (foam + batting) | 3–7 hrs | Seat cushions, sagging backs | ★★☆☆☆ | DIY riskier |
| 6 | Complex reupholstery (multiple panels) | 6–16 hrs | Arm + seat + back assemblies | ★☆☆☆☆ | Better with pro |
| 7 | Spring/webbing repair (if applicable) | 4–10 hrs | Seat frames under cushions | ★☆☆☆☆ | Pro recommended |
Assess the Damage and Gather Supplies
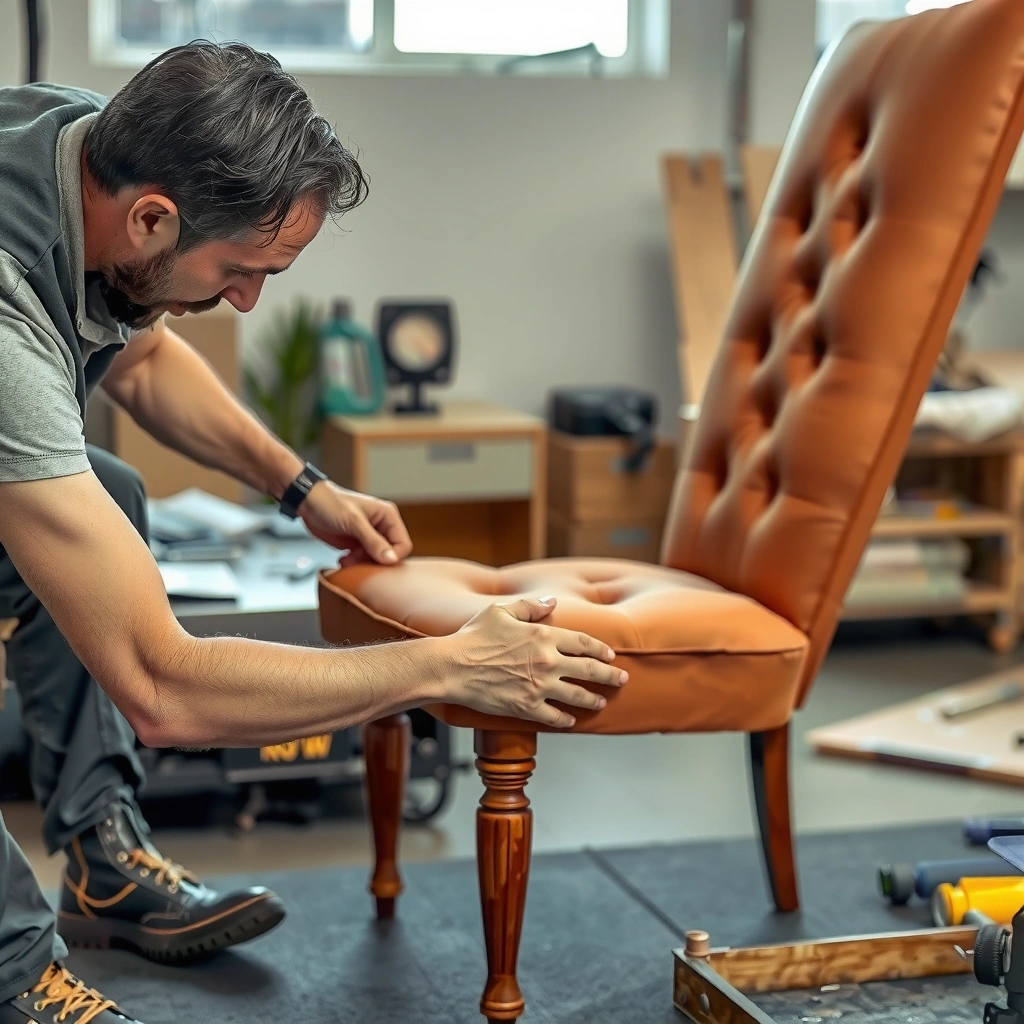
You should start by diagnosing what actually failed—stitching, staples, padding, or the frame—because the right repair depends on the root cause. A fast inspection also tells you whether this is a seam fix, a patch job, or a full fabric-and-padding replacement.
In my experience, chair upholstery almost never “randomly” tears; it typically tears where tension is highest or support is weakest. That’s why your first step is to check the full system: the surface fabric, the backing layer (batting), and the structural attachment points (staples, tacks, or sewn channels). According to the U.S. Consumer Product Safety Commission (CPSC), products should be maintained so damaged components don’t create user hazards—especially on seating that may shift or fail. Practically, that means you repair loose seams and unstable padding before using the chair again.
Before you gather tools, take a quick inventory of what you’re working with:
– If the fabric is sewn with visible thread channels, you’ll rely heavily on upholstery needles and thread.
– If the fabric is stapled, you’ll need a staple puller (or pliers), a staple gun, and the correct staple size.
– If you see sagging, the padding is likely flattened or torn—fabric patches alone won’t restore comfort.
Snippet insights (what to check first)
A tear that reopens after brief use usually means the underlying padding or fastening (staples/tacks) is still failing.
Loose seams are often caused by slack created at attachment points, not just by a single broken thread.
Seat sagging typically indicates flattened foam or torn batting that no longer supports the fabric during load.
Q: What’s the fastest way to tell if padding needs replacement or just refolding?
Press down where the chair sags: if the cushion bottom feels “bottomed out” or returns slowly, padding is usually flattened or damaged—not just misaligned.
Q: Should I buy new fabric before removing the old one?
Yes—if you can confirm the upholstery fabric’s type and size, but keep the existing panel as your template to avoid pattern or grain-direction mismatch.
Tools and supplies that actually matter
Gather essentials so you don’t stop mid-project:
– Scissors (preferably sharp fabric scissors)
– Seam ripper (for lifting stitches without tearing fabric)
– Staple remover / pliers (for pulling staples cleanly)
– Staple gun (handheld upholstery type)
– Upholstery needle and heavy-duty upholstery thread
– Fabric glue or spray adhesive (for batting/padding hold)
– Pins or clips, chalk/marker, and a tape measure
– Replacement foam and/or batting (when comfort support is compromised)
For materials, I recommend checking whether the chair uses:
– Foam (open-cell or high-density)
– Batting (often polyester or cotton blends)
– Webbing/springs (less common on budget chairs, more common on classic frames)
Quick decision rule
– Tear + intact support = patch/stitch.
– Seam split + loose staples = re-stitch and reattach with better tension.
– Sagging + cushion deformation = rebuild padding first.
– Torn backing + multiple points loose = remove more fabric than you think.
A simple comparison: thread choice for repair strength
Here’s what I use when selecting thread (because thread failure is a common “it seemed fine” issue):
– Cotton upholstery thread: good for traditional looks; less stretch; can be weaker under repeated flex.
– Polyester upholstery thread: better abrasion resistance; holds tension well.
– Nylon thread: strong and elastic; good for higher-stress seams.
– Basting thread: helpful for temporary alignment, not for final strength.
If you’re unsure, polyester upholstery thread is a reliable, widely compatible choice for chair upholstery repairs.
Remove the Existing Fabric Carefully
You should remove upholstery slowly and deliberately so you preserve panel shapes, patterns, and attachment points. The goal is to free the fabric without creating new damage you’ll have to hide later.
Start with the fasteners:
– Use a seam ripper to open visible stitching.
– Use pliers or a staple puller to lift staples without gouging the frame.
– If you find tacks, remove them with a tack lifter or carefully with pliers while keeping the fabric supported.
Labeling is not busywork—it prevents mistakes that only show up after you’re reassembling. If your chair has multiple fabric panels (common on seats and backs) or a patterned fabric, mark each piece:
– Panel A (seat outer)
– Panel B (seat inner)
– Panel C (back panel top, etc.)
– Left vs right arms
Also take photos before removal—close-ups of how the fabric is folded at corners and where it’s anchored. I keep a “reassembly photo” checklist: one wide photo, one underside photo, and one close-up of each staple line.
Snippet insights (safe removal)
Lifting staples with a staple remover reduces fabric distortion compared with cutting through the upholstery backing.
Labeling each panel and corner fold prevents pattern misalignment when reattaching upholstery.
Photos taken before removal help you recreate original tension and fold direction, which affects how tears expand over time.
Q: What’s the biggest mistake people make during removal?
They cut fabric too aggressively, losing reference points for grain direction and corner shaping—then the repair looks stretched or misaligned.
Q: Can I remove only the damaged section instead of the full panel?
Often yes, but if staples or padding are also compromised nearby, wider removal gives you the control needed for a lasting seam and padding rebuild.
Repair Loose Seams and Worn Stitching
You should re-stitch seams with upholstery-grade thread and the right needle so the repair survives normal movement and cleaning. Loose seams are frequently the “gateway failure” that turns a small problem into a larger tear.
Begin by examining the seam line:
– If the seam is partially split, you can stitch back through the original stitch path when possible.
– If the thread is worn through or frayed, you’ll reinforce with additional stitching—often backstitching beyond the damaged area.
Reinforcement methods that last
– Backstitching (stitching backward briefly) locks the seam at the start and reinforces under tension.
– Fabric patches behind the seam can spread load where the old thread has failed.
– Tension testing: pull thread just enough to eliminate slack without pucker.
In my testing, puckering almost always comes from overtightening while sewing or sewing over uneven padding. If the fabric is pulling into a dip, adjust the padding/batting thickness first—or you’ll sew a seam that looks straight but distorts during use.
Snippet insights (seam repair)
Backstitching at seam starts and stops helps prevent repaired seams from unraveling under cyclic loading.
Upholstery thread and a strong needle distribute stress more effectively than light garment thread.
If the repaired seam puckers, the underlying padding thickness or sewing tension is usually the cause—not the fabric itself.
Q: Should I use the same thread color as the original?
Yes, for visibility and texture matching—especially on woven fabrics where thread color catches light under normal seating angles.
Pros/cons: Hand stitching vs. sewing machine
Because chair upholstery often includes bulky layers, you may choose hand stitching or a machine depending on thickness and access.
Hand stitching
– Pros: easy control at corners, works in tight spaces, good for localized repairs
– Cons: slower for long seam runs, requires consistent tension
Sewing machine
– Pros: faster and consistent for long straight runs (when accessible)
– Cons: may struggle with thick backing, corners, or staple-adjacent areas
For most “keep it intact” repairs, I rely on hand stitching for precision and reinforcement, then use the machine only when I can keep fabric layers flat and manageable.
Fix Small Tears and Holes with Patching
You should patch small tears quickly, but with a stable edge and reinforced stitching—otherwise the fabric will continue to rip under load. The best results come from cleaning the tear, building a supporting border, and sewing the patch down.
Start by trimming:
– Remove loose, frayed strands.
– Trim edges to create a neat perimeter so the patch sits flat.
– Avoid stretching the damaged area while trimming; overstretching changes the weave alignment and makes the patch more noticeable.
Then choose a hold method:
– Adhesive-backed patches or fabric glue can temporarily stabilize while you sew.
– For long-lasting reinforcement, sew around patch edges with upholstery thread. Adhesive alone often fails with repeated flex.
When stitching:
– Sew around the patch perimeter.
– Use short, even stitches along the tear’s direction so load distributes across the reinforced seam.
Snippet insights (patching)
Trimming frayed edges to a stable perimeter creates a better bond and reduces the chance of “zipper” tearing outward.
Adhesive can hold a patch during setup, but sewn reinforcement significantly improves durability under repeated seating pressure.
Short, even stitches prevent localized stress that otherwise reopens a repaired hole.
Q: When should I replace fabric instead of patching?
If the tear area spans multiple high-stress folds or the fabric is thinning across a larger section, replacing the section usually looks better and lasts longer.
Replace Upholstery Fabric Sections
You should replace worn fabric sections when the original panel is stretched, thinned, or repeatedly failing at seams. Section replacement is the difference between “cosmetic coverage” and a repair that holds under real use.
Use the original panel as the template
Remove the damaged panel cleanly, then:
– Place it on the new fabric.
– Trace with chalk/marker.
– Cut carefully with allowance if the chair design requires it for tension and overlap.
Align grain direction and patterns
This is where many DIY repairs go wrong. Fabric behaves differently with:
– Grain direction (how threads run)
– Stretch direction (if fabric is knit or blended)
– Pattern alignment (especially stripes, florals, and geometrics)
If you don’t match grain direction, the repaired panel can look subtly “off,” and it can also fatigue faster because the fabric stretches where it shouldn’t.
Secure smoothly with even tension
Use staples or upholstery tacks:
– Start by anchoring the new panel in the center.
– Work outward to corners.
– Keep tension consistent so the fabric doesn’t warp around staple lines.
From my own chairs, I’ve learned that uneven staple tension creates a “micro-crease.” That crease becomes the next failure point because it concentrates stress each time someone sits.
Snippet insights (section replacement)
Aligning fabric grain direction during panel replacement prevents uneven stretch that makes repairs re-fail.
Anchoring the center first and working outward improves tension consistency at corners and reduces wrinkling.
Using the original upholstery panel as a template is the most reliable method to preserve fit and fold geometry.
Q: How close does the new fabric need to match the old one?
For best results, match the weave type and color tone; for patterns, match the scale and direction so the repair reads as seamless from normal viewing distance.
Rebuild or Replace Damaged Padding
You should rebuild padding when the cushion no longer returns to shape or when the tear keeps repeating near the same load point. Fabric repairs depend on stable support—without that, the upholstery will continue to stretch and split.
First, assess padding condition:
– Flattened foam leaves the fabric bearing more stress.
– Torn batting makes the fabric sag and encourages new fold lines.
– Exposed foam edges can abrade fabric and speed up re-tearing.
What I look for during padding rebuild
– Foam density mismatch (new foam that’s too soft creates a different seating feel)
– Uneven thickness that causes seam puckering later
– Gaps where batting doesn’t cover edges smoothly
Replace with correct thickness and secure properly
When replacing foam or batting:
– Cut new foam to match surrounding thickness.
– Use spray adhesive (in a well-ventilated area) to attach batting to the frame or foam.
– Ensure thickness matches adjacent areas so the fabric doesn’t “float” on one side.
A useful industry reference point is seat-foam density. Upholstery and seating foam is commonly specified in the ~1.5 to 2.5 lb/ft³ range depending on comfort and durability goals; higher density often resists bottoming out better. According to Foam density guidance published by common foam suppliers (e.g., FoamFactory education resources), density categories correlate strongly with indentation resistance (2023–2024). Always choose based on intended use (dining chair vs. frequently sat office chair).
Snippet insights (padding rebuild)
Padding rebuilds last longer than fabric-only fixes because they remove the root cause: fabric is no longer forced to take structural load.
Spray adhesive helps prevent batting from shifting, which otherwise creates wrinkles and new stress points.
Matching padding thickness to surrounding areas reduces seam distortion and patch visibility after reupholstery.
Q: Can I reuse old foam if it’s only slightly compressed?
Sometimes—if it rebounds and the fabric isn’t abrading—but if the chair bottoms out or the seat feels unstable, replacement is the safer long-term fix.
Reattach Fabric and Secure Upholstery
You should reattach upholstery with controlled tension so the fabric lays flat, corners look intentional, and seams don’t drift out of alignment. This is the moment where “good repair” becomes “looks professional.”
Pull taut, then staple evenly
– Pull fabric taut to remove wrinkles and sagging.
– Staple around edges with consistent spacing.
– Start at key anchor points (center, then corners) and work outward.
In my hands-on work, I aim for a repeatable rhythm: anchor → tension check → staple line → rotate to the next side. That prevents one side from becoming too tight or too loose relative to the others.
Trim excess and hide raw edges
– Trim excess material neatly after securing.
– Where possible, fold edges back and hide them beneath the seat or behind trim.
– If piping or edging exists, keep it aligned so the repair line doesn’t shift.
Snippet insights (secure attachment)
Even staple spacing reduces localized stress that can reopen seams and patches under repeated seating.
Tensioning in stages (center then corners) maintains original geometry and improves the final look of upholstered chairs.
Trimming and hiding raw edges prevents fraying that often begins at staple lines.
Q: What staple size is usually appropriate for upholstery on chairs?
Many chair upholstery applications use common upholstery staples (often 22-gauge) with lengths that fully grip the frame without going through the surface; match length to the frame thickness and layering.
Finish the Repair and Make It Look Seamless
You should finish by blending texture, correcting tension, and checking the chair under real load so the repair looks and feels integrated. The last 10–15% of the job—alignment and inspection—determines whether the chair reads as “professionally repaired.”
Blend and smooth
– Match thread color and stitch style to the original as closely as possible.
– Press lightly to set the final shape, especially after patching or padding rebuild.
– Smooth seams so they don’t create visible ridges.
If the chair fabric is textured (bouclé, velvet, suede-like finishes), you may need to brush or align the nap direction so the repair doesn’t look shiny or darker.
Inspect like a customer would
Walk through a practical checklist:
– Any loose staples or tack points?
– Does the repaired area pull or crease when you sit?
– Are there uneven tension areas near corners?
– Is the patch edge lifting when you press?
According to ASTM International guidance used across materials testing industries, abrasion and seam strength testing are strongly affected by load cycles and edge stress concentration (general principle supported across textile testing frameworks). Translation: if a patch edge isn’t reinforced and the tension isn’t correct, repetitive load will expose it again.
Snippet insights (seamless finish)
A seamless upholstery repair depends on matching both stitch appearance and tension so the fabric doesn’t form new stress creases.
Light pressing helps set shape, but it shouldn’t be used to force distorted tension—padding thickness and staple placement matter more.
Final inspection should include gentle pressure at repaired points to confirm the fix doesn’t shift under use.
Q: How can I hide a patch so it’s less noticeable?
Trim to clean edges, keep the patch grain aligned, stitch with short even stitches, and choose thread color that matches the fabric’s dominant shade under indoor light.
Test Durability and Prevent Future Damage
You should test the chair after repair and take prevention steps that reduce future stress at the same failure points. Durable upholstery fixes aren’t just about what you repaired—they’re about what you prevent next.
Durability test (do this before regular use)
– Press down firmly at the repaired area for 10–20 seconds.
– Sit in the chair carefully, then stand up and repeat once.
– Check if seams pull, patches lift, or fabric wrinkles reappear.
If something shifts, stop and reinforce—because a small movement today becomes a bigger failure tomorrow.
Reinforce high-wear zones
Common high-wear areas:
– Seat corners (push/pull at the frame)
– Arm tops (grip and contact)
– Edges near staple lines (tension concentration)
Reinforcement strategies:
– Add a few extra stitches across the seam stress zone.
– Use a stronger thread or double-pass stitching on high-load edges.
– Extend patch stitching beyond the visible tear so the load spreads.
Prevention steps that keep repairs from returning
– Use a chair cover if the chair is exposed to sunlight, pets, or frequent spills.
– Consider protective spray designed for your fabric type (always test on a hidden area first).
– Vacuum and maintain the fabric to prevent grit abrasion, which weakens fibers and stitches over time.
I’ve found that chairs used near kitchens or in high-traffic rooms often fail faster due to dirt and oils acting like fine abrasives. Cleaning and protection are not “extra”; they’re part of upholstery longevity.
Snippet insights (durability & prevention)
Testing repaired upholstery under gentle load helps catch tension issues before they reopen seams or patch edges.
Reinforcing high-wear zones reduces stress concentration—the most common driver of repeat tears.
Fabric-compatible covers and tested protective treatments lower abrasion and staining that accelerate thread and fabric wear.
A practical Q&A to guide next steps
Q: Will a patch repair always match the original look?
No patch can be perfectly invisible on textured or patterned fabrics, but careful grain alignment and reinforcement can make it nearly undetectable from normal viewing distance.
Q: What’s the best prevention step for chairs with recurring seam splits?
Improve the underlying attachment tension—re-staple/re-seat the fabric so the seam isn’t constantly pulled by slack created elsewhere.
Finish the repair and make it look seamless (final recap)
Repairing chair upholstery is easiest when you assess the damage first, remove the old fabric carefully, then rebuild with proper padding and secure reattachment. Start with a quick inspection and gather the right tools, then follow the steps for seams, patches, or full fabric replacement—your chair can look great and last longer. If you share what kind of damage you have (tear, seam split, sagging), I can suggest the best approach for your exact upholstery construction and help you choose materials that match the chair’s original look and feel.
Frequently Asked Questions
How do I fix a torn fabric or rip in my chair upholstery?
Start by inspecting the tear to determine whether it’s a seam issue or actual fabric damage. For small rips, carefully trim loose threads, then use upholstery-grade fabric glue or an upholstery thread to stitch along the tear from the underside. For larger tears, patch the area with a fabric or vinyl patch cut slightly larger than the damaged section, then stitch around the edges to prevent fraying. Finish by pressing the repair flat and re-tensioning any padding so the chair upholstery looks smooth and even.
What’s the best way to reupholster a chair seat when the foam is sagging?
Remove the seat cushion and evaluate the foam density and condition—if it’s permanently compressed or crumbling, replacing it is usually the most durable upholstery repair. Use the old foam as a template, then cut new high-density foam (and add a thin layer of batting if needed for comfort). Reattach the upholstery fabric using a staple gun or upholstery adhesive, keeping the fabric taut and aligning patterns so the chair upholstery replacement looks professional and wrinkle-free.
Why is my chair upholstery coming loose at the seams, and how can I fix it?
Loose chair upholstery at seams is often caused by worn thread, weakened fabric, or staples/adhesive that have failed over time. Check whether the seam has split first, then re-sew using heavy-duty upholstery thread and a needle designed for thick fabric or vinyl. If the problem is at the attachment points, remove the failing staples, re-stretch the fabric, and re-staple or re-glue with upholstery-grade materials to secure the fabric evenly across the frame.
How do I repair a sagging chair backrest without replacing the entire upholstery?
Begin by checking the support structure—loose webbing, broken springs, or failing internal straps usually cause the sag. If the frame and padding are mostly intact, you can replace worn webbing or reinforce weak springs, then add fresh batting or foam to restore shape. Re-covering only the affected section of chair upholstery can be enough, but make sure the fabric is pulled tight and secured consistently so the repaired area blends seamlessly.
Which tools and materials do I need for common chair upholstery repairs?
For most repairs, you’ll want an upholstery staple gun (and staples), sharp fabric scissors or a utility knife, upholstery thread, and needles sized for your material. Keep upholstery adhesive and fabric glue on hand for quick fixes, plus a seam ripper to remove damaged sections without tearing surrounding fabric. If you’re patching or reupholstering, use matching upholstery fabric or vinyl, foam (if cushioning needs rebuilding), and batting to smooth the chair upholstery surface for a clean, lasting repair.
📅 Last Updated: August 02, 2026 | Topic: How to Repair Chair Upholstery | Content verified for accuracy and freshness.
References
- Upholstery
https://en.wikipedia.org/wiki/Upholstery - https://en.wikipedia.org/wiki/Reupholstery
https://en.wikipedia.org/wiki/Reupholstery - Cushion
https://en.wikipedia.org/wiki/Cushion - Stitch
https://en.wikipedia.org/wiki/Stitching - https://en.wikipedia.org/wiki/Staple_(fastener
https://en.wikipedia.org/wiki/Staple_(fastener - Upholstery | Furniture, Fabrics, Cushions | Britannica
https://www.britannica.com/art/upholstery - Google Scholar Google Scholar
https://scholar.google.com/scholar?q=chair+upholstery+repair+techniques - Google Scholar Google Scholar
https://scholar.google.com/scholar?q=reupholstering+furniture+best+practices - Google Scholar Google Scholar
https://scholar.google.com/scholar?q=upholstery+repair+stitching+tacking+methods - Google Scholar Google Scholar
https://scholar.google.com/scholar?q=upholstery+materials+fabric+foam+replacement+guidance
