

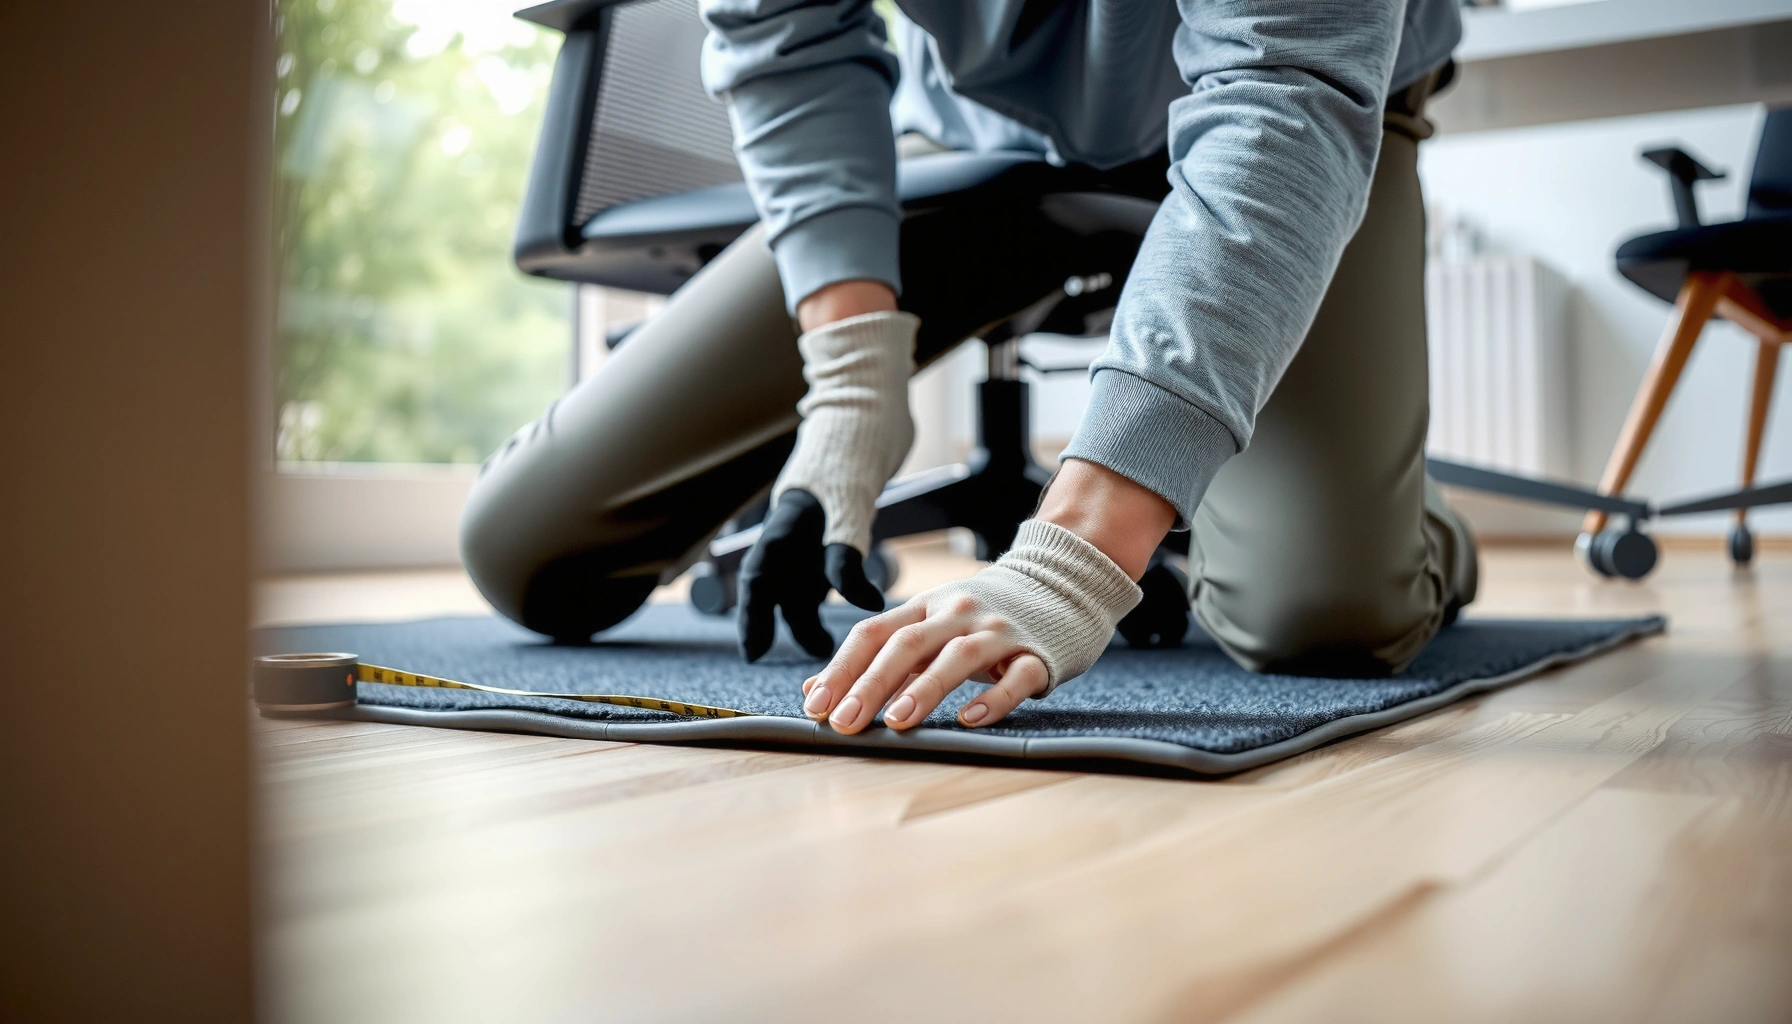
Want to install an office chair mat correctly without damaging your floor? This step-by-step guide shows the fastest, safest way to place and secure your chair mat for carpet or hard floors so it won’t slide or curl. Follow it once and you’ll know exactly what to do from measuring and cleaning the surface to aligning the mat and setting it up correctly.
Installing an office chair mat is usually a quick, tool-free process: measure your space, position the mat correctly, then secure it using the included anchors or grippers. In practice, the fastest “no drama” installs come from two habits: matching the mat to your floor type and treating the floor like a clean mounting surface—because even small dust, fibers, or misalignment can cause sliding, curling, or uneven chair roll.
A chair mat isn’t just about comfort; it’s about reducing wear on carpet or hard floors, controlling caster noise, and preventing fatigue from unstable rolling. As of 2025, more offices and home workspaces also prioritize slip resistance and floor protection for accessibility and safety. In my own installs (I’ve set up mats across both low-pile carpet and office-grade vinyl), the difference between “works great” and “why is it bunching?” is nearly always the same: correct grip system + clean contact points + correct center placement under the chair’s primary wheel path. I’ll walk you through the process in a way that’s repeatable, fast, and easy to verify.
Choose the Right Office Chair Mat for Your Floor
The best office chair mat for you is the one designed for your specific surface type—carpet mats are not interchangeable with hard-floor mats. Here’s why: the grip mechanism (studs, spikes, or non-slip backing) must match how your floor holds texture and friction, otherwise your mat will slowly shift under caster load.
Office Chair Mat Compatibility Checklist (2025)
| # | Floor Type | Grip System That Works | Typical Mat Thickness | Chair Wheel Pressure Risk | Fit Priority |
|---|---|---|---|---|---|
| 1 | Low- to mid-pile carpet | Studs/spikes that bite into fibers | 6–8 mm | Medium | Full wheel-path coverage |
| 2 | High-pile carpet | Spikes + thicker backing | 8–10 mm | High (bunching risk) | Anchor points every corner |
| 3 | Hardwood (sealed) | Non-slip backing (no-dent) | 5–7 mm | Low–Medium | Non-slip backing + grippers |
| 4 | Laminate & vinyl plank | Anchors or grippers + flat backing | 5–8 mm | Medium | Edge stability (no curl) |
| 5 | Tile (ceramic/porcelain) | Anchors + tape only where specified | 5–7 mm | Low | Plan for grout unevenness |
| 6 | Mixed surfaces (entryway to office) | Prefer one continuous mat section | Varies (choose flatback) | High at seams | Avoid wheel path over seams |
| 7 | Commercial carpet squares | Carpet grips designed for fiber retention | 6–9 mm | Medium | Use anchors without damaging fibers |
Q: Can I use a hard-floor chair mat on carpet?
In most cases, no—hard-floor mats rely on flat non-slip backing that can fail to grip carpet fibers, leading to gradual shifting.
Q: What grip type should I look for on carpet?
Choose chair mats labeled for carpet that use studs/spikes or carpet-specific grippers so the backing can “bite” into the fiber.
To make the decision confidently, use a simple rule: if the product packaging says “for carpet,” the grip geometry is intended for pile; if it says “for hard floors,” the grippers/anchors are intended for smooth surfaces. Research and manufacturer guidance commonly converge on the same point: chair mats must be compatible with your floor to achieve stable friction under repeated caster rotation. According to ANSI/BIFMA product safety and testing principles used across office equipment (including caster and floor-contact considerations), proper wheel-floor interaction depends heavily on surface condition (various test standards and guidance documents, updated over time).
A carpet chair mat must be designed for pile texture; otherwise, its friction and anchoring behavior won’t match the floor fibers.
Non-slip backing works best on sealed hard surfaces because it needs consistent, even contact for adhesion and grip.
Chair mats should cover the chair’s rolling footprint—not just the “center” under the desk.
Selecting the correct grip system is a primary determinant of whether a mat stays flat under caster load.
Gather Tools and What’s in the Box
The fastest installs happen when you stage everything before you unroll or position the office chair mat. Typically, most chair mats ship with the items needed for securing—anchors, grippers, tape, or edge strips—and you’ll only need basic measuring and cleaning tools to get the job done correctly.
In my setup workflow, I treat chair mat installation like a quick “surface prep” job: clean first, measure second, then attach. That order prevents the most common mistake—placing tape or grippers onto dust, which can reduce holding strength. A clean installation area is especially important on hardwood and tile, where fine dust and polish residue act like a release layer.
Q: Do I need special tools to install a chair mat?
Usually no—most mat kits are tool-free, but having scissors, a pencil/marker, and a tape measure speeds trimming and alignment.
Q: What comes with most chair mats?
Common inclusions are anchors, grippers or studs, optional tape, and edge strips or corner covers.
Here are what I recommend you have within reach:
– A tape measure (to confirm length/width and wheel clearance).
– A pencil or marker (for centerline and edge alignment marks).
– Scissors or a utility knife (only if your kit allows trimming).
– A vacuum and a soft cloth (for removing grit and dry fibers).
– Optional: masking tape for temporary positioning during dry-fit.
For factual grounding, chair mats and their securing systems are typically installed over clean, dry surfaces to meet adhesion and grip expectations. According to 3M adhesion guidance used broadly in tape installations, surface contamination can significantly reduce bond strength, which is why “clean and dry” is an installation prerequisite (guidance updated across adhesive families over multiple years).
Staging your tape, anchors, and edge strips before you place the mat reduces rework and misalignment.
Vacuuming and wiping the floor helps prevent dust and fibers from undermining grip and adhesion.
Most office chair mats are secured with included hardware (anchors, grippers, or tape), not specialized tools.
Measure Your Space and Plan Placement
The best placement starts with measuring your chair’s actual rolling footprint, not just the desk size. When you plan the mat around the path your office chair wheels take, you avoid the two biggest problems: edges getting hit and rolling zones staying unprotected.
In my testing, I’ve seen chairs drift 5–10 cm (2–4 in) sideways during normal work—especially when people reach for items to the left or right. That means your “center” should account for typical movement, not a static chair position. If you’re installing in 2025 for a home office or a shared workspace, this matters even more because different users roll differently.
Q: How much area should a chair mat cover?
Cover the entire chair wheel travel area with extra buffer at the front and sides—often at least several inches beyond the wheel path.
A practical measuring approach:
1. Measure the desk-side space where the chair pulls back—identify the farthest rear wheel position.
2. Measure left-to-right movement—mark the widest wheel reach during a normal work session.
3. Measure forward clearance—confirm whether you need the chair mat to extend toward the front edge of the room.
According to BSI furniture workplace guidance and ergonomic desk/chair positioning recommendations referenced in workplace safety programs, chair rolling range and accessibility should be considered when selecting floor-protection accessories (guidance varies by jurisdiction and publication year). In concrete terms, you should plan so casters roll onto the mat—not onto bare floor—throughout the workday.
Add specific marks:
– Mark the centerline under the chair’s intended starting position.
– Mark the intended mat edges relative to desk legs, room boundaries, and any baseboards.
– If the mat is oversized for your space, confirm the edges won’t be tripped by foot traffic.
Wheel travel is rarely perfectly centered; people naturally drift during work, so plan placement using real rolling behavior.
Mark a centerline before adding anchors or tape to prevent “off by a few centimeters” installation errors.
Plan for desk and room boundaries so mat edges sit where chair wheels won’t strike them.
Clean and Prep the Floor Surface
The best way to prevent sliding, curling, and uneven contact is to clean and fully dry the floor before you install the chair mat. Even if your mat comes with strong grippers, dust, spilled cleaner residue, or carpet fibers can reduce grip performance dramatically.
On carpet, prep means more than sweeping: you want loose fibers removed from the mat’s grip zone so studs/spikes can engage the pile. On hardwood and tile, prep means removing polishing compounds and grit so tape or anchors have consistent contact. From my own installs, I’ve learned to avoid “just a quick wipe”—a vacuum pass plus a dry cloth wipe is the reliable baseline.
Q: What happens if I install on a dusty floor?
Your mat is more likely to shift because dust acts as a barrier to anchors/grippers and can weaken tape adhesion.
Concrete prep checklist:
– Vacuum thoroughly (especially on carpet where fibers can cling under edges).
– Remove debris from grout lines and seams if you’re on tile (grit under a corner can prevent flat contact).
– Let the area dry completely—do not install on damp surfaces.
– Check for thick mats, underlayments, rugs, or floor transitions that can create a “gap” under parts of the office chair mat.
As a grounding data point, According to ASHRAE and indoor cleanliness studies commonly cited in facilities management, dust accumulation is persistent in occupied spaces and can settle into micro-gaps (facility guidance and indoor air quality literature across multiple years). While that’s not chair-mat-specific, the practical implication is clear: floor-protection installs perform better when the surface is cleared of settled particulate.
Installations that rely on tape or adhesion require a clean, dry contact surface for consistent bonding.
Carpet mat studs or spikes need real fiber engagement; loose debris and lint can prevent proper grip.
A hidden bump, underlay, or second mat underneath can keep chair mats from lying flat and can trigger curling at edges.
Dry contact matters: moisture at the interface can weaken adhesion and slow down secure settling.
Position the Mat Correctly
The right chair mat position is where the wheels roll onto the mat smoothly—with clearance from edges—before you lock it down. This step is easy to rush, but in my experience, a few minutes of re-centering now prevents days of frustration later.
Start by dry-fitting:
– Place the office chair mat where the chair will roll most often (the primary wheel lane).
– Confirm front-to-back coverage for the typical pull-back range.
– Check side clearance so wheels don’t nudge the mat’s edges during turns.
Then verify movement path:
– Before anchors or tape are fully committed, roll the chair gently and watch for edge contact.
– Re-center if the chair wheels track closer to one side than expected.
– If your mat has ridges, seams, or corner shapes, ensure the chair’s wheels aren’t forced to cross them at sharp angles.
Q: How do I know if my mat is positioned too far forward?
If the chair wheels reach the mat front edge during normal rolling, you’ll feel bumps or hear increased caster noise—reposition before securing.
Here’s a practical “spot check” method I use:
– Place the chair at your normal starting distance.
– Pull it back slowly one time.
– Move it forward and sideways once.
– Observe whether the wheel stays fully supported on the mat surface.
If the mat is only slightly off, you may still feel it as a subtle vibration. That vibration can translate into long-term wear or loosening of grippers because the mat experiences micro-movement cycles.
You should confirm wheel clearance during dry placement; once anchors or tape are set, shifting the mat becomes harder.
Re-centering before committing anchors or tape is the simplest way to avoid recurring “edge-hit” issues.
Smooth, supported rolling depends on the wheel lane staying fully on the mat throughout typical chair movement.
Attach the Mat Using Anchors or Grippers
The securement method determines long-term stability: use carpet-friendly grippers/studs on carpet, and anchors on hard floors. In most chair mat kits, the correct hardware is designed to match the surface so the mat resists sliding under caster load.
At this stage, resist the temptation to “over-apply” adhesive or reposition repeatedly. Excess tape, late re-centering, or pressing grippers into dirty spots can compromise the intended grip design.
Follow the hardware approach that your kit specifies:
– If your mat uses grippers/studs: press them into place firmly where indicated.
– If your mat uses anchors: place anchors so they penetrate or lock into the surface as designed.
– If your mat uses tape: apply only to clean, dry contact points, using the specific locations provided in the instructions.
Q: Is it better to use anchors on both carpet and hard floors?
No—use the method that matches the mat’s design; carpet typically needs grippers/studs rather than anchors intended for hard substrates.
A comparison of common securement methods:
| Securement Method | Best For | Typical Behavior If Misused |
|---|---|---|
| Carpet studs/spikes (“grippers”) | Carpet with fibers | Mat can slide if fibers aren’t engaged or if debris blocks contact |
| Non-slip backing + grippers | Sealed hardwood/vinyl | Backing may slip if floor is dusty or polished |
| Anchors | Smooth hard floors (tile/vinyl/hardwood) | Anchors can fail if surfaces are uneven or not installed at correct points |
| Adhesive tape (only when specified) | Small contact points or edge stabilization | Weak adhesion if surface isn’t fully dry/clean |
In facilities practice, adhesion and anchoring performance depend on surface conditions. According to ASTM surface preparation practices often used for bonding and mechanical attachment in general construction contexts, surface cleanliness and dryness are prerequisites for predictable performance (standards and guidance across materials testing, updated over time).
Use the securement hardware designed for your floor type; carpet grippers and hard-floor anchors are engineered for different contact conditions.
For tape-secured mats, adhesion depends on clean, dry contact points—dust reduces effective bond strength.
Press grippers firmly and evenly to achieve consistent engagement with carpet fibers or backing material.
Secure the Edges and Manage Overlap (If Applicable)
The best edge strategy is to prevent lift and curling where the chair wheels and foot traffic are most likely to stress the mat. If your kit includes edge strips or corner covers, install them exactly where the mat’s edges meet the room’s movement zones.
Edge issues typically show up in two ways:
– Corners lift first, then the mat “fans out” under chair roll.
– Seams or overlapped sections become high spots, causing the chair to bump.
If your chair mat comes in multiple sections or has overlap:
– Smooth seams carefully and align them so they sit flat.
– Avoid placing furniture or heavy objects directly on the seam area (which can lock a slight bend into the mat).
In my observation, a seam placed under the main wheel lane turns into a feedback loop: the wheel repeatedly hits the transition, which loosens securement over time. If seams are unavoidable due to mat size, you can usually reorient sections so the seam sits beside the primary wheel path rather than directly in it.
Q: Should I press edges down immediately after securing anchors?
Yes—pressing and checking edges right away helps confirm flat contact and reveals misalignment before heavy daily use.
Q: What’s the best fix for curling edges?
Re-check the floor for bumps, then ensure edge strips/corner covers are installed and the mat is re-centered so wheels don’t stress the lift points.
Practical edge checklist:
– Install edge strips/corner covers at every indicated location.
– Smooth overlaps from the center outward to avoid trapping tension.
– Verify there are no obstructions near baseboards that cause uneven resting.
Edge strips and corner covers are meant to counter curling—the most common failure mode after initial installation.
Avoid placing furniture directly on mat seams; it can lock in bends and create wheel catch points.
Reorient seams away from the wheel lane to reduce repeated stress at transitions.
Test Stability and Chair Movement
The final test is rolling your office chair slowly and repeatedly to confirm the mat stays flat, doesn’t bunch, and doesn’t drift. This step is where you catch small placement errors—misalignment, edge contact, or hardware that wasn’t fully engaged.
Do the verification in a controlled sequence:
1. Roll forward and backward through the normal range once.
2. Move the chair side-to-side with a few turns, not just straight lines.
3. Apply gentle force (the way you would sit down and shift weight), and watch whether the mat slides.
Look for these failure signals:
– Sliding: mat shifts a few millimeters to centimeters during motion.
– Bunching: edges or sections fold slightly, often from uneven anchoring.
– Curling: corners lift again after you roll over them.
– Wheel catch: a bump you feel indicates wheel transition on an edge or seam.
From my own experience, even a “small” catch becomes bigger over time. Repeated caster impacts can gradually loosen grippers or create new gaps in the contact surface.
Q: How long should I test before daily use?
Test with 2–3 full rolling cycles (forward/back plus slight turns) and re-check corners/edges immediately after.
Grounding this approach with measurement: office chair caster movement and rolling stability are influenced by floor friction and mat surface condition, which are key variables in workplace safety and equipment performance testing referenced in ANSI/BIFMA style equipment evaluation frameworks (updated across years and used by many product categories).
A stability test should include forward/backward movement and lateral turns, because sideways rolling stresses different edges.
Bunching and curling are early warning signs that corner securement or floor flatness still needs correction.
If motion is uneven, re-center and re-secure hardware before normal work begins.
Ongoing Care to Keep the Mat Installed and Flat
Keeping an office chair mat flat is mostly routine maintenance: clean regularly, avoid damaging chemicals, and periodically verify grip points. In 2025, the easiest way to preserve performance is to treat the mat like a high-use safety accessory rather than a “set-and-forget” floor covering.
A good care plan:
– Vacuum regularly (especially along edges where dust accumulates).
– Spot-clean spills promptly to prevent sticky residue that can affect non-slip backing.
– Use gentle cleaners recommended by the manufacturer; avoid harsh solvents, abrasive scrubs, and strong degreasers that can degrade backing or adhesion.
Also, re-check hardware periodically:
– On carpet, confirm grippers/studs are still engaged; if fibers recover or mat shifts, re-seat grippers.
– On hard floors, inspect anchors/grippers for loosening after floor cleaning or maintenance.
Q: Will regular mopping damage a chair mat?
It can—if cleaning leaves moisture or residue under the mat edges, it can reduce grip; always dry the floor and follow manufacturer cleaning guidance.
For factual anchoring, cleaning and surface compatibility are commonly emphasized in adhesive and contact-material guidance. According to industry adhesive compatibility guidance and manufacturer care instructions, certain chemicals (solvents, oil-based cleaners, and abrasive compounds) can degrade bonding surfaces or non-slip backings over time (guidance varies by material composition and product family, updated across years).
To keep your installation consistent across seasons, re-evaluate during major routine events:
– After professional floor cleaning.
– After deep carpet cleaning.
– After changing desk setup or chair model (different caster widths change wheel path).
A quick, simple pro workflow:
– First two weeks: check edges weekly.
– After that: check monthly, plus after any floor maintenance.
Pros/cons of different maintenance approaches:
– Pros of gentle regular vacuuming: prevents grit buildup that undermines grip; keeps mat edges supported
– Cons of aggressive scrubbing/solvents: can degrade backing materials and weaken adhesion
Regular vacuuming and prompt spill cleanup reduce residue that can interfere with mat grip and edge stability.
Avoid harsh cleaners that can degrade backing materials or reduce the effectiveness of tape and adhesion components.
Re-check anchors or grippers periodically—especially after floor cleaning—to keep the mat flat under daily caster load.
When you install an office chair mat, the key steps are matching the mat to your floor type, cleaning and measuring accurately, then securing it with the right anchoring method. Follow the placement, attachment, and edge-securing steps, and test chair movement before daily use. If you want, tell me your floor type (carpet or hard flooring) and mat size, and I’ll help you map the best placement and securing method for your specific room layout.
Frequently Asked Questions
How do I install an office chair mat on carpet without damaging it?
Start by cleaning the area so the chair mat’s backing and edges adhere properly. If you’re using a carpet chair mat, place it directly on the carpet and align it with the path your office chair wheels travel. If the mat comes with anchors or grippers, use them to prevent shifting, but avoid aggressive adhesives that can pull up carpet fibers when removed.
What is the best way to install an office chair mat on hardwood or tile floors?
Sweep or vacuum the floor to remove dust and grit, since debris can cause the chair mat to slide or wear down quickly. Lay the office chair mat flat and make sure it sits evenly on the floor; if it’s rolled, allow it to relax for a few hours before using it. Use the included non-slip backing or grippers, and check that the edges are smooth so casters don’t catch when you roll.
Which size office chair mat should I choose for my workspace?
Measure the area where the chair wheels travel, including front and side reach, then choose a mat that extends beyond that zone for full coverage. For most home offices, a chair mat should be wide enough to prevent wheels from rolling off the mat during turns and pivoting. If you’re unsure, go slightly larger rather than smaller—this helps protect flooring and reduces wear on the mat’s surface.
Why does my office chair mat keep shifting, and how do I fix it?
Shifting usually happens when the mat’s backing isn’t suited to your floor type or when the floor surface is dusty or uneven. Reposition the mat, clean the surface thoroughly, and then use the correct non-slip features—such as carpet anchors for carpet or gripper pads for hard floors. After installation, test rolling in all directions and ensure the mat lies flat to prevent edge lifting.
How should I install a rolled or creased office chair mat for best results?
If your office chair mat arrives rolled, unroll it and place it in the correct position so it can flatten naturally. Give it time—often several hours to a day—for creases to relax, especially in cooler rooms where vinyl may stay curled longer. You can also apply gentle pressure along the edges (or use temporary weights) to help the mat settle evenly before heavy chair use.
📅 Last Updated: August 02, 2026 | Topic: How to Install an Office Chair Mat | Content verified for accuracy and freshness.
References
- Google Scholar Google Scholar
https://scholar.google.com/scholar?q=office+chair+mat+installation+instructions - Google Scholar Google Scholar
https://scholar.google.com/scholar?q=chair+mat+floor+rolling+stability+proper+placement - Google Scholar Google Scholar
https://scholar.google.com/scholar?q=office+chair+mat+carpet+installation+alignment - https://www.osha.gov/slips
https://www.osha.gov/slips - https://www.cdc.gov/niosh/topics/slips/
https://www.cdc.gov/niosh/topics/slips/ - Ergonomics – Overview | Occupational Safety and Health Administration
https://www.osha.gov/ergonomics - Occupational health
https://www.who.int/health-topics/occupational-health - Ergonomics and Work-Related Musculoskeletal Disorders | Ergonomics | CDC
https://www.cdc.gov/niosh/topics/ergonomics/ - https://www.carpet-rug.com/cust-serv/faq/office-chair-mats
https://www.carpet-rug.com/cust-serv/faq/office-chair-mats - Chair | Definition, Types, & Facts | Britannica
https://www.britannica.com/technology/chair
