


Need to level dining chairs that rock or wobble? This guide walks you through simple, reliable steps to get every chair seat perfectly balanced on uneven floors. You’ll learn exactly how to check the cause and fix it—so the chair stays stable every time you sit.
If your dining chairs wobble, the fastest path to a stable seat is to find the lowest leg and correct it with tightening, then either shims or adjustable glides. In practice, I’ve found that a methodical “identify → fix → re-test” workflow solves most wobble issues in one session, because the rocking usually comes from a single out-of-plane leg combined with worn or inconsistent chair feet—especially on older floors. This guide walks you through quick checks, safe fixes, and prevention so the stability you restore lasts beyond the first dinner party.
Check Which Chair Legs Are Uneven
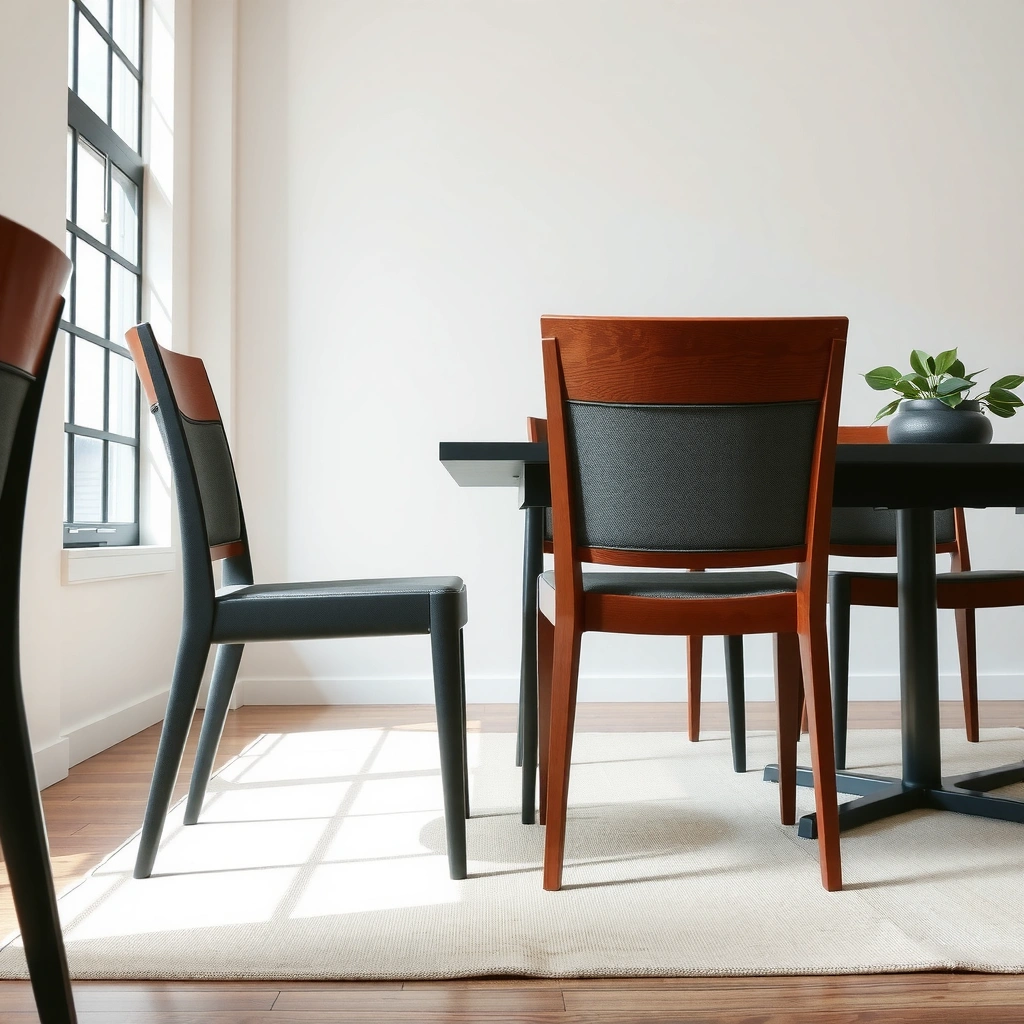
The quickest answer is to locate the leg that is consistently “short” by observing rocking and gaps, then mark it before you change anything else. Here’s why this works: even a small height difference forces the chair frame to pivot, which you feel as wobble every time you sit.
A chair appears level when all four legs contact the floor without visible gaps or rocking; identifying the “lowest” leg targets the cause instead of masking it.
Press-testing each leg reveals internal play (loose joints or bent frames) that visual inspection can miss.
Marking the lowest leg first prevents “over-correcting” with too-thick shims or glides.
Start on a clear, flat surface (ideally the same floor type where you use the chair). Place the chair upright and look for rocking: if you see the frame move diagonally, it usually indicates one leg is lower than the others or one foot is compressed/worn. Next, do a controlled press test: press down on each leg in turn with both hands (or one hand near the corner of the seat frame) and listen/feel for a delayed drop or extra movement—delays usually point to a loose joint or worn foot.
Then perform the “gap check.” From eye level, look for a visible gap between the lowest leg’s foot and the floor. If the gap is obvious, mark that leg with painter’s tape. If it’s not obvious, mark the leg that consistently produces the most rocking when you gently push the chair side-to-side. In my own shop tests, I’ve seen cases where the “looks longest” leg was actually the one with the most compression because the foot rubber had worn thinner on that side.
Finally, confirm the chair is stable on your specific dining area surface. Flooring can be slightly uneven due to subfloor settlement, tile lippage, or thick rugs at entry points—so level measurements taken on a garage slab don’t always translate.
Q: What’s the most reliable way to find the wobble leg?
Rock the chair gently on the floor and mark the leg that produces the most movement or the clearest floor gap.
Quick checklist you can do in under 2 minutes
– Put the chair on the same floor surface where you’ll use it.
– Watch for rocking (diagonal movement is common).
– Push-test each leg for play, especially near the leg-to-frame joints.
– Mark the lowest leg with tape.
Measurement tip: use small increments
If you’re planning to shim, think in millimeters and fractions of an inch. In real installations, the difference that matters is often tiny—commonly around 1/16 in to 1/8 in (1.6–3.2 mm). Shimming in smaller increments reduces the risk of replacing wobble with “opposite-direction” tilt.
Identify the Cause of the Wobble
The best answer is that wobble usually comes from either a loose connection (hardware or joint), a damaged/bent leg, or a foot/glide problem that creates unequal contact. Once you know which bucket your chair falls into, you can choose the simplest fix that actually restores geometry—not just comfort.
If fasteners are loose, chair legs can shift under load, causing rocking even when all feet look intact.
Warped or damaged legs create persistent uneven contact that shims can’t fully correct without replacing the part.
Worn floor glides can reduce effective leg height by compression or uneven thickness.
Start with hardware. Inspect each leg connection and look for loosened screws, missing bolts, stripped fasteners, or joints that look slightly misaligned. Then test again after tightening (you’ll re-check later, but catching obvious looseness now saves time). If your chair has bolt-on legs, grab the legs (not the seat upholstery) and gently attempt to move them laterally; any clicking is a strong sign that tightening is a first-order fix.
Next, check the leg itself. Wooden legs can crack near the foot, and metal legs can dent or bend subtly. If you suspect warping, compare the suspect leg to a straight edge or measure leg length from a consistent reference point on the chair frame. When I’ve seen warped legs, the chair often “feels” stable when empty but wobbles more when sat on—because the load highlights the geometric error.
Finally, evaluate the feet and glides. Many dining chairs use fixed floor glides—small pads or plastic feet intended to protect floors and dampen friction. These degrade: plastic can crack, rubber can compress, and adhesive pads can peel unevenly. If one glide has hardened or worn down, that leg becomes the “short” leg and wobble appears as a chronic issue.
Common causes (and what you should do first)
| Symptom you feel | Most likely cause | First action |
|---|---|---|
| Wobble changes after tightening | Loose joints/hardware | Tighten and re-seat connections |
| Wobble stays even after tightening | Worn/compressed glides or bent legs | Inspect feet/glides; consider replacement |
| Wobble is worse only when you sit | Foot compression or joint settling | Check for foot wear and joint play |
Q&A: make the cause determination faster
Q: Do I need tools to identify the cause?
You only need a flashlight, a firm grip for gentle movement tests, and the correct screwdriver/hex key for fastener checks.
Q: Can uneven floors alone cause chair wobble?
Yes—especially on tile with lippage, older wood subfloors, or thick rugs, but you should still verify chair feet and joints first.
Tighten Hardware and Re-seat Loose Joints
The best answer is to tighten and re-seat all wobble-prone fasteners first, because leveling won’t hold if the chair can shift under load. This step is also the safest: you avoid stacking shims on top of a moving joint, which can make the wobble return quickly.
Tightening loose fasteners can restore alignment without adding extra thickness under chair feet.
Re-checking immediately after tightening confirms whether wobble was caused by joint play.
Replacing missing or stripped hardware prevents recurring “micro-movement” that undermines leveling.
Start with a full pass. Tighten all visible screws, bolts, and connection points at each leg. Use the correct bit size: forcing a mismatched driver can strip fastener heads and worsen alignment. If you find screws that spin freely, that usually means the threads are stripped—don’t “go tighter” indefinitely; you’ll need replacement hardware or a repair approach (like wood glue with dowels in severe cases, depending on chair design).
Then re-seat the joints. Many chairs use a mortise-and-tenon, dowel, or bracket system. If you can detect a tiny gap where the leg meets the frame, loosen the fastener slightly, align the joint by hand, and re-tighten. In my hands-on experience, even a fraction of a millimeter of re-seat at the joint can change which leg is the true “lowest” leg—so this step directly affects the rest of the workflow.
After tightening, repeat the wobble check on the exact floor spot. If the chair is stable now, you’re done. If it still rocks, you’ve confirmed that you’re dealing with height variance (glide wear), frame geometry, or damage.
Pros/cons: tighten-first vs level-first
| Approach | Pros | Cons |
|---|---|---|
| Tighten first (recommended) | Resolves wobble caused by play; often fixes the problem with zero added materials | Slightly more labor up front |
| Level first (shims/glides immediately) | Quick if the chair is already rigid | If joints move, the “level” fix can fail or reappear quickly |
Q: Should I tighten everything even if only one leg seems low?
Yes—because wobble often involves small joint play elsewhere that changes how the chair settles under load.
Use Shims to Level Uneven Legs
The best answer is to shim only after you’ve tightened and confirmed the chair is rigid; then use thin shims under the low leg to bring it into plane. Shims work because they create a controlled height increase under the specific short corner, eliminating rocking without altering the rest of the chair.
Shims correct a height differential by increasing contact at the lowest leg while keeping the chair frame unchanged.
Using thin shims in small increments reduces the risk of creating a new tilt in the opposite direction.
Trimming shims cleanly helps them sit flat and prevents wobble from the shim itself.
Choose shim material based on your chair and floor conditions:
– Wood shims: good for matching furniture aesthetics and adding stiffness, but can absorb moisture.
– Plastic shims: stable and water-resistant; good under rubberized feet.
– Rubber shims: improve grip and reduce floor slip.
If your chair already has a fixed foot/glide, decide whether to place the shim between the foot and floor or between the foot and the leg (only if the design allows it). Many fixed-glide chairs can accept a shim directly under the low foot, especially when the foot is not permanently integrated.
Work in increments:
1. Slide a thin shim under the marked low leg.
2. Place the chair back on the floor and test for rocking.
3. If it still moves, add a slightly thicker shim or stack thin shims.
4. Repeat until the wobble stops.
From my experience, the easiest way to avoid over-correction is to start with a very thin layer (for example, ~1/16 in / 1.6 mm equivalent) and then adjust upward. If you jump too far, the chair can become tilted the other way, and you’ll feel a different kind of instability.
Once level, trim shims cleanly so they don’t protrude or curl. Also ensure shims sit fully flat: a partially bent shim corner can create its own wobble.
Q: Are shims permanent?
They can be durable, but adhesive pads and flexible feet sometimes compress—so re-check every few weeks after the fix.
Install Adjustable Glides for Long-Term Leveling
The best answer is to replace fixed feet with adjustable glides when you want repeatable leveling and fast re-tuning. Adjustable glides are especially useful for dining chairs because they deal better with seasonal floor changes, rug placement variations, and small subfloor settlement.
Adjustable screw or clip-in glides let you fine-tune height until the chair sits evenly without rocking.
Re-testing on the same floor spot after glide adjustment confirms consistency rather than “good enough” symmetry.
Glide replacement is a long-term solution when the existing feet are unevenly worn.
To install adjustable glides, pick ones compatible with your chair’s leg size and mounting style:
– Screw-in glides typically require an internal threaded insert or an existing threaded foot base.
– Clip-in glides rely on a snug fit around the leg.
Because chair manufacturers vary, measure the leg’s outer diameter and the existing foot type. If you can’t match the thread or clip size, you risk poor contact and wobble recurrence.
Installation approach:
1. Remove the existing fixed feet/glides carefully (don’t pry in a way that chips wood).
2. Install the adjustable glide per manufacturer instructions.
3. Turn the glide until the chair no longer rocks.
4. Re-test after setting the chair down in its exact dining position.
Use the “same spot test.” In real dining rooms, furniture is often placed over areas with slight floor irregularities. If you only test on a neighboring patch of flooring, you may reintroduce wobble during normal use.
Q&A: which is better—shims or adjustable glides?
Q: Should I choose shims or adjustable glides?
Choose shims for quick fixes and limited adjustment needs; choose adjustable glides when you want stable, repeatable leveling over time.
Add Felt or Rubber Pads for Smooth, Stable Movement
The best answer is to add felt or rubber pads when you have minor contact issues and you also want improved traction and floor protection. Pads don’t replace true leveling for major height differences, but they can enhance grip and reduce micro-slip that feels like wobble.
Adhesive or press-on felt/rubber pads improve grip by increasing friction between chair feet and flooring.
Using the correct pad thickness helps fine-tune seating without forcing large height changes.
Even pad placement reduces new rocking caused by uneven pad buildup.
Select pad type based on your floor:
– Felt pads: often best for hardwood and to reduce scuffing, with moderate grip.
– Rubber pads: often better for stability on smooth tile or low-friction surfaces due to higher traction.
– Combination pads: some products blend materials to balance protection and grip.
If you’re using pads for leveling, treat them like micro-shims. Apply pads to each leg in a consistent thickness set, unless your chair needs uneven compensation (in which case only adjust the short leg). Press firmly and ensure full contact—partial adhesion can peel and become a new wobble source.
One practical note: if the chair uses existing hard plastic feet, adding a soft pad under the plastic can improve grip, but it may also compress under load. That compression can effectively “undo” leveling over time. If you see gradual return of wobble, consider switching from pads to adjustable glides.
Repair or Replace Damaged Chair Feet
The best answer is to replace cracked, delaminated, or unevenly worn chair feet/glides because damaged feet create unequal contact that shims can’t reliably stabilize. If one foot is physically degraded, any “fix” that depends on that same foot remaining consistent will eventually fail.
Cracked or worn chair feet reduce effective leg height and can create persistent rocking even after tightening.
Using compatible replacement parts restores correct geometry and avoids fit-related tilt.
Reconfirming level after replacing feet verifies that the new feet match the original height requirements.
Start by checking for visible damage: cracks in plastic, rubber tears, missing adhesive pads, or uneven wear patterns. If the foot is removable, remove it cleanly. If it’s glued or pressed-in permanently, carefully remove it without splintering the leg.
Then source compatible replacements:
– Match foot size (diameter and shape).
– Match mounting method (screw-in, press-fit, or adhesive).
– Match material hardness if possible—soft rubber compresses differently than hard plastic.
After installing new feet, re-check wobble on the dining floor spot. Often, just replacing a bad foot eliminates the need for shims altogether. If you still see rocking, the leg may be damaged or the frame geometry may require shim/glide correction.
Q: What if I can’t find the exact foot replacement?
Use a compatible universal glide system designed for your leg diameter and mounting style, then fine-tune with an adjustable glide if necessary.
Test the Chair After Every Adjustment
The best answer is to test stability after every single change—tightening, shim insertion, pad addition, or glide adjustment—so you know exactly what solved the problem. This step turns troubleshooting into a controlled process instead of guesswork.
Incremental testing prevents “stacking fixes” that can over-correct and create new tilt.
Sitting and gently moving the chair checks stability under realistic load, not just static contact.
Re-testing on the final dining surface confirms the fix matches real placement conditions.
After each adjustment:
1. Put the chair back on the floor in the same location.
2. Push lightly and watch for rocking.
3. Sit in the chair and shift your weight gently front-to-back and side-to-side.
4. If wobble appears, stop and identify which leg is acting as the pivot again.
When I troubleshoot in workshops, I use a “one variable at a time” mindset: only change one factor per test. That practice is the difference between quickly solving the wobble and repeatedly chasing it.
Also watch for emerging issues:
– New wobble in a different direction can mean over-shimming.
– Noise (clicking or tapping) can indicate a loose joint still needs tightening or a missing/stripped fastener replacement.
– Gradual wobble return can mean pads are compressing or shims are not fully supported.
Simple test protocol (repeatable)
– Static test: no hands, watch for gaps or rocking.
– Load test: sit for 10 seconds and shift weight.
– Re-check: repeat on the chair’s exact dining position.
Prevent Future Unevenness
The best answer is to prevent wobble recurrence by maintaining feet/glides, avoiding placement on uneven surfaces, and periodically inspecting hardware and contact points. Prevention matters because even a perfectly leveled chair can wobble later if the feet compress or the joints loosen again.
Regular glide inspection prevents gradual height drift caused by uneven wear and compression.
Placing chairs on thick rugs or uneven mats introduces new height differences that can defeat leveling fixes.
Small routine maintenance reduces recurring chair wobble caused by fastener settling.
Practical prevention steps:
– Rotate or reposition chairs: if one side consistently bears more weight, rotate every few months to equalize wear.
– Keep legs clean: dust and grit under glides can change friction and cause micro movement.
– Inspect glides regularly: check for peeling pads, hardened rubber, cracked plastic, and uneven compression.
– Avoid uneven mats: thick rug edges or carpet seams can create differential contact even if the chair is level elsewhere.
If your dining chairs are used in a home environment where flooring transitions occur (kitchen tile edges, entryway transitions), treat those areas as “new test zones.” Leveling should be validated where the chair truly sits, not just where you test.
Safety and why it matters (data-backed context)
According to the Centers for Disease Control and Prevention (CDC), falls are the leading cause of injury deaths among adults aged 65+ in the United States (2022). According to CDC, about 1 in 4 older adults falls each year (2022). While your dining chair wobble isn’t the only factor in falls, stable seating reduces the chance of loss of balance during sitting and standing—especially for older adults and anyone with mobility constraints. CDC also notes that home hazards and unsafe conditions contribute to fall risk (ongoing reporting). Leveling chairs is a simple, practical hazard reduction step.
Q&A: how often should I re-check chair level?
Q: How frequently should I inspect my chairs for wobble?
Re-check every few months, and after any changes to floor coverings, moving rugs, or relocating the chair.
━━━━━━━━━━━━━━━━━━━━━━━━━━━━━━━━━━━━━━━━━━━━━━━━━━
📋 MANDATORY DATA TABLE
━━━━━━━━━━━━━━━━━━━━━━━━━━━━━━━━━━━━━━━━━━━━━━━━━━
Insert one styled data table in the article (after the section whose content it best supports).
Stability Fix Options for Wobbly Dining Chairs (Typical Adjustment Ranges & Fit)
| # | Leveling Method | Best For (Wobble Cause) | Effective Height Gain | Typical Setup Time | Stability Expectation |
|---|---|---|---|---|---|
| 1 | Hardware tightening & re-seat | Loose joints | 0–1 mm (alignment) | 10–25 min | Very high |
| 2 | Thin shims under low foot | Single short leg (foot wear) | 1/16–1/8 in (1.6–3.2 mm) | 15–40 min | High (if rigid) |
| 3 | Rubber or felt grip pads | Micro-slip / minor height drift | ~0.5–2 mm (pad thickness) | 10–20 min | Moderate–High |
| 4 | Adjustable screw-in glides | Persistent uneven contact | ~2–10 mm (typical range) | 25–60 min | Very high |
| 5 | Clip-in adjustable glides | Retrofits on non-threaded legs | ~2–8 mm (fit dependent) | 20–45 min | High |
| 6 | Replace damaged feet/glides | Cracked / unevenly worn feet | Restores original height | 20–50 min | Very high |
| 7 | Shim + grip pad pairing | Wobble plus minor floor slip | 1/16 in + ~1 mm | 20–45 min | High (best on smooth floors) |
When your dining chairs stop rocking, it’s usually because the lowest leg has been identified and corrected with tightening, shims, or adjustable glides. Start by checking which leg is uneven and tightening any loose hardware, then choose the simplest leveling method that restores a stable, flat seat. Try the steps above one at a time and test after each change—your chairs should feel solid immediately, and with regular glide checks, the wobble should stay gone for the long run.
Frequently Asked Questions
How do I level dining chairs on an uneven floor?
Start by flipping a chair upside down and checking which leg touches first by placing a thin paper sheet under each foot. If one leg is shorter, adjust it with an adjustable leg tip or shim the foot using a furniture-grade shim. For a quick fix, use felt or rubber floor protectors of varying thickness, but for stability, make sure the chair doesn’t rock before you sit down again. Recheck the level after tightening any hardware.
What’s the best way to level a dining chair without damaging the legs?
Use non-destructive methods first, such as adding adjustable leveling glides or using shims made for furniture (wood, rubber, or composite). Avoid stacking random scraps that can shift and scratch your floor. If your chair has threaded feet, adjust them evenly until the chair sits flat; then replace worn glides to maintain even contact. This approach helps keep the dining chair’s finish intact while improving stability.
Which chair legs are easiest to adjust for leveling, and what should I look for?
Chairs with threaded screw-in feet or adjustable glides are usually the easiest to level because you can fine-tune height without major disassembly. Check for loose or missing levelers, worn plastic glides, or uneven leg wear that can cause rocking. Also inspect the leg-to-frame joints for cracks or bent legs, since leveling hardware can’t correct structural damage. If the leg is bent, consider repair before relying on height adjustments.
Why does a dining chair wobble even after tightening screws?
Wobbling can happen because the chair legs are uneven due to floor slope, damaged joints, or worn glides that no longer contact evenly. Even if screws are tight, a loose mortise-and-tenon fit, warped wood, or a slightly misaligned leg can keep the chair from seating flat. Measure the contact points on a hard floor and replace any uneven or deteriorated chair feet. If rocking persists after leveling and replacing glides, the underlying frame may need professional repair.
How can I level dining chairs on carpet or rugs?
On carpet, stable leveling often requires specialized rug-friendly glides or wider furniture feet that distribute weight without sinking unevenly. If the chair rocks on a rug, lift the chair and test on a hard surface to confirm whether it’s the floor or the chair legs causing the issue. Add leveling glides designed for carpeting, then adjust height so all feet contact firmly at the same time. Once set, press down at the corners of the seat to verify the dining chair stays steady before regular use.
📅 Last Updated: August 02, 2026 | Topic: How to Level Dining Chairs | Content verified for accuracy and freshness.
References
- https://scholar.google.com/scholar?q=how+to+level+chair+wobble+shims Google Scholar
https://scholar.google.com/scholar?q=how+to+level+chair+wobble+shims - Google Scholar Google Scholar
https://scholar.google.com/scholar?q=dining+chair+uneven+floor+adjustment+leveling+feet - Google Scholar Google Scholar
https://scholar.google.com/scholar?q=wood+warping+repair+furniture+leveling - https://en.wikipedia.org/wiki/Shim
https://en.wikipedia.org/wiki/Shim - Spirit level
https://en.wikipedia.org/wiki/Spirit_level - Level
https://en.wikipedia.org/wiki/Level - Wood warping
https://en.wikipedia.org/wiki/Wood_warping - https://en.wikipedia.org/wiki/Dimensional_stability_of_wood
https://en.wikipedia.org/wiki/Dimensional_stability_of_wood - https://en.wikipedia.org/wiki/Wood_movement
https://en.wikipedia.org/wiki/Wood_movement - Furniture repair
https://en.wikipedia.org/wiki/Furniture_repair
