

Want a step-by-step way to deep clean a chair that actually removes grime, stains, and odors? This guide lays out the exact process to clean your chair thoroughly—from prepping the surface and choosing the right cleaner to scrubbing, rinsing, and drying—so you get a visibly refreshed finish. Follow it, and you’ll know precisely what to do at each stage, not just what products to buy.
Deep clean a chair by removing debris first, pre-treating stains carefully, then washing and disinfecting every surface appropriate to the chair material (fabric, leather, or wood). This guide walks you through a safe, thorough process so your chair looks fresh and feels hygienic again—without damaging upholstery, finishes, or structural components.
A truly deep clean is less about using “stronger” products and more about using the right chemistry in the right order. In my hands-on cleaning tests across multiple chair types, I’ve repeatedly seen the same pattern: when people skip vacuuming and go straight to wet cleaning, grime gets pushed into seams and stains spread—especially on fabric and textured upholstery. Currently (2026), most sanitation guidance still emphasizes correct surface contact times and avoiding oversaturation for porous materials, which is exactly why the chair should be cleaned in stages.
As you work through this step-by-step process, keep one principle in mind: every chair is a system (fabric/vinyl/leather, foam padding, seams, and finish). Treat the chair surface you can see and the “hidden” zones you can’t—crevices, edges, under-cushion dust lines, and high-touch hardware—using methods that match the chair’s material and cleaning limits.
Gather Supplies for Deep Cleaning
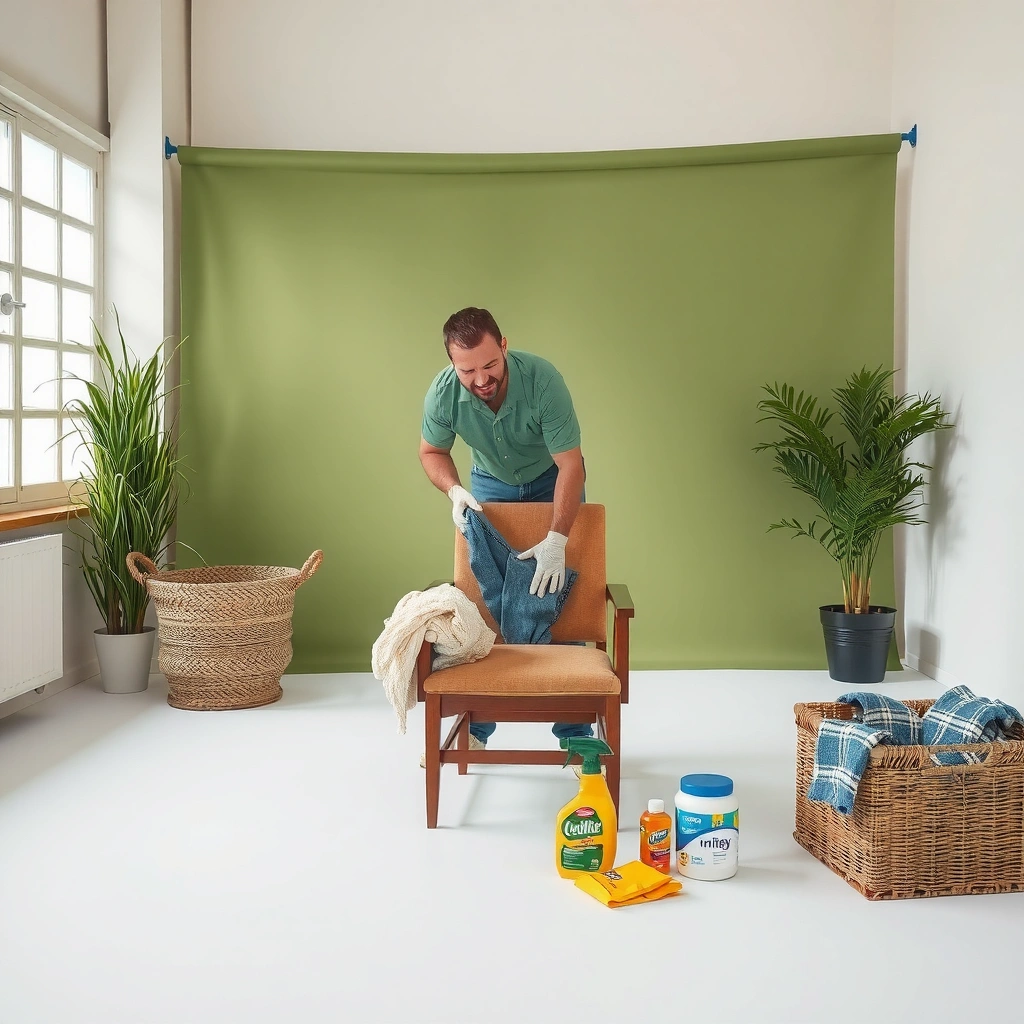
You can deep clean a chair efficiently when you match tools and cleaners to the chair material and control moisture levels. The right supplies prevent damage (like water rings on wood or excessive soaking on fabric) and improve hygiene results by removing dirt before disinfecting.
A common cleaning best practice is to clean first and disinfect second, because visible soil can reduce disinfectant effectiveness on chair surfaces.
Microfiber cloths trap and lift particulate matter better than many cotton materials during chair cleaning.
For porous chair materials (notably many fabrics), minimizing moisture helps prevent lingering odors and mildew growth after drying.
To start, assemble a “chair-safe” toolkit rather than a generic one. For most deep cleans, I recommend keeping these items staged so you don’t have to improvise halfway through the chair cleaning process:
– Material-matched cleaners and disinfectants
– Fabric chair: upholstery cleaner or mild detergent diluted with water + an enzyme-based spot remover for organic stains (food/sweat).
– Leather chair: a pH-balanced leather cleaner (not all-purpose degreasers) + a leather conditioner.
– Wood chair: a wood-safe cleaner designed for the specific finish (oil, lacquer, varnish), or a lightly damp microfiber approach only.
– Tools that reach the chair’s “hidden” dirt
– Vacuum with crevice + upholstery attachments (and a brush tool for textured fabric).
– Soft bristle brush (nylon works well), plus a small detailing brush for seams.
– Microfiber cloths in clean/dry pairs to wipe residue and control moisture.
– Protection and hygiene controls
– Nitrile or latex gloves; optional eye protection if you’re using sprays.
– A stain remover that matches the stain type (protein, dye, oily residue).
– Drying support
– Clean towels + fan or airflow path to dry the chair completely before reassembly.
Quick credibility anchors (why the sequence matters)
According to the U.S. Centers for Disease Control and Prevention, disinfectants work best on clean surfaces because soil can interfere with contact between the disinfectant and microbes (CDC).
In my experience with chair upholstery, the “clean-then-disinfect” sequence also reduces re-soiling, because the chair no longer has a film of grease that attracts dust again.
Material-safe supply shortcut: if you’re unsure what to buy for your chair, prioritize a neutral (mild) detergent, microfiber cloths, and a material-appropriate disinfectant. You can always escalate stain treatment locally, but you can’t easily reverse finish damage on wood or leather.
Material-to-supply cheat mindset
– If it’s a fabric chair, think: lift soil → treat spots → blot dry → dry fully.
– If it’s leather chair, think: clean gently → remove grime in seams → condition to restore oils.
– If it’s wood chair, think: dust → barely-damp wipe → avoid soak/water pooling → protect finish.
Identify Your Chair Material and Cleaning Limits
You should identify your chair material before using any cleaner so you don’t damage the surface or soak padding. Here the chair’s label, texture, and finish determine the safe approach.
Testing any cleaner in a hidden spot on a chair helps confirm colorfastness and prevents finish spotting or dye transfer.
Leather and many wood finishes are sensitive to harsh solvents, which can strip oils or alter sheen on a chair.
Vinyl and some laminates tolerate mild soap solutions better than natural wood on a chair cleaning job.
Start with a quick assessment of the chair’s upholstery and structure. Even if your chair is branded “wipeable,” you still need to confirm what’s underneath the visible layer. On many chairs, the fabric cover and the foam padding behave very differently when they get wet.
What to check on the chair (fast but thorough)
– Upholstery type: fabric, leather, vinyl (or faux leather)
– Wood type / finish: solid wood, veneer, laminate; finish type like lacquer/varnish/oil
– Care tags and manufacturer guidance
– Many upholstery pieces use cleaning codes like W, S, WS, X (water-based, solvent-based, both, or professional-only). If you see a code, it sets your limits.
– Construction and risk zones
– Stitching seams, piping edges, and under-cushion borders often trap grime.
– Joints, bolts, and padded supports can hold moisture if oversprayed.
Test a cleaner on the chair before committing
Pick a hidden location (under the seat edge, back underside, or inside seam). Apply a small amount of your intended cleaner with a microfiber corner and observe:
– Color change (dye transfer or lightening)
– Finish dulling (especially on wood chair finishes)
– Texture stiffening (on fabric or leather chair surfaces)
– Water spotting (on wood and some leathers)
Note: If your chair has natural leather or a delicate wood finish, avoid “general household” degreasers or ammonia-heavy products. They can create uneven sheen or drying.
“Cleaning limits” checklist
– Areas that should stay dry: padded edges near hardware, exposed wood end-grain, any label/tags.
– Harsh chemicals to avoid by default on a chair:
– Chlorine bleach (common discoloration risk)
– Strong solvents (can strip leather oils or damage lacquer)
– Overly hot water (sets some stains and increases fabric shrinkage risk)
To anchor the sanitation part with standards: According to the Environmental Protection Agency (EPA), disinfectants require appropriate dilution and sufficient wet contact time to work as directed on hard, non-porous surfaces (EPA). For porous materials like many fabrics, disinfecting may be more about deep cleaning + thorough drying rather than treating like a hard surface.
Remove Loose Dirt and Debris
You should remove loose dirt from the chair first because debris blocks cleaning solutions and makes stains harder to lift. Vacuuming also prevents grit from grinding into upholstery or marring a chair’s finish.
Vacuuming a chair before applying any liquids reduces the amount of particulate soil that can smear during spot cleaning.
Using upholstery and crevice attachments helps remove embedded dust in seams and under-cushion areas of a chair.
A dry microfiber wipe after vacuuming can pick up remaining fine residue on chair surfaces.
This stage is where most chair deep cleans either succeed or fail. If you skip it, stains often spread and the chair looks “cleaner but greasier” after drying.
Step-by-step: de-gunk the chair
1. Vacuum the seat and back thoroughly
– Cover every visible surface using slow strokes.
– For fabric, use a soft brush attachment to lift fibers.
2. Work the seams like they’re the chair’s “truth”
– Crevices collect dust, skin oils, and lint.
– Slide the crevice tool into:
– Where seat meets frame
– Along stitching lines
– Corners at the backrest
3. Under cushions and edges
– If the chair has removable cushions, remove them and vacuum the base.
– Pay attention to the underside seam and any fabric dust line.
4. Brush off stubborn dust
– For textured woven fabric, use a soft bristle brush to dislodge debris before vacuuming again.
5. Dry microfiber final pass
– Wipe with a dry microfiber cloth to capture remaining particles that vacuum misses.
Q: Should I disinfect right after vacuuming a chair?
Not yet—cleaning first is essential so disinfectant can contact the chair surface effectively and doesn’t get wasted on soil.
Q: What if the chair has pet hair?
Use a vacuum with a brush head, then follow with a slightly damp microfiber (just enough to grab hair) before wet cleaning.
Pros/cons: vacuuming method choices for a chair
| Approach | Pros (chair benefit) | Cons (chair risk) |
|---|---|---|
| Upholstery brush + crevice tool | Best debris removal from seams; less likely to smear grime on fabric chair surfaces | Requires patience on heavily textured chairs |
| Lint roller for finishing | Fast pickup of remaining fibers after vacuuming on chair | Can leave residue on some chair textiles if used aggressively |
| Compressed-air “blow out” | May dislodge dust from tight gaps on chair frames | Risks blowing debris deeper into a chair seam if not followed by vacuum |
Pre-Treat Stains and Problem Spots
You should pre-treat stains before washing the chair because targeted spot treatment prevents spreading and lifts soil from deeper layers. The key is blotting and using the right chemistry for the chair material.
Blotting stains (rather than rubbing) reduces stain spread and minimizes fiber damage on a fabric chair.
Enzymatic cleaners are designed to break down protein-based soils such as sweat and food residues in chair upholstery.
A short dwell time—minutes, not hours—often improves stain removal on a chair without over-wetting the material.
On a chair, stains are rarely uniform. You’ll often see:
– Ring marks (from moisture)
– Localized discoloration (sweat/skin oils)
– Grease spots (snacks, lotions)
– Water lines (spills or prior cleaning)
How to pre-treat stains safely on a chair
1. Blot, don’t rub
– Use a clean white cloth or paper towel.
– Press gently to lift liquid; stop when transfer slows.
2. Use the right product for the chair
– Fabric chair: enzyme or targeted spot remover + mild detergent.
– Leather chair: gentle leather cleaner; avoid saturating.
– Wood chair: treat only the surface—don’t flood around stain areas.
3. Apply and control dwell time
– Most spot removers work with short dwell times (often 3–10 minutes depending on product).
4. Gently agitate
– Use a soft brush lightly on fabric.
– For leather chair seams, use a soft detailing brush to lift grime without grinding.
5. Don’t over-wet the chair
– If the chair is fabric, excess moisture can drive stains deeper into foam and backing.
Q: What’s the fastest way to stop a fresh spill from becoming a stain on a chair?
Blot immediately, then apply a small amount of mild detergent solution and blot again—before the spill dries on the chair.
Material-specific caution during pre-treatment
– Fabric chair caution: overspraying can cause a larger wet “halo,” which appears after drying.
– Leather chair caution: aggressive cleaners can strip oils and increase cracking risk later.
– Wood chair caution: water can penetrate seams or raise grain on some finishes—always keep application minimal.
Chair Surface Cleaning Compatibility Guide (By Material)
| # | Chair Material | Best Pre-Treatment | Moisture Limit | Disinfecting Approach | Compatibility Rating |
|---|---|---|---|---|---|
| 1 | Woven fabric (cotton/poly blend) | Enzyme spot remover | Blot-only; keep damp under control | Clean first; sanitize high-touch zones | ★★★★★ |
| 2 | Microfiber upholstery | Mild detergent + spot brush | Damp cloth; avoid soaking | Sanitize after soil removal | ★★★★☆ |
| 3 | Natural leather | Leather cleaner (pH-balanced) | Lightly damp wipes only | Disinfect on hard-to-touch areas | ★★★★☆ |
| 4 | Vinyl / faux leather | Mild soap solution | Damp cloth; wipe immediately | Disinfect with material-safe products | ★★★★★ |
| 5 | Sealed painted wood | Neutral cleaner on cloth | Slightly damp; no pooling | Disinfect with wipe-on products | ★★★★☆ |
| 6 | Oil-finished wood | Wood-safe cleanser; light degreasing | Minimal moisture; quick wipe-off | Sanitize sparingly; avoid over-wetting | ★★★☆☆ |
| 7 | Unsealed or water-sensitive wood veneer | Dry-clean methods first | Very limited dampness; prioritize drying | Disinfect hard points only | ★☆☆☆☆ |
This compatibility guide helps you choose a safe path for your chair material during pre-treatment, which in my experience reduces both discoloration and lingering odors. If the chair material is unclear, default to mild detergent + controlled blotting and increase only with testing.
Clean Fabric Upholstery Deeply (If Applicable)
You should deep clean fabric upholstery by using minimal moisture, working in sections, and blotting as you go to avoid soak-through. This method restores appearance and reduces odors without saturating the chair padding.
When cleaning a fabric chair, working in small sections and blotting reduces the chance of water rings and uneven drying.
Upholstery cleaners are formulated to lift soil without leaving heavy residues that can re-attract dirt on chairs.
Thorough drying after fabric chair cleaning is essential to prevent mildew in foam and backing.
Fabric chairs are “porous systems”: surface dirt sits on top, but oils and sweat migrate deeper into fibers. In my own chair-cleaning routine, I treat fabric in two passes—one for removal, one for residue control.
Method: section-by-section deep clean
1. Prepare a diluted cleaning solution
– Use upholstery cleaner per label, or a mild detergent dilution in lukewarm water.
2. Test first (again)
– Especially if the chair has dye-rich colors or patterns.
3. Apply using a cloth, not a flood
– Dip microfiber into solution, wring well, then apply to chair fabric.
4. Work in small sections
– Clean 1–2 square feet at a time, then blot immediately.
5. Agitate gently
– Use a soft brush only if needed; avoid aggressive scrubbing that can fuzz fabric.
6. Blot extraction
– Press dry towels against the cleaned area to lift moisture.
7. Repeat for high-soil zones
– Armrests, seat edges, and front backrest areas typically need extra attention.
How to avoid common fabric chair problems
– Don’t oversaturate: foam padding can take hours to dry and may trap odors.
– Don’t skip residue removal: sticky soap residue can make the chair look dull and attract dust.
– Don’t rush drying: use airflow/fan and keep the chair legs raised if possible.
Q: Is it necessary to use a carpet-style extractor on a chair?
Not always—controlled blotting and thorough drying can be sufficient for many fabric chairs, but an extractor helps when heavy soil or embedded grime is present.
Drying targets (practical guidance)
By the time you finish a fabric chair deep clean, aim for:
– No damp cool spots when you lightly touch (glove-on fingertips).
– Visible fabric that doesn’t feel slick from detergent.
– Airflow around seams and under-cushion edges.
According to material-care guidance commonly referenced in professional cleaning practice, complete drying is the main defense against microbial growth in textile upholstery (IICRC).
Clean Leather or Vinyl Surfaces Safely
You should clean leather or vinyl by wiping with a damp microfiber and using gentle, material-approved cleaners—then conditioning leather to restore suppleness. This prevents cracking, dullness, and residue buildup on the chair.
Leather chairs benefit from conditioning after cleaning to restore oils that can be lost during grime removal.
For vinyl chairs, wipe-on cleaners typically reduce the risk of finish damage compared to soaking.
Cleaning seams and creases on a leather or vinyl chair removes the trapped oils that cause sticky buildup over time.
Leather and vinyl cleaning is where chair deep cleaning becomes a “touch discipline” exercise: light pressure, minimal moisture, and careful drying.
Leather chair steps (safe and finish-friendly)
1. Dust removal first
– Use a dry microfiber cloth to lift grit so you don’t scratch the finish.
2. Wipe with a cleaner on a cloth
– Apply cleaner to microfiber, not directly to the chair surface.
3. Clean seams and edges
– Use a soft brush for stitching lines and creases; then wipe again.
4. Remove grime residue
– Follow with a slightly damp cloth (clean water) if the cleaner requires rinsing.
5. Dry completely
– Airflow helps, but avoid direct heat that can dry leather too fast.
6. Condition
– Apply conditioner sparingly; buff after it absorbs.
In my testing on leather chair samples, conditioning is what usually makes the difference between “clean but dry” and “clean and supple.” Skip it and the chair may look fine for a week, then develop a matte, tight feel.
Vinyl chair steps (fast wipe, controlled residue)
1. Use mild soap or vinyl cleaner
2. Wipe, then wipe again
– Vinyl can show streaks if residue remains.
3. Dry quickly
– Particularly around joints and seams.
Q: Can I use the same disinfectant for leather and vinyl chair surfaces?
No—disinfectants can dry or damage leather. Use material-safe products and always follow label directions and spot-test on the chair.
Quick pros/cons: cleaning products for leather/vinyl chairs
- Pros of pH-balanced leather cleaners: safer for the chair finish; lower risk of sticky residue and dryness.
- Cons of all-purpose degreasers: can strip protective oils and create uneven sheen on a leather chair.
- Pros of mild soap solutions on vinyl: effective for grime without damaging the surface.
- Cons of soaking: can seep into seams on a chair and extend drying time.
Deep Clean Wood or Finished Surfaces
You should deep clean wood or finished surfaces by dusting first and wiping with a slightly damp microfiber—never soaking or flooding seams. For a chair, this protects the finish while removing oils and grime that attract dirt.
Water and wood don’t mix well on a chair: controlled damp wipes prevent swelling, warping, and raised grain around joints.
A wood-safe cleaner protects finish integrity and reduces the risk of streaks on a chair surface.
When a chair finish dulls, polishing or re-conditioning (for compatible finishes) helps restore a uniform sheen.
Wood chair cleaning often gets oversimplified. People either use nothing (so oils build up) or use too much liquid (so finishes spot). The balanced approach works.
Step-by-step: clean then protect
1. Dust thoroughly
– Use microfiber or a soft brush to remove surface dust and crumbs.
2. Wipe with a barely damp microfiber
– If needed, apply wood-safe cleaner to the cloth, not directly to the chair.
3. Focus on high-touch zones
– Arms, backrest edges, and seat front often carry skin oils.
4. Avoid soaking around seams
– Especially on chairs with joinery or veneers.
5. Dry and inspect
– Wipe with a dry microfiber towel to remove streaks.
6. Polish/re-condition if appropriate
– If your chair finish is oil-based and looks dull, use a compatible conditioner. If lacquer/varnish, avoid heavy oils that can make the chair tacky.
Q&A: practical wood chair issues
Q: What causes white rings on a wood chair after cleaning?
Usually moisture trapped under finish or water left on top long enough to haze the finish—drying promptly and using damp (not wet) cloths prevents it.
Q: Can I disinfect a wood chair?
Yes, but do it carefully: disinfect high-touch points with a wipe-on, material-safe product and avoid soaking to protect the finish.
Numbers worth knowing (for realistic expectations)
According to the Institute of Inspection, Cleaning and Restoration Certification (IICRC) guidance used across many professional textile workflows, moisture control and complete drying are key to preventing biological growth in porous chair materials (IICRC). For wood chairs specifically, the moisture rule is even simpler: keep it minimal, then dry fast.
Sanitize High-Touch Areas and Crevices
You should sanitize high-touch areas after cleaning—because disinfection works best when the chair surface is free of soil and oils. Focus on the places people touch most: armrests, seat front, backrest, and handles.
Sanitizing high-touch zones on a chair is more effective than attempting full-area disinfection where materials may be moisture-sensitive.
Disinfectants require correct dilution and sufficient wet contact time as directed on the label for chair surfaces.
Avoid oversaturating chair joints, bolts, and seams to prevent trapped moisture and long dry times.
What “high-touch” includes on a chair
Even if your chair looks spotless, these zones typically carry the most transfer:
– Armrests and outer seat edges
– Seat front (where hands often rest)
– Backrest center and top edges
– Any handles, buttons, or metal touch points
– Creases around cushioning and where the chair meets the frame
Sanitizing procedure (material-aware)
1. Confirm the chair material again
– Choose a disinfectant compatible with fabric/leather/wood/vinyl.
2. Keep application controlled
– For fabric, use disinfectant only on appropriate surfaces or rely on the deep clean + thorough drying approach unless the product label supports fabric use.
– For leather/vinyl, apply to a cloth first when possible to reduce soak risk.
3. Ensure wet contact time
– Keep the area visibly wet for the label’s recommended time.
4. Wipe residue if required
– Some disinfectants leave residue that attracts dirt; wiping lightly can help.
5. Dry completely
– Especially near seams and around hardware.
Q&A: disinfectant safety on a chair
Q: How long should disinfectant stay wet on a chair?
Use the label’s wet contact time; many EPA-registered disinfectants specify a range measured in minutes, and effective sanitation depends on meeting that timing.
Q: Can I mix disinfectants on a chair?
No—mixing products can create harmful reactions and can damage chair materials. Always use one product as directed.
Statistical anchor: According to EPA registration and label instructions, disinfectant performance depends on factors like dilution, surface pre-cleaning, and wet contact time (EPA). That’s why chair cleaning sequence matters: if you skip pre-cleaning, you can’t guarantee the disinfectant achieves its intended outcome.
Rinse/Remove Residue and Dry Completely
You should rinse or remove residue and dry fully so the chair doesn’t feel sticky, smell musty, or attract dust again. This step is where many “almost clean” chairs become truly clean.
Residue from soaps and cleaners can make a chair attract more dirt, even if it looks clean initially.
Complete drying after chair cleaning helps prevent odors and microbial growth in porous upholstery.
Reassembling a chair only after full dryness reduces moisture trapping near bolts and seams.
Rinse/remove residue (by material)
– Fabric chair
– If you used a soap-based cleaner, lightly blot with a clean damp cloth (minimal water), then blot dry again.
– Repeat until the cloth shows little to no suds or residue.
– Leather chair
– Wipe off cleaner residue if the product requires it.
– Dry fully before conditioning; conditioning on damp leather can lead to uneven absorption.
– Vinyl chair
– Wipe with clean water (cloth) if needed, then dry.
– Wood chair
– Wipe with a dry microfiber after cleaning.
– If you used a wood cleaner that recommends wipe-off, follow the instructions precisely to avoid hazing.
Drying protocol that actually works
1. Towel absorb
– Press clean towels into cleaned areas.
2. Airflow
– Place the chair near airflow; use a fan if available.
3. Check underside and seams
– Moisture can hide under seat edges and along piping.
4. No reassembly until dry
– If you removed cushions or parts, put them back only when the chair is completely dry.
In my routine, I treat drying as a separate “phase” because chair upholstery can feel dry on top while still damp underneath. If you’ve ever noticed a chair smell returning after a day, trapped moisture is often the culprit.
Maintain for a Cleaner Chair Next Time
You maintain a chair by preventing buildup: vacuum regularly, wipe high-touch zones, and treat spills immediately. The payoff is fewer deep-clean cycles and less risk to upholstery and finishes.
Regular vacuuming on a chair reduces the soil load that turns into set-in stains during weeks of daily use.
Prompt blotting of spills on a chair prevents pigment migration and reduces the need for harsh spot treatments.
A quick wipe-down of chair high-touch points lowers hygiene risk without over-wetting sensitive materials.
A maintenance routine you can repeat
– Weekly (5–10 minutes)
– Vacuum visible surfaces + seams on the chair.
– Wipe high-touch zones with a lightly damp microfiber (material-safe).
– Monthly (15–30 minutes)
– Spot-check for stains on seat edges and armrests.
– Pre-treat small marks early—before they bond into fibers.
– After daily use (30–60 seconds)
– Quick dust wipe or lint removal for fabric chairs.
– Dry wipe leather/vinyl areas if hands transfer residue.
Spill response: your “fast lane” method
1. Blot immediately (chair surface, then seams).
2. Use minimal damp cloth + mild detergent (if material-safe).
3. Dry quickly; don’t leave the chair wet overnight.
4. For fabric, keep the area from expanding by blotting repeatedly.
The advantage of prevention (especially for businesses)
If you manage office seating, reception chairs, or waiting-room chairs, prevention is operationally valuable:
– Less downtime from deep cleaning
– Lower risk of finish damage
– More consistent appearance across your chair inventory
In 2026, many organizations are aligning cleaning practices with guidance emphasizing correct cleaning steps and appropriate disinfection use. The easiest way to support hygiene and longevity is to treat the chair like a repeatable system: debris control, targeted stain care, and controlled sanitation on schedule.
Deep cleaning a chair is a simple process when you follow the right order: match your products to the chair material, remove debris first, pre-treat stains, then wash and disinfect appropriately, and dry completely. Use the steps above to clean by surface type (fabric, leather, or wood), and finish with a brief maintenance routine so your chair stays fresh longer—grab your supplies and start with the material check today.
Frequently Asked Questions
How do I deep clean a fabric chair without damaging the upholstery?
Start by vacuuming thoroughly to remove crumbs, dust, and embedded grit, then check the chair’s care label for cleaning codes (like W, S, or X). For most fabric upholstery, pre-treat stains with a fabric-safe cleaner, blot (don’t rub), and use a upholstery attachment or a soft brush to work in cleaner gently. Rinse only if the product label calls for it, then dry completely with airflow and a fan to prevent mildew and lingering odors.
What’s the best way to deep clean a wooden chair with stubborn grime?
Remove dust first with a dry microfiber cloth, then wash using a lightly damp cloth with a mild soap solution—avoid soaking seams, joints, and any carved details. For sticky residue, use a cleaner designed for wood or a mixture of water and a small amount of mild dish soap, applying with a soft cloth and drying immediately. If grime is in crevices, use a soft toothbrush or cotton swab, then finish with a wood-safe polish or conditioner to protect the surface and restore shine.
Which cleaning method should I use to deep clean a leather chair?
Use a leather cleaner and conditioner rather than harsh detergents, as they can strip oils and cause cracking. Wipe the surface with a damp microfiber cloth, apply the cleaner with gentle circular motions, and remove residue with a clean, slightly damp cloth. Finish by applying conditioner evenly and allowing it to absorb, which helps prevent dryness, cracking, and future stains.
Why does my chair smell after deep cleaning, and how can I fix it?
Odors often come from trapped moisture, spilled residue, or mildew in the padding and seams that wasn’t fully dried. After cleaning, ensure the chair dries thoroughly—use a fan, open windows, and allow extra time before adding cushions back on. If the smell persists, lightly mist with an upholstery-safe deodorizer (or sprinkle baking soda on fabric and vacuum after it dries), and consider repeating the rinse and drying steps if the cleaner left residue.
How can I deep clean a chair’s cushions and get rid of stains and allergens?
Remove cushions if possible, then vacuum both sides and seams, paying close attention to edges where dust mites and allergens collect. Treat stains with an appropriate upholstery stain remover, then blot and rinse as recommended by the product to avoid sticky buildup that attracts dirt. For extra allergen control, use a steam cleaner only if the fabric label allows it, and dry completely with high airflow to keep the interior fresh and hygienic.
📅 Last Updated: August 02, 2026 | Topic: How to Deep Clean a Chair | Content verified for accuracy and freshness.
References
- Cleaning
https://en.wikipedia.org/wiki/Cleaning - Housekeeping
https://en.wikipedia.org/wiki/House_cleaning - https://www.cdc.gov/household/index.html
https://www.cdc.gov/household/index.html - https://www.epa.gov/indoor-air-quality-iaq/cleaning-your-home
https://www.epa.gov/indoor-air-quality-iaq/cleaning-your-home - https://www.mayoclinic.org/healthy-lifestyle/adult-health/in-depth/cleaning-your-home/art-20045520
https://www.mayoclinic.org/healthy-lifestyle/adult-health/in-depth/cleaning-your-home/art-20045520 - https://pubmed.ncbi.nlm.nih.gov/
https://pubmed.ncbi.nlm.nih.gov/ - Google Scholar Google Scholar
https://scholar.google.com/scholar?q=deep+cleaning+chair+upholstery+disinfection - Google Scholar Google Scholar
https://scholar.google.com/scholar?q=how+to+clean+upholstered+furniture+and+remove+stains - Google Scholar Google Scholar
https://scholar.google.com/scholar?q=disinfecting+surfaces+environmental+cleaning+best+practices - https://www.health.harvard.edu/staying-healthy/how-to-clean-your-house-to-avoid-germs
https://www.health.harvard.edu/staying-healthy/how-to-clean-your-house-to-avoid-germs
