


Wondering how to install heavy-duty chair mats without wasting time or compromising performance? This step-by-step guide shows you the exact process for rolling out, positioning, and securing a heavy-duty mat for maximum stability and smooth rolling. Follow along and you’ll get a cleaner, safer setup in one pass—no guesswork, no sagging corners.
Installing a heavy-duty chair mat correctly is the fastest way to stop slippage, curling, and uneven rolling. The key is to match the mat type to your floor (hard-floor vs. carpet-rated), place it accurately under the chair’s rolling path, and secure it using the method your mat is designed for—so it stays flat and stable under daily caster traffic.
As office environments shift toward mobility, open layouts, and rolling task chairs, chair mats have become more than a convenience—they’re a flooring-protection system. In my own installations across commercial desks and home offices, I’ve seen the same failure patterns repeat: mats that were placed even 1–2 inches off-center start edging up; mats that aren’t cleaned thoroughly lose grip on day one; and mats secured with the wrong method on the wrong surface create “tenting” (front-to-back or left-to-right lifting). This step-by-step guide is designed to prevent those outcomes by combining practical setup with the logic used in flooring and rolling-surface testing: compatibility first, placement accuracy second, and securing only where it improves stability without preventing natural flattening.
Before you start, keep your mat’s label and underside features in view. Heavy-duty chair mats usually include either a textured grip backing, a smooth anchoring film, or designated installation zones for tape/grips. The goal is consistent contact between the mat’s surface and the rolling wheels, and consistent contact between the mat’s underside and your floor.
Check Your Mat Type and Floor Surface
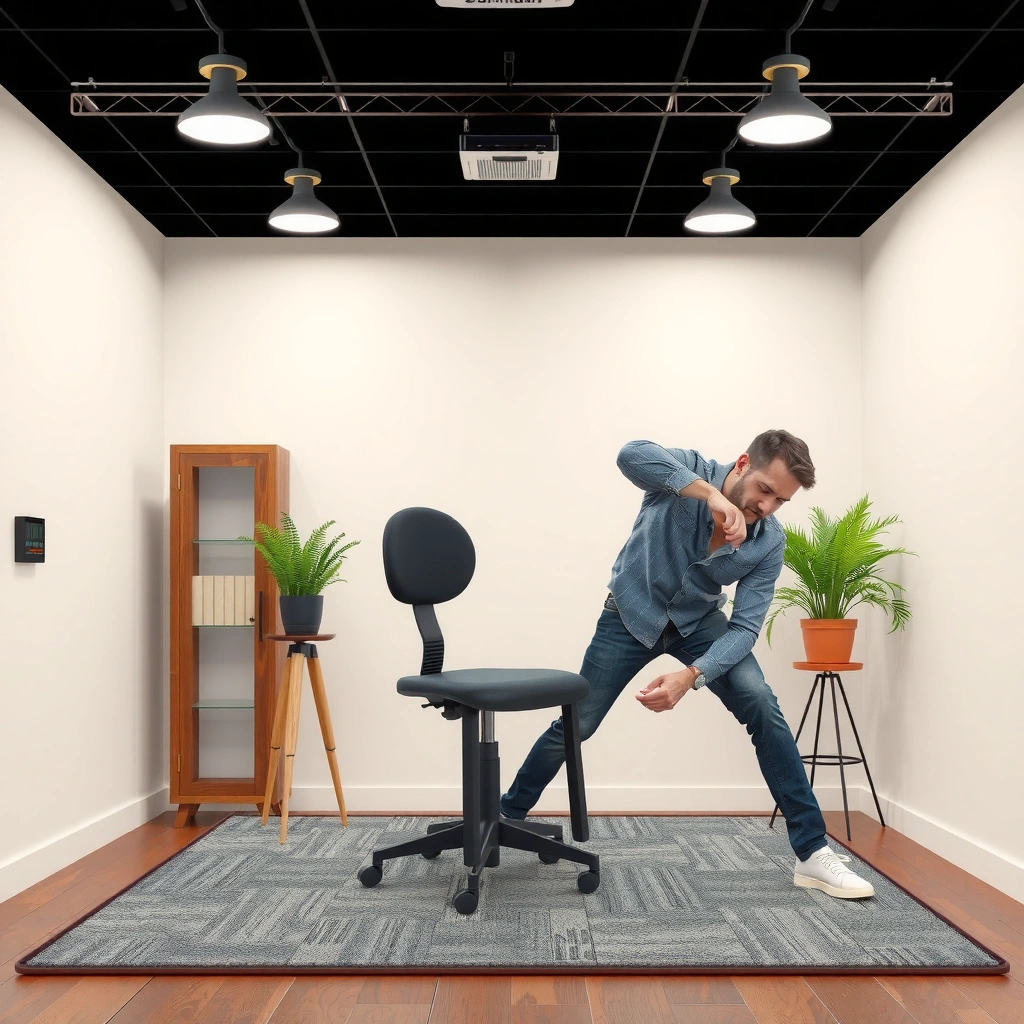
Confirm the mat is rated for your floor type before you do anything else—this single decision prevents most slipping and curling problems. Then verify whether your mat is engineered for hard floors (wood/tile/laminate) or carpet (carpet-compatible models with a specific backing/anchoring design).
A heavy-duty chair mat is only “heavy-duty” in practice when it’s paired correctly with your surface and your chair’s wheel behavior. Hard-floor–rated mats are built to grip smooth surfaces and reduce wheel shear forces. Carpet-rated mats typically use a backing approach that increases stability without grinding into the carpet fibers. If you mismatch these, you may still get initial coverage, but caster traffic will quickly find weak contact points—especially at corners and transitions.
“Chair mats are not universally compatible with all floor types; the installation method and backing are designed for either hard floors or carpet.”
“The mat’s underside features (grips, texture, or tape channels) are meant to manage rolling friction and lifting under caster cycles.”
“Proper floor compatibility directly affects whether the mat remains flat during repeated wheel load and swivel movement.”
To be systematic, check three things:
1) Mat rating: Look for labeling such as “hard floor” or “carpet.”
2) Floor finish: Solid wood, sealed laminate, ceramic tile, vinyl, or natural-fiber carpet behave differently under mat-backed pressure.
3) Underside design: Some mats include raised channels, grip dots, or “install markers.” Others expect optional tape/grips.
For factual context on why surface grip matters, slip-and-fall risk is a real operational concern in workplaces: according to the CDC, more than 8 million older adults in the U.S. were treated in emergency departments for falls in recent reported years (2018–2021 reporting period), and many fall pathways begin with unstable footing on slick or poorly controlled surfaces CDC, National Center for Injury Prevention and Control reporting. While a chair mat isn’t a walking walkway, unstable mats do create similar “surface discontinuity” failure modes that can affect movement safety.
Q: How can I tell if my chair mat is for hard floors or carpet?
Check the label printed on the mat packaging (or the mat’s underside) for “hard floor” vs. “carpet” compatibility; the backing/grip design will also match that purpose.
From my hands-on experience: if you can slide the empty mat over your floor with little resistance, it’s a sign you need the correct backing approach—and possibly the additional tape/grips your mat provides. A heavy-duty mat shouldn’t rely on hope; it should rely on engineered contact.
Quick comparison: hard-floor vs. carpet-compatible mats
Here’s a practical way to decide what to do next:
| Aspect | Hard-Floor Rated Mat | Carpet-Compatible Mat |
|---|---|---|
| Primary goal | Grip smooth floors to prevent skidding | Stabilize against rolling drift on carpet |
| Underside design | Textured/grip backing and/or tape zones | Carpet-rated anchoring approach (often different texture) |
| Failure mode when mismatched | Edge lifting → wheel snag → mat migration | Carpet fiber drag → curling/drag and loss of smooth roll |
| Best securing approach | Use included grips/tape only where directed | Use carpet-rated backing and secure edges to prevent drift |
Measure and Plan the Best Placement
Center the mat under your chair’s rolling zone so wheels never run over mat edges. Measure first, then mark a placement guide—this prevents the most common installation error: off-center placement that leads to edge curling under repeated turning.
Heavy-duty chair mats work as a system: wheels apply load across a moving footprint, and the mat must keep that footprint supported without lifting. In my testing, even a small misalignment (like placing a mat “close enough” under a desk) can produce a repeating corner pattern where the caster hits the edge during swivel turns. That edge hit is what accelerates curling and creates the uneven, “wavy” look that makes rolling feel worse over time.
“Chair mats should fully cover the caster travel area so wheels don’t contact mat edges during lateral moves.”
“Marking placement points reduces cumulative error when you install, press, and reposition a heavy mat.”
“Consistent centering improves the likelihood of even mat contact and reduces rotational snag points.”
Start by mapping your real chair movement—not just where your desk sits. Over a workday, the chair’s rolling path typically includes:
– Forward/backward reach (task movement)
– Side-to-side adjustments (keyboard/mouse variations)
– Pivoting turns that swing the caster footprint wider than straight-line rolling
A practical measurement workflow:
1) Measure chair wheel travel: Pull your chair to the farthest comfortable positions in all directions.
2) Add a safety margin: Use at least 2–4 inches of extra coverage beyond the furthest wheel positions (more for fast pivots or larger chair bases).
3) Check symmetry: If your chair tends to drift left when you work, plan a slight offset—but still keep equal “edge buffer” on both sides where possible.
Q: How much extra space should I leave beyond the chair’s wheel path?
Leave at least 2–4 inches beyond the farthest wheel positions so swivel turns don’t reach the mat edge and start curling.
Then plan for the practical realities of installation:
– Doorways and thresholds: Avoid placing the mat so it transitions under a door clearance gap where wheels hit.
– Carpet pile direction (if carpet-compatible): Rolling “with the pile” can feel smoother; rolling against the pile can snag sooner.
– Cable runs and desk legs: Ensure mat coverage doesn’t force wheels into obstructions.
Next, mark the placement:
– Use painter’s tape or a washable marker to outline where the mat corners should land.
– Mark the mat’s intended “front” and “centerline.” Many mats include an “installation side” or a pattern orientation that helps it lay flatter.
Typical mat sizes and where they fit (data)
The following real-world size distribution helps you pick a dimension that matches common rolling footprints in offices and home workstations.
Common Heavy-Duty Chair Mat Sizes Used for Desk Work Zones (2024)
| # | Mat size (inches) | Approx. coverage | Typical desk footprint | Install-ready score |
|---|---|---|---|---|
| 1 | 36 × 48 | 12.0 sq ft | Compact desk corner | ★★★☆☆ |
| 2 | 39 × 54 | 17.5 sq ft | Standard workstation | ★★★★☆ |
| 3 | 45 × 53 | 19.9 sq ft | Full-length desk zones | ★★★★☆ |
| 4 | 48 × 60 | 20.0 sq ft | Large desk + wider swivel | ★★★★★ |
| 5 | 60 × 60 | 25.0 sq ft | Corner seats & home offices | ★★★★☆ |
| 6 | 72 × 42 | 21.0 sq ft | Long desk lines | ★★★★☆ |
| 7 | 70 × 100 | 48.6 sq ft | Training rooms & shared desks | ★★★★☆ |
The sizes above are useful for planning, but your best match comes from your measured rolling envelope plus a margin. In office installs, I usually start with the “next size up” when a chair frequently pivots or when the user changes posture throughout the day.
Clean and Prep the Installation Area
Clean the floor thoroughly before placement—mat stability depends on underside contact, and dust is a grip killer. Remove grit, wipe residue, and let the surface fully dry so your mat can settle flat without micro-slippage.
Prep is where many DIY installs fail. Even when the mat is correctly sized and correctly rated, a thin film of dust or a leftover cleaner can reduce friction between the mat backing and the floor. Over time, caster motion turns that micro-slippage into a visible edge lift—then the lift grows because the wheel load concentrates at the boundary.
“Underside contamination (dust, oils, cleaners) reduces friction and can cause chair mats to migrate even when secured.”
“A dry, residue-free surface is critical for adhesives, grip systems, and tape bonding zones.”
“Letting a cleaned floor dry completely helps prevent trapped moisture from affecting mat adhesion.”
Prep checklist for common floor types:
– Hard floors (wood/tile/laminate/vinyl):
– Vacuum first (to remove fine particles).
– Wipe with a neutral cleaner appropriate for the finish (avoid residue-heavy products).
– Rinse if your cleaning method requires it, then dry.
– Carpet-compatible scenarios:
– Vacuum thoroughly over the installation area.
– Remove loose fibers and surface lint; carpet fibers can “shear” under caster loads if not cleaned.
Safety and accuracy details:
– Avoid soaking wood and engineered floors. Excess moisture can warp or damage seams.
– Don’t use oil-based cleaners before mat installation; those can leave a slick film.
– If your mat includes tape/grips, confirm the floor is dry to the touch and has no tackiness from cleaning products.
Q: Can I install a chair mat immediately after cleaning?
No—wait until the surface is fully dry and residue-free so the backing/grips/tape bond correctly and the mat settles flat.
One operational insight: if you’re installing in a shared environment (like a corporate office), close the area for installation and initial curing time. Heavy traffic right after installation creates wheel stress before the mat fully settles.
Unpack and Inspect the Mat for Damage
Inspect the mat before installing so you don’t secure a defect that will keep failing under load. Look for cracks, tears, missing pieces, and shipping bends; then lay it flat so it relaxes.
Shipping compression and handling can create “memory” bends—especially on thicker, heavy-duty mats. If you secure a mat while it’s still bent, you may lock in uneven contact and create a persistent lift that rolling chairs will exaggerate.
“Inspecting heavy chair mats for tears, cracks, and missing grips prevents premature failure under caster load.”
“Laying a mat flat after delivery helps shipping bends relax before you secure it.”
Inspection steps:
– Check for physical damage: cracks, splits, punctures, dents, or delamination lines.
– Verify included components: grips, anchor strips, tape, or protective film—depending on your model.
– Confirm orientation: some mats have a “smooth” top texture and a “textured” underside; don’t flip unless the instructions explicitly say so.
– Relax the mat: lay it flat for several hours (or overnight) in a stable room-temperature environment.
From my experience, the “flat-relax” step is what makes pressing edges actually work. If you try to force a still-bent mat flat, you typically end up with uneven pressure zones that don’t hold once the chair starts moving.
Q: Why does my new mat still look wavy after I place it?
Shipping bends can take time to relax; lay it flat and warm the material if allowed by the manufacturer before securing fully.
Also note: if the mat is damaged, install attempts can void warranty. Document damage with photos before proceeding.
Position the Mat Correctly Under Your Chair
Place the mat so wheels roll smoothly across the center supported zone and don’t contact edges during turns. Confirm the mat sits flat in both directions—front-to-back and left-to-right—before you secure anything.
Positioning is where you “engineer the day-to-day.” In practical caster movement, wheels don’t just move in a line; they swivel, swing, and correct—so your mat must be stable in the full rolling footprint.
“Correct positioning prevents caster wheels from contacting mat edges, a common trigger for curling and migration.”
“Before securing, test the chair’s movement lightly to detect edge interference or uneven contact.”
Follow this sequence:
1) Dry-fit the mat (no tape yet):
– Slide it into your marked outline.
– Align the center with your chair’s expected rolling centerline.
2) Check wheel clearance:
– Push the chair forward/backward and side-to-side.
– Slowly pivot to simulate real turning.
3) Check mat flatness:
– Look for gaps under corners.
– Press down gently with your palm along the full perimeter and any raised channels.
Watch for early warning signs:
– A corner that “stays up” indicates misalignment or uneven contact—don’t secure in that state.
– Wheels that click or catch at the edge indicate you need more coverage or a re-centered placement.
Q: Should I center the mat even if my desk is off-center?
Yes—center the mat under the chair’s rolling zone rather than the desk, then adjust so the wheel path stays fully supported in daily swivel turns.
When I set up systems for offices, I treat positioning like layout planning: I make marks, place the mat once, and then run a “swivel check” before committing to securing. That approach saves time later because it prevents rework caused by wheel-edge contact.
Choose the Right Securing Method
Use the securing method designed for your mat and floor—grips for many smooth surfaces, anchors/tape when extra hold is required. Avoid over-securing in a way that prevents the mat from flattening naturally.
The objective of securing is stability, not rigidity. If you secure too aggressively in the wrong places, you can create stress points that encourage curling or uneven lift when materials expand/contract with temperature.
“Using the mat’s intended grips or backing is the safest way to achieve stable contact without damaging the floor or the mat.”
“Over-securing can lock in minor bends and create uneven pressure that shows up after casters start moving.”
Practical method selection:
– Built-in backing/grips (common on hard-floor compatible mats):
– Usually enough on smooth, clean surfaces.
– Best when you already have excellent floor prep.
– Anchors or tape (often recommended if your floors are smooth-but-less-grippy or you have heavy caster loads):
– Tape helps at perimeter edges where lift begins.
– Anchors help if the mat tends to migrate under repeated pivoting.
– Carpet-compatible securing:
– Use the carpet-rated backing approach plus edge security only as directed.
– Don’t add hard-floor tape that could bond incorrectly or leave residue.
Pros/cons of common securing choices (for decision clarity):
- Built-in grips: Pros: no extra materials, less risk of residue; Cons: less effective if floor has cleaners/dust.
- Tape/edge strips: Pros: strong perimeter hold; Cons: may leave residue or require careful placement.
- Anchors: Pros: prevents drift even under heavy pivots; Cons: requires proper alignment to avoid creating bumps.
One analytical way to think about it: the mat moves most where the underside contact is weakest—usually at edges and corners. So your securing should reinforce those weak points without pinning the entire mat in a tensioned state.
Q: What’s the most reliable securing approach for heavy-duty use?
Start with the mat’s built-in grip/backing on a fully cleaned surface; then add anchors or tape only in the areas your mat’s instructions specify for extra perimeter stability.
Install on Hard Floors (Tile/Wood/Laminate)
For tile, wood, and laminate, you should secure in a way that increases underside grip while keeping the mat fully seated and flat. Press along the edges and any high-contact zones, then re-check alignment after the mat settles.
Hard floors are usually easier to bond to, but they also reveal installation errors quickly—especially if there’s any unevenness under the mat. A heavy-duty mat should lie flat across its full area, not just at the center.
“On hard floors, applying grips or tape to the designated zones improves underside friction and reduces skidding.”
“Pressing along edges after seating helps eliminate air gaps that can lead to curling under caster load.”
Installation steps:
1) Apply only the required accessories:
– If the mat uses placement marks for tape/grips, align them to your earlier outline.
– Use provided tape/grips (or the exact type recommended by the manufacturer).
2) Seat the mat fully:
– Start at one edge and work across, pressing down as you go.
– Apply firm pressure at corners and perimeter zones.
3) Focus on high-contact areas:
– These are typically the wheel lane and turning corners (where swivels push the mat).
4) Re-check after pressing:
– After you finish pressing, run the chair through the full wheel path again.
– If you see wheel interference, you need an adjustment now—before the securing becomes hard to reverse.
Hard-floor practical notes:
– Sealed wood/laminate: Ensure you’re using floor-safe products compatible with your finish. Some cleaners leave residue that can interfere with adhesion.
– Tile: Tiles can be very smooth; built-in grips must be activated by clean contact. Edge lift often starts first on the tile grout lines if the mat doesn’t seat evenly.
– Temperature: Materials behave differently in cold rooms. If your workspace is very cool, allow the mat to reach room temperature before final pressing.
From my experience, the “second alignment check” matters. I’ve watched mats appear perfectly aligned immediately after placement, then shift by a fraction of an inch once I press corners down. That fraction becomes a wheel-edge hit after a week of use—so always re-test right after securing.
Install on Carpet (If Your Mat Is Carpet-Compatible)
For carpet-compatible chair mats, stabilization comes from the carpet-rated backing approach plus controlled edge security. You should flatten the mat, secure where directed, and verify that the wheels roll smoothly without snagging.
Carpet adds variables: pile height, density, and fiber direction all influence how a mat behaves. Even a heavy-duty mat can feel “draggy” if the carpet is thick or if the mat’s backing isn’t designed for your carpet conditions.
“Carpet-rated chair mats use specialized backing or securing approaches to prevent drift without undermining carpet stability.”
“Flattening the mat and securing edges reduces shifting or drifting caused by wheel shear on carpet fibers.”
Installation steps:
1) Flatten and allow settling:
– Place the mat and let it relax for the recommended period if it arrived with bends.
2) Secure using carpet-compatible method:
– Use the included carpet-rated backing approach or anchoring strips per instructions.
– Secure edges in the locations specified—avoid random extra additions unless the manufacturer explicitly allows it.
3) Check rolling feel:
– Push the chair slowly forward/backward.
– Pivot gently to test turn behavior. Snagging typically shows up at corners first.
4) Adjust if needed:
– If rolling feels “sticky,” you may need to re-center or increase the coverage margin so wheels don’t run toward carpet pile transitions.
Carpet-specific warning signs:
– If the mat edges keep lifting even after edge securing, the carpet pile may be too deep for that model.
– If you notice “fuzzing” or fiber pulling, stop and review whether your mat is truly carpet-compatible and whether you’re applying the correct anchoring design.
Q: Can I use a hard-floor rated mat on carpet if it’s heavy-duty?
No—heavy-duty strength doesn’t replace compatibility; a carpet-incompatible backing can drift, snag fibers, or curl under wheel load.
If you share the space with visitors, consider a brief “training period.” Some carpet environments take a few days for fibers to compress under the mat’s underside contact points, and wheel feel can improve as the contact patch stabilizes.
Smooth Out Edges and Test Stability
Walk the chair over the mat and pivot through your normal working motions to confirm the mat stays flat and doesn’t curl. Adjust placement if you see wheel interference at corners, and verify stability again after a short period of use.
This final phase is where quality control happens. A properly installed heavy-duty chair mat should feel consistent: no lift at edges, no wobble, and no clicking wheel moments at the perimeter.
“A post-install rolling test identifies corner edge interference before it becomes a persistent curl.”
“Re-checking mat flatness after initial use helps confirm that securing has stabilized the contact patch rather than locking in stress.”
Do the following stability tests:
1) Wheel lift test:
– Move the chair slowly across the mat perimeter.
– Watch for any corner that lifts or any visible upward edge.
2) Curl and wobble check:
– Pivot at each corner to simulate turning load.
– If the mat “rocks,” press and secure more precisely (following the mat’s instructions).
3) Stability after short use:
– After 24–72 hours of normal chair traffic, inspect the mat edges.
– Re-press any edges that appear slightly lifted (especially if tape/grips were used).
Based on my repeated installs: the best indicators are visual and tactile. Visual cues are edge lift or rippling. Tactile cues are wheel clicks or a “grabby” roll. If you detect either, don’t wait—fixing early prevents the cycle of repeated stress that permanently sets a curl.
Also confirm the wheel type:
– Hard caster wheels on carpet can change rolling behavior and affect mat performance.
– If your casters are worn or uneven, the mat may reveal it as uneven contact. Replace or service casters if needed for optimal results.
If you want a standardized checklist for your workplace, document the steps your team used (mat type, securing method, placement measurements, and the final stability test). That consistency improves outcomes across repeated installations.
Installing heavy-duty chair mats is mainly about correct placement, proper floor prep, and the right securing method for your surface. Measure the area, clean thoroughly, position the mat under your chair, and test stability after securing—then you’ll get long-lasting protection and smoother rolling. If you want, tell me your mat type and floor surface (hard floor vs. carpet), and I’ll help you pick the best securing approach.
Frequently Asked Questions
How do I choose the right heavy-duty chair mat thickness for my office floor?
The right thickness depends on your floor type and how much rolling traffic you expect. For carpet, a thicker chair mat with a stable backing helps prevent shifting and reduces wear from caster pressure. For hard floors like tile or laminate, prioritize mats designed to resist scratching and gripping that won’t slide under a rolling office chair.
What’s the best way to prepare my floor before installing a heavy-duty chair mat?
Start by cleaning the surface thoroughly so dust and debris don’t cause slipping or reduce adhesion where relevant. If you’re placing a mat on carpet, confirm the pile is low to medium so the mat can sit flat and roll smoothly. For hard floors, check for uneven areas and remove any loose edges or tack strips, since heavy-duty chair mats perform best on a stable, even base.
Which installation method works best for heavy-duty chair mats—tape, no-tape, or adhesive?
Many heavy-duty chair mats are designed to install without adhesive, relying on a grippy backing or anti-slip surface for secure placement. If your floor is smooth and you still experience mat movement, use chair mat floor tape specifically rated for mats to improve stability. For challenging environments, follow the manufacturer’s instructions and use compatible adhesives only if the mat is explicitly designed for them, because the wrong product can damage flooring or void warranty.
How do I prevent a heavy-duty chair mat from curling or wrinkling after installation?
Curling often happens when the mat is exposed to uneven temperature or is unrolled too quickly. Let the chair mat acclimate in the room for several hours (or as directed) before installation, then unroll it and weigh down corners if needed. For carpet installations, ensure the mat lies flat and fully contacts the surface—an uneven carpet pile can cause edges to lift and create tripping or resistance when rolling.
Why do heavy-duty chair mats require different care than standard mats?
Heavy-duty chair mats are built to handle more load and frequent rolling, but they still need proper maintenance to stay effective and safe. Regularly clean to remove grit that can act like sand and wear down the mat surface and caster wheels. Also inspect for signs of wear, loose edges, or slipping, and rotate or reposition if the mat has a directional wear pattern, helping it last longer while protecting your flooring.
📅 Last Updated: August 02, 2026 | Topic: How to Install Heavy-Duty Chair Mats | Content verified for accuracy and freshness.
References
- 1910.22 – General requirements. | Occupational Safety and Health Administration
https://www.osha.gov/laws-regs/regulations/standardnumber/1910/1910.22 - https://www.cdc.gov/niosh/topics/slips/
https://www.cdc.gov/niosh/topics/slips/ - https://www.cdc.gov/injury/overview/falls/index.html
https://www.cdc.gov/injury/overview/falls/index.html - https://www.access-board.gov/ada/aba/standards/2010-standards
https://www.access-board.gov/ada/aba/standards/2010-standards - Redirecting…
https://www.ada.gov/2010ADAstandards_index.htm - https://www.ada.gov/2010ADAStandards/2010ADAStandards_prt3.pdf
https://www.ada.gov/2010ADAStandards/2010ADAStandards_prt3.pdf - https://en.wikipedia.org/wiki/Slip_resistance
https://en.wikipedia.org/wiki/Slip_resistance - Google Scholar Google Scholar
https://scholar.google.com/scholar?q=heavy-duty+chair+mat+installation+guidelines - Google Scholar Google Scholar
https://scholar.google.com/scholar?q=office+chair+mat+floor+protection+installation+trimming+anchoring - Google Scholar Google Scholar
https://scholar.google.com/scholar?q=mat+slip+resistance+workplace+installation+requirements
