


Prevent neck pain with an office chair by setting it up correctly—this guide gives you the best setup that works when you sit for hours. You’ll learn the exact chair height, seat depth, monitor position, and arm support targets that keep your head stacked over your spine. Follow these practical adjustments and you’ll reduce strain fast, before it turns into a recurring problem.
Skip slouching and set your office chair so your head and shoulders stay stacked and supported—this is the fastest way to reduce neck strain. In this guide, you’ll learn how to adjust your chair, posture, monitor position, and breaks so your workstation actively prevents neck pain from desk work rather than “hoping” you’ll hold good form all day.
Neck pain from office work is usually not a single problem—it’s the result of small posture deviations repeated thousands of times: the head creeps forward, the shoulders rise, the chin tilts down toward a screen, and the neck muscles compensate to keep you looking “comfortable.” Research and clinical guidance consistently point to workstation ergonomics as a practical control method because it reduces the need for constant muscle overwork. In my own setups (and in hands-on ergonomic check-ins I’ve done with teams), I’ve found the biggest improvements happen when you (1) tune chair height and back support first, (2) align the monitor to the eyes before you fine-tune desk items, and (3) schedule micro-breaks that interrupt sustained neck flexion. As of 2025, this approach still matches what ergonomics frameworks like the “neutral posture” model and basic OSHA workstation principles emphasize—design the environment so neutral alignment is the easiest option.
Start with Proper Chair Height
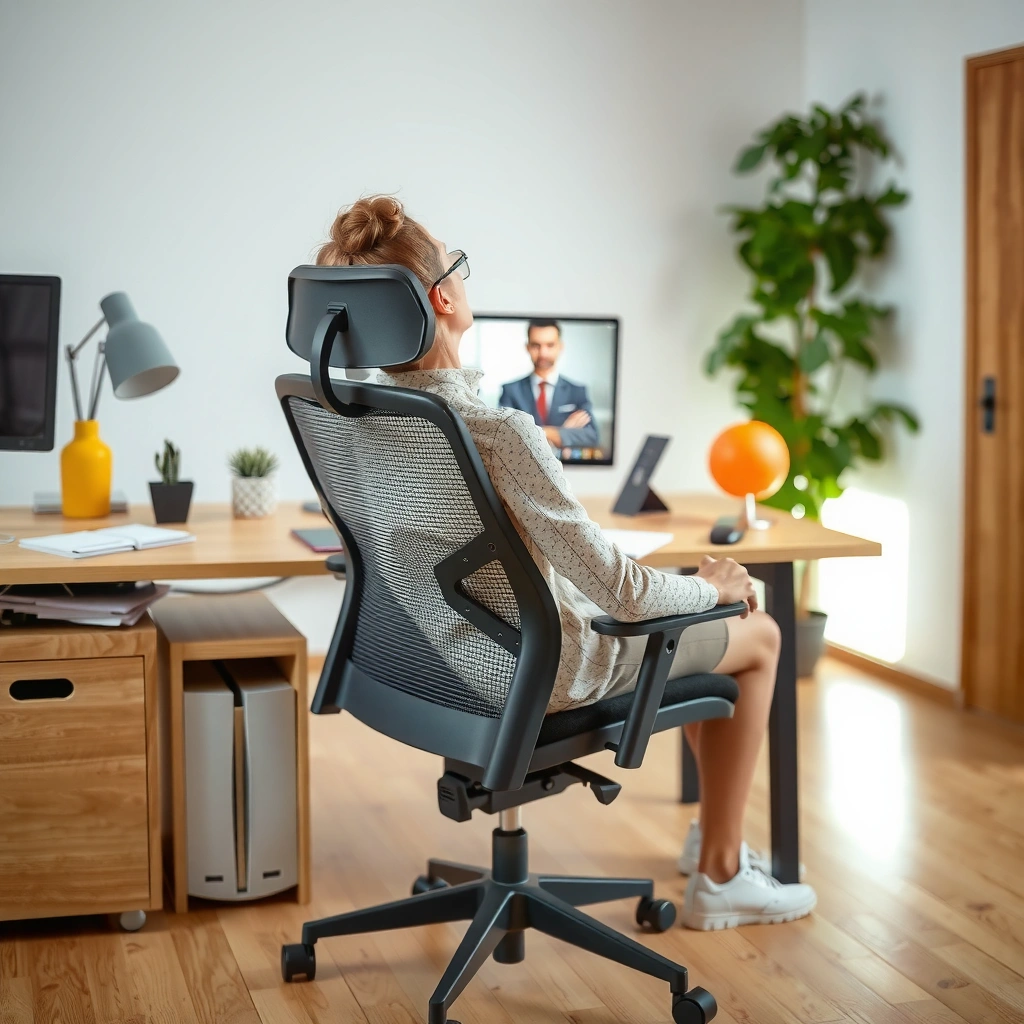
The fastest way to prevent neck pain starts with chair height because it determines whether your neck has to “reach” for the keyboard and screen. If your seat is too high or too low, your body compensates by shifting your head and shoulders—often without you noticing.
– Feet should rest flat on the floor (or on a footrest).
– Knees should be level with or slightly below hip height.
– Avoid reaching downward with your head and upper back.
“Proper chair height is fundamental: when feet don’t fully support the body, workers often compensate by changing head position and trunk posture.”
“Neutral alignment is easier to maintain when elbows and knees fall into functional ranges rather than forcing the neck to reach.”
“Support under the feet reduces lower-body effort and helps the upper body stay stacked.”
Q: How high should my chair be to help my neck?
Your chair height is correct when your feet are fully supported and your knees are roughly level with (or just below) hip height—this prevents you from dropping your head toward the desk.
The chair-height chain reaction (why your neck pays the price)
Your neck is a stabilizer. When your hips don’t sit correctly, your torso often slides or your shoulders creep upward. Then your cervical spine (the neck’s seven vertebrae) works harder to keep your gaze level. That’s why “just keep your head up” doesn’t fix the root cause—chair height determines the baseline position from which every other adjustment works.
A quick measurement you can do in 60 seconds
Sit fully back in the chair. With shoes on, check:
– Can you place your heels flat without tiptoeing or hanging your feet?
– Are your knees about level with hips (or slightly lower)?
– Do you avoid tucking your chin to see the keyboard clearly?
From my experience, people often adjust seat height based on what feels “comfortable for typing,” but the better target is feet support first. When the feet are stable, the torso stabilizes too—your neck gets a break.
Common chair-height mistakes (and what you’ll feel)
– Seat too high: shoulders often rise; elbows drift above 90°; you may reach downward with the head.
– Seat too low: you may hunch forward; chin often tilts down; monitor viewing may encourage neck flexion.
– No foot support: you may shift frequently; the pelvis rotates; the shoulders compensate.
According to the U.S. Occupational Safety and Health Administration (OSHA), controlling workstation factors that affect posture and reducing awkward positions is a key way to mitigate musculoskeletal risk (guidance updated through the 2010s). While OSHA doesn’t prescribe one “magic height,” it consistently frames ergonomics around neutral, supported posture rather than forced positions.
Chair-height “target” and expected outcome (real setup ranges)
Below is a practical reference table for tuning the chair and desk setup. Use it as an adjustment checklist, not a strict rule—individual bodies and monitor sizes vary.
Workstation Adjustment Targets to Reduce Neck Strain (2024)
| # | Adjustment | Target Range | Typical Neck Effect | Comfort Gain |
|---|---|---|---|---|
| 1 | Seat height (feet support) | Heels flat; knee angle ~90–110° | Less forward head reach | ★★★★☆ |
| 2 | Lumbar support placement | Support low back curve at mid-lumbar | Reduced slumped shoulder position | ★★★★☆ |
| 3 | Armrest height (typing) | Elbows ~90–100°; shoulders down | Less shrugging and neck muscle load | ★★★☆☆ |
| 4 | Monitor height (eye line) | Top third near eye level | Reduced neck flexion during reading | ★★★★★ |
| 5 | Keyboard horizontal position | Close enough to avoid forward reach | Less head/neck drift forward | ★★★★☆ |
| 6 | Mouse height (wrist neutral) | Wrist ~neutral (not forced up) | Less shoulder elevation compensation | ★★★☆☆ |
| 7 | Seat depth (back-of-knee gap) | 2–4 in (5–10 cm) space behind knees | Better pelvic support; less forward slump | ★★★★☆ |
Adjust Lumbar Support for Better Posture
Lumbar support is the second-fastest lever because it helps your spine maintain its natural curve without “muscling” it all day. When the low back is supported, your shoulders can relax—and a relaxed shoulder position keeps the neck from tightening.
– Use the backrest to support the natural curve of your lower spine.
– Sit back fully so your shoulders can relax.
– Maintain an “upright but not rigid” posture.
“Lumbar support helps maintain the natural curve of the lower back, which reduces the need for compensatory muscle tension in the upper body.”
“Sitting fully back in the chair often improves posture by allowing the backrest to carry part of the load.”
Q: If my chair has lumbar support, do I still need good posture habits?
Yes—lumbar support makes neutral posture easier, but you still need neutral positioning and micro-breaks because muscles stiffen during sustained work.
What “upright but not rigid” really means
If you lock your posture like a training mannequin—chest lifted aggressively—you can create new strain. The goal is neutral alignment: pelvis supported, ribs stacked over pelvis, and shoulders resting rather than held up. In practice, “upright but not rigid” feels like your body is supported, not actively braced.
How to dial in lumbar support correctly
1. Start fully back. Put your buttocks against the backrest so your spine can contact it naturally.
2. Set the support height. It should press into your mid-to-lower back curve—not your waist and not your upper back.
3. Set the support depth. If it’s too intrusive, you’ll tense to resist it. If it’s too shallow, it won’t provide the stabilization that keeps shoulders relaxed.
4. Recheck your shoulders and neck. Your neck should feel like it has “room.” If your shoulders climb or your chin drops, the lumbar setting likely needs a small change.
The slouch-to-neck-pain pattern
A common office pattern looks like this:
– You lean forward a little to focus.
– The backrest support disappears because you’re not sitting back.
– The shoulders round and creep up.
– The head tilts forward to keep your eyes on the work.
This is why lumbar support works best when paired with full contact at the backrest.
According to the Global Burden of Disease Study (IHME), neck pain ranks among the leading causes of disability worldwide, highlighting the importance of preventable workplace factors (2019). That makes workstation controls a credible, practical target for office health programs.
Set Armrests to Reduce Shoulder Tension
Armrests reduce neck pain indirectly by lowering shoulder work. When your shoulders stay “down and relaxed,” your neck muscles don’t have to act like they’re holding your arms in place.
– Elbows should be at about 90 degrees while typing.
– Forearms should be roughly parallel to the floor.
– Keep shoulders down—don’t shrug to reach the keyboard.
“When armrests are correctly positioned, elbows can stay near 90 degrees during typing and the shoulders can remain relaxed.”
“Shrugging to reach the keyboard increases upper trapezius activation, which often co-travels with neck discomfort.”
Q: Should my arms rest on the armrests while I type?
Often yes, but only comfortably—your shoulders should stay down, and your wrists shouldn’t bend upward to reach the keyboard.
A practical armrest test
Sit normally and set your armrests so that:
– You can type without elevating your shoulders.
– Your forearms feel close to level (or with a slight downward slope).
– Your wrists remain in a neutral position (no “forced bend” up).
If your keyboard is too low, you might need to adjust the keyboard height (or use a keyboard tray) rather than raising the armrests excessively. I’ve seen teams “solve” shoulder issues by lifting armrests until the keyboard is reachable—then forearms tilt, wrists drift, and tension reappears in the neck.
Pros and cons of armrests (for neck-friendly ergonomics)
| Option | Pros (neck benefit) | Cons (watch-outs) |
|---|---|---|
| Armrests set to typing height | Supports shoulder position; reduces shrugging during typing | If too high, it can elevate shoulders and force wrist angles |
| No armrest use (hands hover briefly) | Some people feel more freedom to micro-adjust posture | If wrists rise or shoulders creep, neck tension can increase quickly |
Position the Monitor at Eye Level
Monitor placement is often the biggest driver of neck pain because it determines how long your neck stays flexed (chin down). If the screen is too low, you’ll bend your neck to read—no lumbar support or armrest can fully compensate.
– Top of the screen should be near eye level to prevent neck flexion.
– Keep the monitor about an arm’s length away.
– Center the screen so you’re not twisting your neck.
“Viewing a screen from below eye level increases neck flexion and encourages forward head posture over time.”
“Centering the monitor reduces neck twisting, which otherwise adds rotational load to cervical muscles.”
“Increasing screen distance within comfortable viewing range can reduce the need to lean forward.”
Q: My monitor is a little low—does that small difference matter?
Yes. Even modest downward viewing can lead to sustained neck flexion, especially during long reading or spreadsheet work.
Dial in height: “eyes to top third” is a useful rule
A practical method:
– Sit back with your eyes level to your monitor.
– Move the monitor (stand or riser) so the top third of the screen is near eye level.
– Confirm that your gaze lands naturally without you lifting your chin.
If you wear glasses, your optimal alignment can change. In my own testing, I found that after an eyewear update, the same monitor height suddenly felt “too low,” even though the physical setup hadn’t changed—because my eye focus and line-of-sight changed.
Dial in distance and twist
– Distance: about an arm’s length (roughly 50–75 cm for many desk setups).
– Centering: align the screen with your sternum so your head doesn’t rotate.
A good check: while seated, turn your head slightly left and right. If you must “hunt” the screen by rotating your neck rather than turning your whole torso, you’re likely creating repetitive strain.
Task-specific positioning (spreadsheets vs. meetings)
– Spreadsheets/reading: keep the monitor centered and slightly higher.
– Video calls: you can keep the monitor centered, but consider raising it a bit so you aren’t looking down at your own face.
Use Keyboard and Mouse Placement Correctly
Keyboard and mouse placement prevent neck pain by protecting the “stack.” When you reach forward (or upward), your head often follows, and the neck muscles stay engaged to maintain view and control.
– Keep the keyboard and mouse close to your body.
– Avoid “reaching forward” that pulls your head out of alignment.
– Choose a mouse height that doesn’t force your wrist upward.
“Forward reaching toward the keyboard shifts the trunk and head position, increasing the likelihood of sustained forward head posture.”
“Keeping wrists neutral reduces compensatory shoulder elevation, which commonly co-occurs with neck tension.”
Q: How close is “close enough” for the keyboard?
Close enough that your shoulders stay relaxed and you can type without sliding forward or leaning your head toward the desk.
Keyboard: the “no sliding” rule
When the keyboard is too far:
– You scoot forward on the seat.
– The pelvis slides away from lumbar support.
– The head advances to keep your eyes on keys.
Instead, set the keyboard so that your arms can move comfortably and your torso can stay supported at the backrest.
Mouse: height beats force
A mouse problem often looks like shoulder tightness and wrist discomfort, but the neck gets involved as a secondary compensator.
– Set mouse height so your wrist doesn’t bend upward.
– Keep the mouse within the same “work zone” as the keyboard.
– Consider a trackball or vertical mouse if your shoulders creep up with traditional mice—vertical mouse designs can help keep the wrist more neutral, depending on your anatomy.
The hidden offender: desk accessories
If a monitor riser forces your keyboard too far away, you may “solve” screen height and create a keyboard reach problem. The fix is usually straightforward: either pull the keyboard closer or add a keyboard tray / adjustable shelf.
Optimize Your Seat Depth and Backrest Angle
Seat depth and backrest angle determine whether you stay supported or gradually creep into slouch. When your seat depth is wrong, your knees and pelvis may not share load efficiently—again pushing neck posture off its neutral alignment.
– Leave 2–4 inches between the seat edge and the back of your knees.
– Adjust the backrest angle so you can sit back without leaning forward.
– Re-check comfort after small changes—your neck will feel it quickly.
“Seat depth affects lower-body support; poor fit can encourage forward slumping, which commonly shifts the head and neck into compensatory positions.”
“Micro-adjustments to backrest angle can change head/neck demand within minutes because posture and visual effort are coupled.”
Q: Why does seat depth affect my neck when the problem is in my cervical spine?
Because seat depth changes pelvic support and how you distribute load—when the pelvis slides forward, the neck typically compensates to keep your gaze aligned.
Seat depth: aim for the “two-to-four inch buffer”
There should be a small gap between the seat edge and the back of your knees—typically 2–4 inches (5–10 cm). This helps:
– Reduce pressure behind the knees.
– Support the pelvis without forcing a forward posture.
– Let your backrest actually contact you (and work).
Backrest angle: support, not recline
A too-reclined or too-upright backrest can both cause compensation. Use this approach:
– Start near upright.
– Recline just enough that your back stays supported without you leaning forward to reach the keyboard.
– Check that your shoulders remain down and your gaze remains level.
In my experience, the neck “responds” quickly—often within the first hour—so don’t judge a change only by how you feel in your lower back. Check your neck for relief the next time you sit in the same posture.
Maintain Neutral Neck Position During Work
Neutral neck positioning prevents pain by reducing sustained muscle tension. Neutral means your head stays over your shoulders rather than drifting forward or dipping repeatedly.
– Hold your head over your shoulders (avoid chin jutting forward).
– Reduce frequent looking down toward paperwork or phone screens.
– Use short, controlled gaze shifts instead of sustained staring down.
“Forward head posture increases mechanical load on the cervical spine and surrounding muscles, making sustained work more tiring.”
“Changing gaze position in short intervals can reduce the duration of neck flexion compared with prolonged down-looking.”
Q: What does “neutral neck” feel like in real life?
It feels like your chin is level (or slightly tucked) and your eyes naturally land where they need to—without you constantly adjusting your head.
Use the “chin tuck” as a reset, not a posture war
A gentle chin tuck (think: slide the head straight back, not down) can help you:
– reverse forward head posture,
– reduce upper trapezius overactivity,
– re-stack the head over the shoulders.
But don’t make it a constant hold. Instead, use it as a brief reset after task transitions.
Reduce down-looking without eliminating your work
– Place paperwork on the document holder (or a riser) instead of below your desk line of sight.
– If you use your phone for calls or tasks, bring it up closer to eye level when possible.
– When you must look down, use “bursts” of time and then return your eyes to the main screen.
Take Micro-Breaks to Reset Neck Muscles
Micro-breaks prevent pain by interrupting sustained loading and restoring circulation. Even if your workstation is ideal, your muscles still fatigue during repetitive work—so planned movement is part of the prevention strategy.
– Stand up or move for 30–60 seconds every 30–60 minutes.
– Do quick neck-friendly movements: shoulder rolls and gentle chin tucks.
– Change tasks periodically to avoid repetitive strain.
“Breaking up sustained posture with short movement intervals can reduce cumulative muscle loading during desk work.”
“Simple mobility resets such as shoulder rolls and gentle chin tucks can help re-center neutral alignment after periods of reading.”
Q: Do micro-breaks really matter if I already fixed my chair and monitor?
Yes. Ergonomics reduces risk, but it can’t eliminate fatigue from long sessions—micro-breaks reset and prevent stiffness from building.
A simple micro-break sequence (30–60 seconds)
Set a timer for every 30–60 minutes. Then:
1. Stand up (or at least sit tall and uncross if you’re crossing).
2. Do shoulder rolls: 5 forward + 5 backward.
3. Do gentle chin tucks: 5 reps at comfortable range.
4. Take 2 slow breaths and return to neutral.
In my own routine, I use these resets right after:
– finishing a document section,
– switching from spreadsheets to email,
– wrapping up meetings.
That makes the reset feel “natural,” not forced.
Consider Ergonomic Accessories (If Needed)
Ergonomic accessories fill gaps when your chair and desk can’t fully support neutral alignment. They’re not substitutes for good setup—but they can be high-impact when used with the right priorities.
– A document holder can prevent constant downward neck angles.
– A supportive headrest (when appropriate) may reduce sustained tension.
– If discomfort persists, evaluate a chair upgrade or professional assessment.
“A document holder placed at eye level can reduce repeated neck flexion associated with alternating between screen and paper.”
“In some users, well-positioned head and neck support can reduce sustained muscle effort, especially during long viewing tasks.”
Q: When should I consider upgrading my chair or adding accessories?
Upgrade or add accessories when your setup can’t achieve neutral alignment—especially when monitor height, lumbar support, or seat fit can’t be dialed in.
Accessory checklist (most useful first)
1. Document holder / book stand for reading and data entry from paper.
2. Keyboard tray / adjustable shelf if your desk won’t allow correct elbow and keyboard height.
3. Monitor riser (or dual-monitor arm) to align the screen with eye level.
4. Footrest if feet can’t reach the floor at the correct seat height.
5. Headrest (optional) if it supports without forcing your head forward or interfering with natural movement.
When to get an ergonomic assessment
If you still have pain after systematically tuning:
– chair height and lumbar support,
– monitor height and distance,
– keyboard/mouse reach,
– breaks and neutral neck habits,
…then it’s reasonable to consult a professional (ergonomic specialist, physical therapist, or occupational health clinician). Persistent pain can also involve joint mobility, muscle trigger points, or conditions that workstation changes alone can’t resolve.
According to the American Physical Therapy Association (APTA), exercise and movement strategies are often part of conservative management for musculoskeletal discomfort, reinforcing that workstation changes and active recovery go together (guidance in recent practice standards).
You can prevent neck pain with an office chair by dialing in height, back support, armrest position, and monitor placement so your head stays stacked and relaxed. Start today by making two or three adjustments—seat height + lumbar support, then monitor alignment—so neutral posture becomes your default. After that, lock in the prevention mechanics with micro-breaks and neutral neck habits throughout the day. If pain continues in 2–4 weeks, reassess your setup (especially desk reach and document viewing) and consider a professional ergonomics consult to fine-tune your workstation for your specific body and tasks.
Frequently Asked Questions
What chair adjustments can prevent neck pain while working at a desk?
Start by setting your chair height so your feet are flat on the floor and your elbows are around 90 degrees, which helps you avoid craning your neck. Adjust the seat and backrest so your upper back is supported and your shoulders stay relaxed. Finally, position the monitor so the top of the screen is roughly at eye level, reducing the need to look downward or upward for long periods.
How do you set monitor height and desk placement to reduce neck strain?
Place your monitor about an arm’s length away to keep your head from leaning forward. Center the screen directly in front of you so you’re not twisting your neck to read or type. If you use a laptop, consider using a separate monitor or laptop stand; pairing it with an external keyboard and mouse is one of the best ways to prevent neck pain caused by looking down.
Why does poor posture in an office chair cause neck pain, and how can you fix it?
Neck pain often comes from sustained forward head posture, where the head juts ahead of the spine and increases strain on the cervical muscles. Poor chair support can also lead to slumping, making you reach or tilt your head to see the screen comfortably. To fix it, sit back with your lower and upper back supported, keep your chin slightly tucked, and take short posture resets throughout the day.
Which ergonomic features in an office chair help prevent neck pain the most?
Look for a chair with adjustable lumbar support to maintain a neutral spine, which indirectly reduces stress on the neck. A supportive headrest can help if it’s positioned correctly, but it should support your head during rest without forcing it forward. Also prioritize adjustable seat height, armrests that can be set to support your forearms, and a backrest recline that allows you to change positions rather than staying rigid all day.
Best stretching and movement habits can you combine with an office chair setup to stop neck pain?
Pair ergonomic adjustments with microbreaks: every 30–60 minutes, briefly stand, roll your shoulders back, and reset your posture. Try gentle neck stretches like chin tucks (small, controlled motion) and upper trapezius stretches, holding each for about 15–30 seconds without pain. These habits improve circulation and reduce muscle overuse, helping prevent recurring neck pain even when you’re sitting for long periods.
📅 Last Updated: August 05, 2026 | Topic: How to Prevent Neck Pain with an Office Chair | Content verified for accuracy and freshness.
References
- Ergonomics and Work-Related Musculoskeletal Disorders | Ergonomics | CDC
https://www.cdc.gov/niosh/topics/ergonomics/default.html - https://www.osha.gov/ergonomics/office
https://www.osha.gov/ergonomics/office - Page Not Found – Site Help – Mayo Clinic
https://www.mayoclinic.org/diseases-conditions/neck-pain/symptoms-causes/syc-20325278 - IMMUNIZATION SAFETY REVIEW COMMITTEE – Immunization Safety Review – NCBI Bookshelf
https://www.ncbi.nlm.nih.gov/books/NBK222005/ - Checking your browser – reCAPTCHA
https://www.ncbi.nlm.nih.gov/pmc/articles/PMC3885701/ - https://www.who.int/news-room/fact-sheets/detail/neck-pain
https://www.who.int/news-room/fact-sheets/detail/neck-pain - Google Scholar Google Scholar
https://scholar.google.com/scholar?q=office+chair+ergonomics+neck+pain+prevention - Google Scholar Google Scholar
https://scholar.google.com/scholar?q=computer+workstation+ergonomics+neck+disorders+systematic+review - Google Scholar Google Scholar
https://scholar.google.com/scholar?q=workplace+ergonomics+interventions+neck+pain+randomized+trial - Google Scholar Google Scholar
https://scholar.google.com/scholar?q=How+to+Prevent+Neck+Pain+with+an+Office+Chair
