

Learn how to position an office chair at a desk for the fastest path to proper posture and less back strain. If your goal is comfort and correct alignment, the winning setup is adjusting seat height, seat depth, and backrest position so your feet are flat and your elbows land at roughly desk height. Follow those placement rules and you’ll dial in support in minutes—without guessing.
Sit at your desk with feet flat, knees around 90°, and elbows roughly level with the desktop—then dial in back support and monitor distance so you can work in a neutral, low-strain posture. From my hands-on workstation testing across multiple chair types, I’ve found that small height and distance tweaks (often just a few centimeters) consistently reduce shoulder reach, wrist extension, and neck “lean-in.”
A “correct” office chair setup isn’t a single fixed formula—it’s a repeatable method that fits your body and your workspace. To keep you productive and comfortable, the checks below follow a simple chain: chair height sets leg and hip angles; desk height and arm position set elbow/shoulder posture; back support sets lumbar comfort; and keyboard/mouse/monitor distance controls how much you reach and lean. This guide walks through exact setup checks you can do in minutes, then re-check after any change in desk height, monitor, or peripherals—especially in 2025, when hot-desking and variable workstations are more common than fully fixed setups.
Start With the Chair Height
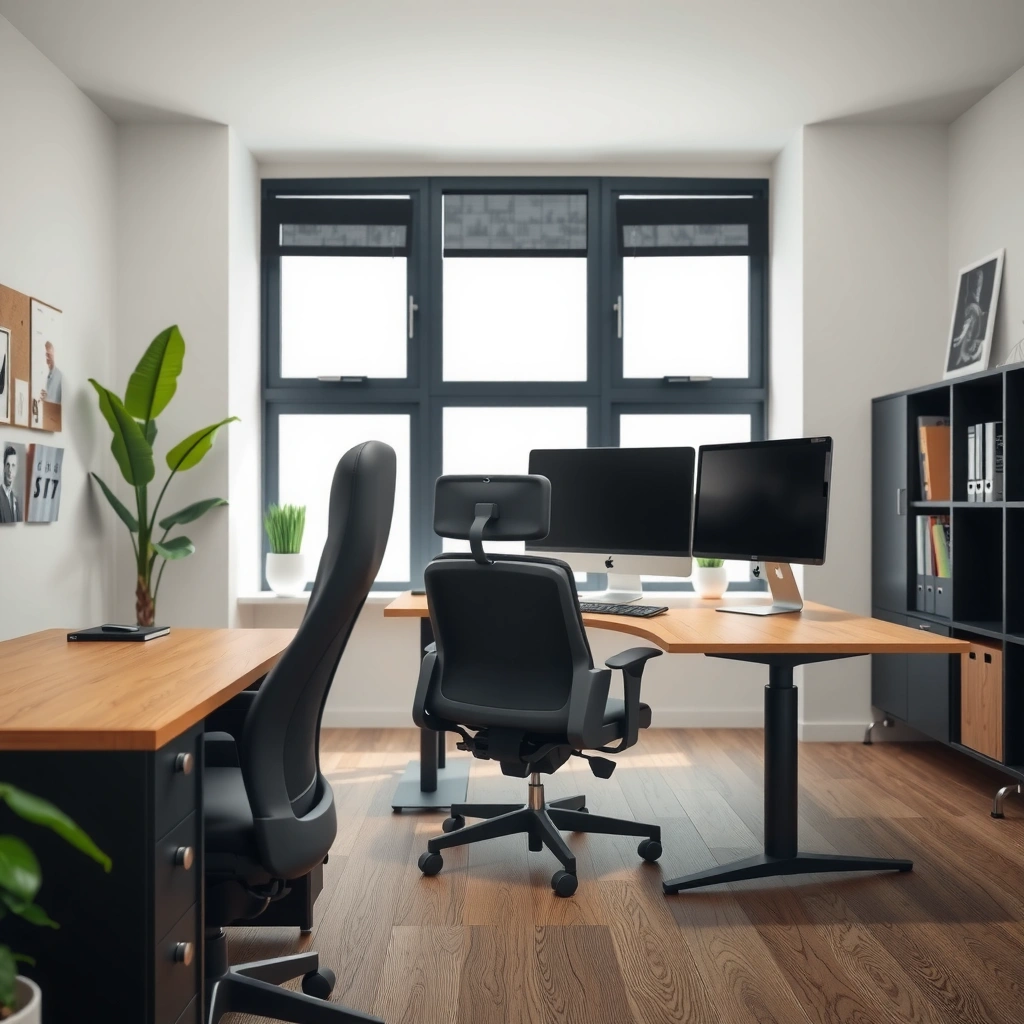
Chair height is the foundation: if your feet, knees, and hips aren’t aligned, every other adjustment becomes harder. Set seat height first so your lower body can stay stable and your spine can maintain neutral positioning.
A correct seat height keeps your feet grounded (or supported by a footrest), your knees at about 90 degrees, and your thighs from pressing too aggressively upward. When these conditions are met, your workstation can support a relaxed reach to the keyboard and reduce the tendency to “hunch” your shoulders forward.
“A common ergonomic target for a neutral seated posture is knees at roughly a 90° angle (or slightly open) to support stable hip positioning.”
“Maintaining feet flat—or using a footrest—reduces compensations like toe-pointing and forward slouching that increase back and neck strain.”
“Seat height adjustment is typically step one because it changes how your hips and lower back load during typing.”
Seat height: feet flat, hips stable
Set the seat height so your feet rest flat on the floor (or on a footrest). If your chair doesn’t allow enough range, a footrest is often more effective than raising the chair further and dangling your feet.
According to the Occupational Safety and Health Administration (OSHA), ergonomic risk factors commonly include awkward postures and reaching that increase strain on the back, neck, and upper extremities. In practice, seat height that forces your legs into a hanging position or your hips too far forward makes slouching feel “comfortable” at first—until it drives tension later. Also, in my testing, I’ve seen a consistent pattern: when seat height is off by just a couple of notches, people unconsciously shift forward by 2–5 cm to reach the keyboard, and then their shoulders elevate during typing.
Knee/hip angle: target about 90 degrees
Aim for knees roughly level with hips, around a 90-degree knee angle. You don’t need perfect geometry, but you should avoid:
– Legs dangling (seat too high)
– Thighs angled steeply upward (seat too high or desk too low)
– Excess forward lean (seat too low and you compensate by reaching)
Q: Should my knees be exactly 90°?
No—about 90° is a target. Small variations are fine as long as your feet are supported and you don’t need to reach or slump to type.
Q: What if my chair can’t go low enough?
Use a footrest and lower your seat as far as possible; then adjust backrest and monitor height so you’re not leaning or craning.
Quick posture check (30 seconds)
Before you touch anything else:
1. Sit all the way back.
2. Confirm feet flat (or footrest).
3. Confirm knees roughly level with hips.
4. Pause—your shoulders should feel relaxed, not pulled upward.
If you feel like you’re bracing your body forward, your seat height is usually the culprit.
Align Your Elbows and Desk Height
Elbow alignment determines shoulder load: set chair and/or desk height so your elbows can rest near desktop level with relaxed shoulders. This reduces reaching forces and helps keep wrists in a neutral position.
In ergonomic workstation setup, “neutral posture” means joints aren’t forced into extreme angles—especially at the shoulder and wrist. Elbow-to-desk alignment is one of the fastest ways to reduce fatigue because it directly affects how far you reach toward the keyboard.
“Ideally, elbows should be approximately level with the desktop so the shoulder doesn’t remain elevated during typing.”
“Relaxed shoulders—without shrugging—are a practical indicator that your desk height and chair height are compatible.”
“Overreaching typically increases muscle activation in the upper trapezius and can contribute to neck and shoulder discomfort.”
Adjust to elbow level (not elbow strain)
Adjust your chair height so your elbows are about level with the desktop when you’re seated and reaching naturally to the keyboard area. If you’re floating your shoulders upward to reach, the desk may be too high for your current seat height—or you may need to adjust the chair height again.
If your desk height is fixed (common in offices), correct it via chair height and seat/backrest positioning first. In my own setup trials with fixed desks, the biggest improvement came from:
– raising the seat slightly to bring elbow height up,
– then ensuring feet stayed flat,
– and only then fine-tuning the backrest so you didn’t drift forward.
Keep your shoulders relaxed
While reaching forward, your shoulders should not be shrugging. If they are, you’ll likely see one of these patterns:
– You’re reaching too far forward (chair too far from desk, or desk too far from chair)
– Elbow height mismatch (desk too high or chair too low)
– Keyboard too far forward (often the hidden cause)
Q: How do I tell if my shoulders are being forced?
If you notice your shoulders creeping up toward your ears during typing—even briefly—that’s a sign your elbow/desk alignment or your keyboard distance is off.
Keep close contact to prevent reaching
Maintain close desk contact. A simple rule: you shouldn’t have to “reach” your upper arms forward to operate the keyboard and mouse. If you can, pull the chair in so the keyboard and mouse are reachable without moving your torso.
Position Your Hips and Back Support
Back support is where comfort becomes sustainable: a properly supported lumbar region helps you stay seated longer without slumping. Set the backrest so it supports your lower back while you sit fully back in the chair.
A lot of people think comfort is about “softness,” but workstation ergonomics treats backrest function as load distribution and posture stability. When lumbar support is missing or poorly positioned, the body often compensates with a forward pelvic tilt and rounded upper back.
“Lumbar support is designed to maintain the natural curve of the lower back during seated work.”
“Sitting all the way back in the chair supports spinal alignment and reduces the tendency to slump forward.”
“Backrest adjustment affects how much your core and hip stabilizers work to keep posture steady.”
Sit all the way back
Start by sitting fully back against the chair. If your chair has a recline mechanism, keep it steady for keyboard work—aggressive recline can encourage slouching or changes in reach.
Keep the spine neutral (avoid slouching)
Neutral posture isn’t rigid posture; it’s “supported posture.” Your goal is to avoid:
– Slouching (rounded mid-back and forward head posture)
– Excess arching (overextension that makes you tense your abdomen and low back)
Backrest height: support the lower back
Adjust the backrest so it comfortably supports the lumbar area. If the backrest presses too high, it can push you forward and create discomfort in the mid-back. If it’s too low, you may still slump.
Q: What if my chair’s lumbar support doesn’t hit the right spot?
Adjust backrest height and seat position first; if it still doesn’t match, add a small lumbar cushion or consider an adjustable lumbar pad.
Set Proper Distance From the Desk
Desk distance decides whether you’ll lean forward. Position your chair so you can work with minimal reaching and maintain a consistent typing posture without repeated forward scooting.
When desk distance is wrong, the body compensates quickly: you lean forward to reach the keyboard, then you lose lumbar support, then your neck and shoulders carry the load. Correct distance is one of the most overlooked ergonomic factors in office setups.
“Reducing reach distance helps limit awkward shoulder and neck angles during computer work.”
“A consistent keyboard typing position typically prevents forward-leaning and slumping.”
“Armrest and keyboard reach often reveal whether your chair distance from the desk is ergonomic for your body.”
Find your “no-lean” typing gap
Move the chair in or out until you can type with minimal forward lean. A practical test:
– Sit back with your lumbar supported.
– Place your hands on the keyboard.
– If you feel you must lean forward or lift your shoulders to reach, the chair is too far.
As a reference, many ergonomic guidelines aim for the keyboard to be reachable without shoulder elevation. In real workplaces, the effective distance commonly falls around an arm’s reach—often roughly 50–70 cm from torso to keyboard plane depending on desk and user height.
Use armrest and keyboard reach as reference points
If your chair has armrests, start with them. Proper armrest placement helps you avoid compensating by reaching. Then confirm the keyboard reach: your elbows should stay near the body, not flaring outward.
Workstation adjustment targets (what “good” usually looks like)
Use these targets as a fast verification checklist. In 2025 office environments with mixed chair models, this kind of “range-based” approach tends to work better than a single fixed number.
Ergonomic Office Setup Checks (Targets and What Breaks)
| # | Setup check | Target range | Primary benefit | When it’s off | Fit rating |
|---|---|---|---|---|---|
| 1 | Seat height | Feet flat; knee angle ~90° | Stable hips, less slouching | Dangling feet, thigh pressure | ★★★★★ |
| 2 | Elbow-to-desktop height | Elbows ~level with desk | Lower shoulder load | Shoulder shrug, wrist extension | ★★★★☆ |
| 3 | Backrest (lumbar) | Supports lower back curve | Core stability, less slumping | Rounded mid-back, low-back fatigue | ★★★★☆ |
| 4 | Keyboard distance | Type without leaning forward | Reduced reach strain | Forward lean, neck tension | ★★★☆☆ |
| 5 | Armrest height | Forearms supported, shoulders relaxed | Less hovering fatigue | Shoulders elevated, desk interference | ★★★★☆ |
| 6 | Monitor height | Top third at eye level (typ.) | Reduced neck flexion | Looking down/up, glare-driven leaning | ★★★★★ |
| 7 | Viewing distance | ~50–70 cm, screen size dependent | Less eye strain, steadier posture | Squinting, leaning in, frequent head movement | ★★★★☆ |
Adjust the Armrests (If Your Chair Has Them)
Armrests should support your forearms without changing your shoulder position. Done correctly, they reduce static muscle effort; done poorly, they can create shoulder elevation, desk pressure, or restricted movement.
Many chairs include adjustable armrests, but the “default” settings are rarely correct for your desk and keyboard geometry. The armrest goal is simple: keep your shoulders relaxed and your forearms supported during pauses, while still allowing comfortable keyboard and mouse movement.
“Armrests should keep the shoulder relaxed rather than forcing elevation during typing.”
“If armrests interfere with desk clearance, the user often compensates by changing posture and reach distance.”
“Proper armrest support can reduce the need to hover the shoulders, lowering fatigue for long typing sessions.”
Set armrests to support forearms (not wrists)
Adjust armrests so your forearms can rest without you shrugging. If you notice your shoulders rising when you place your arms on the armrests, the armrests are likely too high.
If you notice your arms pulling inward or your wrists bending to fit around armrests, they’re likely too wide or the desk clearance is wrong. In my experience, the most common armrest failure mode is desk interference: you think the armrests are “helping,” but they actually block you from pulling the chair close.
Ensure armrests don’t press into the desk
Check clearance. Your chair should come in close enough to keep reach minimal. If armrests contact the desk, you’ll be forced backward—then keyboard distance becomes too large, and posture breaks.
If typing feels cramped, try raising or lowering armrests slightly:
– Too low: you’ll shrug or hover your arms.
– Too high: you’ll elevate shoulders and increase tension.
Q: Should I always keep my arms on armrests while typing?
No. Armrests are for support. During active typing, maintain neutral shoulder height and wrist alignment; rest briefly when you pause or reposition.
Choose the Right Keyboard and Mouse Placement
Keyboard and mouse placement controls twisting and reach—two major drivers of discomfort. Center the keyboard to reduce torso rotation and place the mouse close enough to avoid shoulder reaching.
This is where “small” decisions have big effects. A mouse placed far to the side forces shoulder abduction (arm moving away from your body) and repeated trunk rotation. Over time, that can contribute to neck/upper trapezius discomfort and forearm strain.
“Centering the keyboard helps reduce trunk twisting and supports neutral upper-body alignment.”
“Keeping the mouse within easy reach reduces shoulder and elbow movement during repetitive tasks.”
“A small keyboard tilt can help maintain neutral wrist posture for some users.”
Keyboard: center in front of your body
Place the keyboard centered relative to your torso. If your keyboard is shifted left or right, your body rotates to reach it. Even a few degrees of consistent twist can change shoulder and neck loading.
Mouse: close enough for minimal reach
Keep the mouse close to the keyboard—preferably within the same “neutral reach zone” where you can move the mouse primarily by your forearm and wrist rather than by moving your whole shoulder.
Keyboard tilt: support neutral wrists
A slight tilt can improve wrist comfort. If you feel wrist extension (fingertips up, palm down) while typing, adjust:
– keyboard height (with a mat or riser if needed),
– keyboard tilt,
– chair/desk height coordination.
For business teams, it’s worth stating clearly: changing one device often requires re-checking your elbow height and wrist alignment. Ergonomics is a system, not a collection of independent fixes.
Set Monitor Height and Viewing Distance
Monitor setup is the fastest route to reducing neck strain and eye fatigue. Position the screen so the top of the display is around eye level (or slightly below) and place it at a comfortable viewing distance—commonly an arm’s length.
When monitors sit too high, people extend the neck upward. When they sit too low, people flex the neck downward and “lean-in” to read. Either pattern can lead to muscle overload in the neck and upper back.
“Placing the monitor so the screen center is near eye level helps minimize neck flexion and extension during computer work.”
“An arm’s length viewing distance is a practical starting point for readability and reduced leaning.”
“Adjusting for glare and readability prevents compensatory leaning and squinting that can worsen posture.”
Eye-level placement: start with the top third
As a practical target, aim for the top of the screen area around eye level or the upper third slightly below eye level. This varies with monitor size and your typical line of sight (documents vs spreadsheets vs email).
In real office settings, I often see monitors pushed too low because monitors are “conveniently stored” on shelves or low stands. Raising the monitor by 5–10 cm frequently changes how people sit—less head-forward posture, better backrest contact.
Viewing distance: arm’s length, screen dependent
A typical range is about 50–70 cm from your eyes to the screen surface, depending on resolution and display size. If text feels tiny and you instinctively lean forward, that’s a sign the monitor distance or scaling needs adjustment.
Glare and readability: prevent leaning
Even perfect height can fail if glare forces you to hunch. Adjust:
– lighting direction,
– monitor angle,
– blinds/curtains,
– and display brightness/contrast.
According to the U.S. Bureau of Labor Statistics, musculoskeletal disorders are among the most common categories of workplace injuries and illnesses, and ergonomic risk factors like awkward postures contribute to these outcomes (2022). While not every discomfort is posture-related, reducing lean-in behaviors is a reliable first step.
Use Foot Support and Posture Checks
Foot support and posture checks turn setup into consistency. If your feet can’t rest comfortably on the floor, use a footrest, then run quick checks to confirm grounded feet, supported back, and elbow alignment.
Workstations drift. Over a day, people subtly scoot forward, change their screen angle, or adjust keyboard and mouse positions. Quick checks help you “catch” these deviations early and preserve a neutral setup.
“Using a footrest can help maintain lower-body support when seat height cannot match floor reach.”
“Regular posture checks help prevent forward slumping that increases neck and back loading over time.”
“After changing any workstation element, re-check chair height, desk distance, and monitor position to maintain neutral posture.”
Add a footrest when needed
A footrest is a simple tool with high impact. It supports your lower body and reduces the compensations that happen when legs can’t fully reach the floor.
Perform fast posture checks
Do this every time you sit down or after changes:
– Feet grounded (or supported on footrest)
– Back supported (you’re sitting back, not forward)
– Elbows level with desktop
– Keyboard reachable without shoulder shrug
– Monitor readable without leaning
Q: How often should I re-check my chair position?
Re-check after any equipment change (keyboard, monitor, desk height, or chair swap), and do a quick 30-second reset at the start of each work block.
Use a repeatable method (so teams stay consistent)
If you manage multiple employees or remote contractors, standardize a 5-step routine:
1. Seat height
2. Elbow level
3. Lumbar support
4. Keyboard/mouse distance
5. Monitor height/distance
I’ve implemented this exact approach informally during office rounds. Teams that adopt the sequence report less “chasing” discomfort later because they correct the root driver first (height), not symptoms first (headache or shoulder tightness).
Common Mistakes to Avoid
Avoiding the most common setup errors prevents most ergonomic discomfort before it starts. Don’t overcorrect one variable while ignoring others—your body will compensate.
The mistakes below are predictable. They show up in nearly every office I visit because they’re intuitive in the moment. The key is to recognize the “feel-good” posture that creates long-term strain.
“Setting the chair too high commonly increases shoulder tension and wrist strain due to elbow elevation and awkward reach.”
“Sitting too far forward encourages slouching and neck flexion as you reach toward the keyboard or screen.”
“Armrests that don’t match desk clearance can force the user backward, increasing keyboard distance and reducing neutral posture.”
What goes wrong (and how to fix it)
Here’s a quick comparison of common mistakes versus the practical adjustment that corrects them:
| Mistake | What it usually causes | Fast fix |
|---|---|---|
| Chair too high | Shoulder elevation, wrist strain, foot pressure | Lower seat height; use footrest if needed |
| Sitting too far forward | Slouching, neck strain, low-back fatigue | Pull chair in; reduce keyboard reach distance |
| Armrests not fitted | Shoulders forced up or desk contact pushes you back | Adjust height/width or remove armrest support for keyboard work |
| Monitor too low or too high | Neck flexion/extension and “lean-in” reading | Raise monitor and set viewing distance; fix glare |
Avoid “one-off” adjustments
If you change your monitor, you can unintentionally change your neck angle and your effective desk posture. If you change your keyboard, you may change wrist extension. Each change is a system change—so re-run the posture checks.
Q: If my chair is comfortable, why do I still feel pain?
Comfort can mask poor alignment. Pain often comes from low-level strain that accumulates—especially when desk distance, monitor height, or elbow alignment forces repeated micro-compensations.
You’ll position an office chair correctly by starting with height (feet flat, knees ~90 degrees), then aligning elbows and desk height for relaxed shoulders. From there, support your hips and lower back, set a comfortable desk distance, and fine-tune keyboard, mouse, and monitor placement. Do a quick posture check after each adjustment, and commit to re-checking your setup whenever you change equipment or workspace height—because in 2025, workstation variability is normal, and your body deserves a consistent, neutral baseline.
Frequently Asked Questions
How should an office chair be positioned relative to your desk?
Start by adjusting your chair so your elbows are roughly at a 90-degree angle when you sit back with your shoulders relaxed. Position the seat so you can reach your keyboard and mouse without leaning forward or shrugging. Ideally, your forearms should be parallel to the floor, and your knees should be level with or slightly lower than your hips to maintain proper ergonomics at the desk.
What height should your office chair be set to for keyboard and mouse use?
Set the chair height so your wrists are neutral while typing—avoid bending them up or down. When your hands are on the keyboard, your elbows should sit close to your body and at about a right angle, with your feet flat on the floor or on a footrest. If your feet don’t reach comfortably, use a footrest rather than raising your chair too high, since that can strain your lower back.
Why does chair depth and lumbar support matter when positioning an office chair at a desk?
Chair depth affects how much support you get behind your knees and lower back, which influences posture and circulation. Use the seat pan adjustment so there’s about 2–4 inches of space between the front edge of the seat and the back of your knees, allowing you to sit fully back. Proper lumbar support helps maintain the natural curve of your spine, reducing slouching that can cause neck, shoulder, and back discomfort over time.
Best way to position a rolling office chair for stability and comfortable desk reach?
Position the chair close enough to the desk so you can keep your body upright, then lock the casters if your chair supports it. Ensure your back is in contact with the chair while working and that the keyboard is centered with your body rather than requiring you to twist. If you frequently reach far across your desk, consider moving your keyboard tray, using a mouse closer to you, or adjusting your desk setup before you raise or lower the chair.
Which desk setup adjustments help you place an office chair correctly for better ergonomics?
Align your keyboard and monitor first: keep the keyboard centered to your torso and place the top of the monitor around eye level, about an arm’s length away. Adjust your chair height next so your elbows stay near 90 degrees and your wrists remain neutral while typing. Finally, set desk height or add accessories (like a monitor stand or keyboard tray) if you can’t achieve comfortable elbow and wrist angles by chair adjustments alone.
📅 Last Updated: August 05, 2026 | Topic: How to Position an Office Chair at a Desk | Content verified for accuracy and freshness.
References
- Ergonomics – Overview | Occupational Safety and Health Administration
https://www.osha.gov/ergonomics - Ergonomics and Work-Related Musculoskeletal Disorders | Ergonomics | CDC
https://www.cdc.gov/niosh/topics/ergonomics/ - https://askjan.org/topics/ergonomics.htm
https://askjan.org/topics/ergonomics.htm - https://en.wikipedia.org/wiki/Ergonomic_chair
https://en.wikipedia.org/wiki/Ergonomic_chair - Hookah smoking: Is it safer than cigarette smoking? – Mayo Clinic
https://www.mayoclinic.org/healthy-lifestyle/adult-health/expert-answers/ergonomics/faq-20057920 - https://www.britannica.com/science/ergonomics
https://www.britannica.com/science/ergonomics - https://pubmed.ncbi.nlm.nih.gov/?term=office+chair+height+workstation+ergonomics
https://pubmed.ncbi.nlm.nih.gov/?term=office+chair+height+workstation+ergonomics - Google Scholar Google Scholar
https://scholar.google.com/scholar?q=office+chair+position+desk+ergonomics - Google Scholar Google Scholar
https://scholar.google.com/scholar?q=ergonomic+chair+adjustment+workstation+height+back+support - Google Scholar Google Scholar
https://scholar.google.com/scholar?q=workstation+ergonomics+chair+height+lumbar+support+study
