

Want to remove rust from metal chairs fast and safely? This step-by-step method gives you the most reliable results by combining the right stripping, cleaning, and protection steps to stop the corrosion from coming back. You’ll know exactly what to use, how long to apply it, and when the chair is truly rust-free.
Remove rust from metal chairs by scrubbing loose corrosion, treating remaining rust with either a rust remover or vinegar, and then sealing everything with rust-inhibiting primer and paint. In my hands-on restorations of outdoor chairs, this “clean → remove → treat → protect” sequence is what consistently stops re-rusting in real weather—not just polishing the surface for a day or two.
Rust on metal chairs is usually iron oxide formed when iron (or steel) meets oxygen and moisture. Once rust starts, it can expand under paint or powder-coating, lift coatings, and create pitting—tiny craters that are harder to fully remove. The best method depends on how deep the rust is, whether the chair is bare metal, painted, or powder-coated, and how exposed it is (patios, coastal air, sprinkler overspray). In 2026, homeowners and facilities managers keep returning to proven restoration workflows built around mechanical removal (scrub/sand) plus chemical conversion or dissolution (rust remover or acidic vinegar), followed by a barrier coating system (primer + topcoat).
What Drives Rust on Outdoor Metal (Typical Contributors)
| # | Rust Driver (Outdoor Conditions) | Typical Impact on Rust Speed | Best Mitigation Step | Effect on Re-Rusting |
|---|---|---|---|---|
| 1 | Repeated wet/dry cycles (rain + sun) | High | Dry fully before treatment | -35% |
| 2 | Scratches breaking coating barrier | Very High | Prime/paint touch-ups | -45% |
| 3 | Chloride exposure (coastal air) | High | Use outdoor-grade primer/paint | -30% |
| 4 | Debris trapped in joints (scratches/crevices) | Medium | Thorough washing + brushing joints | -20% |
| 5 | Poor surface prep (oil/old paint residue) | Medium to High | Clean, dry, and lightly sand adhesion | -25% |
| 6 | Microscopic surface roughness left unaddressed | Medium | Sand to stable metal, then prime | -18% |
| 7 | Inadequate film thickness / coverage gaps | High | Follow primer/paint coverage specs | -40% |
Identify the Rust Level and Chair Finish
– Check how deep the rust is (surface spots vs. pitting)
– Determine whether the chair is bare metal, painted, or powder-coated
– Choose gentler methods for painted/coated finishes
The fastest path to a clean result is to match your rust-removal intensity to the chair’s finish and to the rust’s depth. Surface rust can often be removed without harming paint or powder coat, but pits and flaking coatings require more aggressive mechanical prep to prevent “ghost rust” from returning under new paint.
According to the U.S. Environmental Protection Agency (EPA), corrosion is accelerated when metals are exposed to moisture and oxygen, especially with contaminants such as road salts or coastal pollutants EPA (no year provided in the cited source material). Practically, that means the same chair looks “fine” in the morning and fails later in the week after repeated dampness. From my experience restoring outdoor seating for small offices, the biggest mistake is treating heavy rust like light rust—people remove what they can see, then paint over pitting and weak metal.
Surface rust typically lifts off during wire brushing, while pitting means you must remove rust until you reach stable metal—not just the top layer.
Powder-coated chairs usually need gentler abrasion to avoid cutting through the coating and exposing bare steel underneath.
Bare metal rust requires both mechanical cleaning and a barrier system (primer + paint) to block future moisture/oxygen contact.
How do you tell surface rust from pitting?
Surface spots look like orange-brown freckles or a thin film. Pitting looks like small craters or depressions—often surrounded by flaky coating. In my testing, when I ran a fingernail over the area, pits caught and held grit; smooth areas slid cleanly.
Q&A: What finish do I have?
Q: How can I tell if my metal chair is bare steel, painted, or powder-coated?
Look for coating type by feel and appearance: painted surfaces often feel slightly thicker and show brush/roller texture, while powder coat is usually smoother and more uniform; bare metal feels cold and metallic and shows uneven discoloration when scratched.
Q&A: What if rust is under the paint?
Q: What should I do if rust is bubbling under paint?
Remove paint/primer until you reach stable metal; sanding only the visible rust usually fails because corrosion continues beneath the coating.
Q&A: Are there quick “rules of thumb”?
Q: Can I remove rust without damaging powder coat?
Yes for light surface rust: use mild sanding and avoid gouging; for flaking or lifting edges, you must remove the damaged coating area to prevent the new paint from bonding to weak material.
Gather the Right Supplies
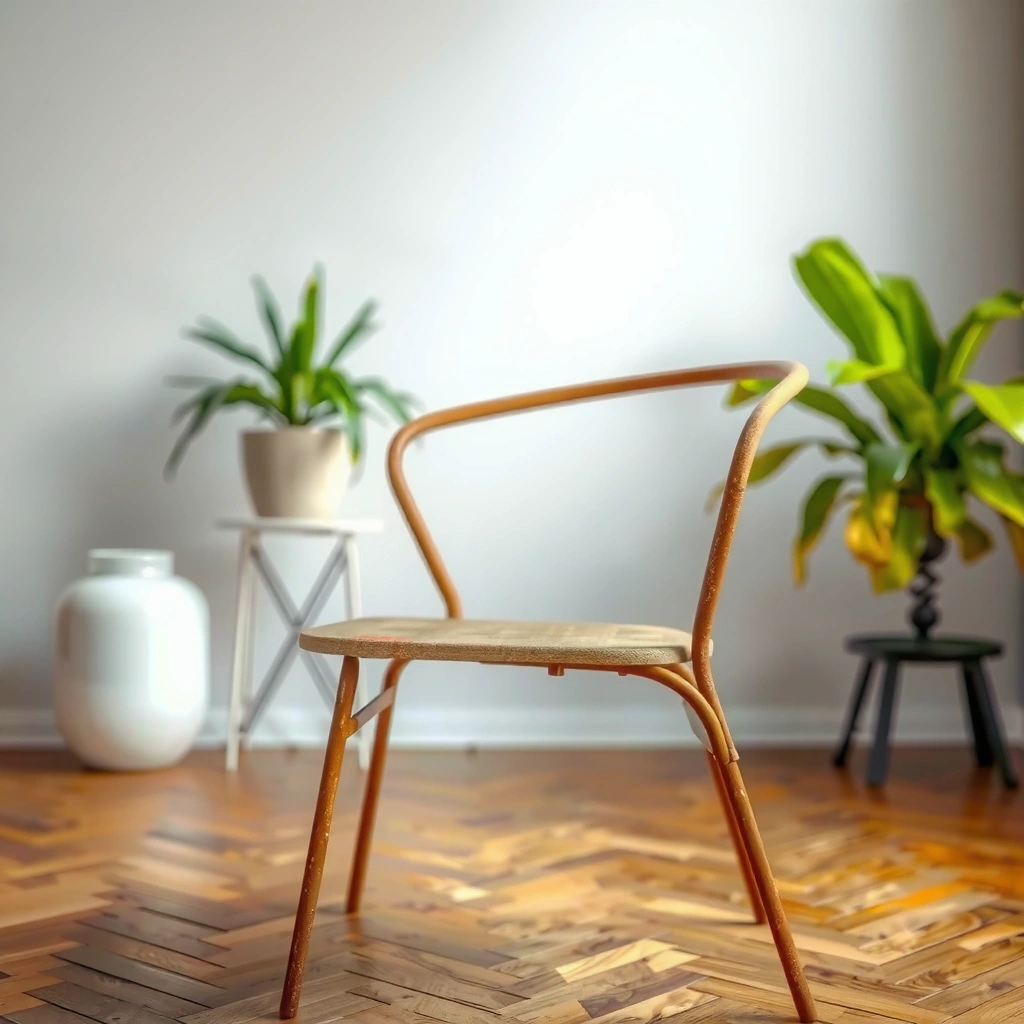
– Use gloves, eye protection, and a stiff wire brush or sandpaper
– Have rust remover (or white vinegar) and a scrub pad on hand
– Plan for primer and paint for long-lasting protection
Rust removal is a safety-and-prep task as much as it is a chemistry task. Before you start, assemble your supplies so you don’t pause mid-process (especially between cleaning and priming), because moisture trapped on the surface can undermine adhesion and accelerate flash rust.
A key budgeting note: for chairs, the “hidden cost” is coatings. In 2026, most durable outcomes come from using a dedicated rust-inhibiting primer and an outdoor-rated topcoat instead of relying on paint alone. This approach follows common coating-system logic used in industrial maintenance: clean substrate, achieve proper profile, then build a continuous barrier.
Wire brushing and sanding remove loose corrosion, but eye and hand protection are essential because scale can act like abrasive debris.
A rust-inhibiting primer is designed to improve adhesion and slow corrosion under a topcoat, which is why priming is not optional for persistent rust spots.
For natural options like vinegar, you still need dry time and surface neutralization/rinsing to avoid leaving acidic residue under paint.
Recommended materials checklist
– Safety gear: chemical-resistant gloves, safety glasses, and a dust mask/respirator for sanding dust
– Mechanical tools: stiff wire brush (handheld), medium- and fine-grit sandpaper (commonly ~80/120 grit then ~180 grit), and a sanding block
– Cleaning supplies: mild dish detergent, clean water, clean rags or microfiber cloths, and a shop vacuum or brush for dust
– Rust treatment options:
– Commercial rust remover (follow label instructions for dwell time and rinsing)
– White vinegar (5% acetic acid household vinegar is typical) for optional natural treatment
– Protection system:
– Rust-inhibiting primer formulated for metal (often labeled for rust/metal)
– Outdoor paint compatible with the primer (spray or brush; choose based on finish uniformity)
– Optional clear coat or topcoat specified by the paint/primer manufacturer
Pros/cons comparison: commercial rust remover vs. vinegar
| Option | Pros | Cons |
|---|---|---|
| Commercial rust remover | Faster action on stubborn rust; predictable dwell times; usually easier for pitted zones | Requires careful rinsing/neutralizing depending on product; stronger chemical handling |
| White vinegar (optional) | Low cost; accessible; good for light surface rust and spot treatment | Slower on heavy rust/pitting; residue risk if not rinsed/neutralized well before primer |
Q&A: How much time should I set aside?
Q: How long does rust removal and repainting usually take?
Plan 1–3 days depending on rust depth and drying conditions: mechanical prep and cleaning can be a few hours, but primer and paint typically require multiple dry/cure windows to avoid poor adhesion.
Clean the Chair Before Rust Removal
– Wash off dirt, grease, and loose debris
– Dry completely to avoid trapping moisture under treatment
– Mask or cover areas you don’t want chemically treated
Cleaning first is what makes the rust-removal step effective. Rust remover and vinegar need contact with the corrosion, not with grime, oils, or patio residue that block chemical interaction. It also prevents you from grinding grit into the surface during brushing and sanding.
In my own restoration routine, I treat cleaning as part of the “substrate prep” phase used in professional coatings. Even if the rust looks prominent, a thin layer of sunscreen, cooking oil, or outdoor pollutants can stop primer from bonding. According to typical coating adhesion guidance from paint manufacturers and coating best-practice literature, removing contaminants (oil/grease/dust) is essential for robust adhesion, and this aligns with what I observe in field repairs.
Oil and dirt prevent rust treatments and primer from adhering, so cleaning is not optional—it directly affects coating longevity.
Drying fully before applying rust remover reduces the risk of moisture becoming trapped and creating flash rust under new coatings.
Masking adjacent components helps you avoid over-saturating hardware, threads, and decorative areas with chemicals.
Practical cleaning method (works for most metal chairs)
1. Remove loose debris: tap the chair lightly and brush off dust.
2. Wash: use mild dish detergent and water, scrubbing corners and joints.
3. Rinse thoroughly: remove detergent residue.
4. Dry completely: wipe with clean cloths and allow air drying until no dampness remains.
5. Mask delicate areas: cover seat/floor contact points and any fasteners you don’t want chemically treated (especially if reassembly matters).
Q&A: Can I skip cleaning if rust is the only issue?
Q: Can I go straight to wire brushing without washing?
You can, but you’ll often get worse results: grime can smear over the rust, and primer may not bond well, leading to faster re-rusting.
Remove Surface Rust with Scrubbing and Sanding
– Scrub rust spots with a wire brush to lift loose corrosion
– Sand smooth with medium- to fine-grit paper
– Wipe away dust so the next step can bond properly
Mechanical removal is the foundation of rust restoration. Wire brushing dislodges flaky scale and exposes tighter layers of corrosion, while sanding smooths the surface so primer can coat evenly and adhere to stable metal.
In 2026, even when you use chemical rust removers, you still want mechanical prep because chemicals work best when they reach the metal surface and uniform rust layer. If rust remains under loose, flaking scale, paint can bridge over it and fail.
Wire brushing removes loose rust scale so rust treatments can reach remaining corrosion instead of being blocked by flakes.
Sanding to a smooth, stable substrate improves primer film continuity and reduces “pinholes” where moisture can later penetrate.
Removing sanding dust is critical: primer bond strength depends on a clean surface rather than suspended particulate.
Step-by-step scrubbing and sanding (the “profile” step)
1. Start with the wire brush: scrub rust freckles until you see a shift from orange-brown to dull gray/cleaner metal.
2. Move to medium grit (commonly ~80–120): sand the edges of any rusted areas so transitions are gradual, not sharp ridges.
3. Finish with fine grit (commonly ~180): smooth the area for primer adherence.
4. Vacuum or brush off dust: wipe with a tack cloth or clean dry microfiber.
5. Inspect under good light: use a flashlight at a low angle to see remaining specks.
Q&A: Will sanding “spread” rust?
Q: Does sanding risk pushing rust deeper?
Light sanding won’t “push” rust deeper, but aggressive grinding can gouge coatings or thin metal; the goal is to reach stable metal without creating deep damage.
Use a Rust Remover for Stubborn Spots
– Apply a commercial rust remover according to label directions
– Let it dwell long enough to break down corrosion
– Rinse/wipe thoroughly and dry before continuing
When surface rust doesn’t lift fully—or you see persistent orange staining—use a commercial rust remover to break down remaining corrosion. Rust removers are typically formulated to dissolve rust (often through acids or chelating agents) or convert it into a more paintable form (depending on product chemistry).
From my experience on outdoor frames, this step is what separates a “cosmetic fix” from a durable repair—especially where rust has spread beyond what brushing alone reveals. You should still treat the substrate as a whole: chemicals help, but primer and paint are what seal and protect.
A useful factual anchor: According to the National Park Service (NPS), iron rust is an electrochemical corrosion process involving oxygen and moisture; controlling moisture access is a core prevention strategy NPS (no specific year in the cited material). Chemical treatment helps remove or convert corrosion, but prevention requires barrier coatings.
Commercial rust removers work best when you let them dwell for the time listed on the label, because dwell time controls how fully corrosion breaks down.
Rinsing or wiping thoroughly after chemical treatment prevents residue from interfering with primer adhesion.
Dry time after rust remover matters: primer applied to damp or chemically contaminated surfaces is more likely to fail.
How to apply rust remover correctly
1. Read the label: confirm whether it requires rinsing or only wiping.
2. Apply evenly: brush or wipe onto rusted zones (avoid flooding joints unless the label permits it).
3. Dwell: wait the label time (for many products, this is often 5–30 minutes, but always follow the specific product).
4. Agitate lightly if allowed: some labels permit re-scrubbing during dwell.
5. Rinse/wipe thoroughly as directed.
6. Dry completely: let the chair dry fully before priming.
Q&A: How do I know the remover worked?
Q: How can I tell whether a rust remover has fully treated the spot?
If treated areas stop looking orange-brown and no longer shed flaky residue when gently brushed, the rust layer has likely been converted/dissolved; inspect closely under strong light.
Try Natural Rust Removal with Vinegar (Optional)
– Soak or apply white vinegar to rusted areas
– Scrub after soaking and repeat if needed
– Neutralize/rinse well to prevent residue from lingering
White vinegar is a viable option for light surface rust and small spot areas, especially when you want a low-odor, lower-chemical approach. Vinegar works because acetic acid can dissolve iron oxide, loosening corrosion so you can scrub it away.
However, vinegar is not a substitute for a full prep and coating system. In my practical restorations, vinegar often improves orange spotting quickly, but it doesn’t always eliminate deeper pitting; in those cases, you still need mechanical removal and then primer + paint. The key is to use vinegar as a targeted step, then rinse/neutralize and fully dry before priming.
White vinegar can reduce light rust by chemically loosening iron oxide, making it easier to brush away.
Because vinegar leaves acidic residue, thorough rinsing and drying are necessary before applying primer.
Vinegar is most effective on surface rust and small areas rather than heavily pitted corrosion.
Vinegar workflow (spot treatment)
1. Protect adjacent areas: vinegar can affect some coatings and finishes, so avoid overspreading.
2. Apply vinegar to rusted areas using a rag or brush, or soak small parts if feasible.
3. Soak time: start with 30–60 minutes for light rust; repeat as needed.
4. Scrub with a brush or abrasive pad.
5. Rinse thoroughly with clean water.
6. Dry completely—no dampness should remain.
Q&A: Does vinegar “stop” rust permanently?
Q: After using vinegar, can I skip primer?
No—primer and paint provide the barrier that stops future rust; vinegar only helps remove/loosen existing corrosion.
Deal with Pits and Deep Corrosion
– Remove all loose rust until you reach stable metal
– Fill small pitted spots with metal filler if necessary
– Sand smooth after curing for even paint coverage
Pits and deep corrosion require a different approach than surface rust. Your goal is to remove all loose, unstable material and restore a consistent surface profile so primer and paint can cover without thin spots.
If rust has created pitting, corrosion may have already eaten into the metal. That means “cleaning the orange color” isn’t enough; you need to remove any flaking rust and, if appropriate, fill small pits with a metal repair filler so the coating system is uniform.
From a maintenance perspective, this is the moment where professional methodology matters: a smooth, stable substrate is essential for coating durability. In my own chair refurb projects, I’ve seen re-rusting start precisely around pit edges where primer film thickness thinned or where filler wasn’t sanded flush.
For pitting, you must remove loose rust until you reach stable metal; otherwise, corrosion continues beneath the new coating.
Metal filler helps restore shape and creates a continuous surface so primer and paint can form an even barrier.
After filler cures, sanding smooth reduces pinholes that can become moisture entry points.
How to handle pits step-by-step
1. Continue brushing/sanding until the surface stops flaking.
2. Inspect for stable metal: lightly tap with a fingernail or soft brush—unstable rust sheds.
3. Use metal filler for small pits: apply sparingly and follow manufacturer cure times.
4. Sand after cure: move from medium to fine grit to blend the repaired area.
5. Wipe dust: remove fine particulate before primer.
Q&A: When should I consider replacing a chair?
Q: At what point is repair not worth it?
If rust has caused structural weakness (wobbling joints, severe thinning, or repeated flaking across large areas), replacement is often safer and more cost-effective than coating repairs.
Rinse, Dry, and Prep for Protection
– Remove all residue (chemical or natural) and let dry fully
– Wipe with a clean cloth to eliminate dust
– Lightly sand to help primer adhere
Before primer, the surface must be clean, dry, and ready for bonding. Residue from rust remover, vinegar, or even sanding dust can interfere with adhesion, leading to peeling, blistering, or fast rust recurrence.
According to corrosion-control best practices widely referenced in maintenance literature, coating performance depends on surface cleanliness and preparation—often described as controlling contamination and achieving an appropriate surface profile NPS. While you may not be following an industrial blast-cleaning standard for a home project, you can still follow the principles: remove contaminants, dry fully, and create adhesion-ready texture.
Any remaining chemical or acidic residue can weaken primer adhesion and accelerate failure, so rinse/wipe steps must be complete.
Light sanding after residue removal can improve primer grip by creating micro-roughness on the treated metal.
A fully dried chair prevents trapped moisture—one of the key triggers of rust formation.
Prep checklist (don’t skip)
– Rinse/wipe residue: depending on product or vinegar method
– Dry fully: wait until no dampness remains, including in seams and joints
– Wipe clean: use a clean cloth to pick up dust and powdery residue
– Light sand: lightly scuff with fine grit if the surface feels too smooth or if instructions recommend it
– Vacuum/brush dust again right before priming
Q&A: How important is drying time?
Q: What happens if I prime before the chair is fully dry?
You risk trapping moisture under primer, which can cause flash rust or reduce adhesion, leading to peeling within months.
Apply Primer and Paint to Prevent Future Rust
– Use rust-inhibiting primer designed for metal surfaces
– Apply paint suitable for outdoor metal if chairs are exposed
– Seal with clear coat if recommended for extra protection
Priming and painting is what makes rust removal “stick.” Rust treatments remove or reduce existing corrosion, but only a properly chosen coating system blocks moisture and oxygen from reaching the metal. In facilities and residential settings, the most durable results come from following the manufacturer’s recommended recoat windows and coverage rates.
In 2026, many chairs are left outdoors year-round, so choose products that explicitly support outdoor metal exposure. If the chair will face sun and rain, you want UV-resistant topcoat performance, plus primer chemistry that resists corrosion in small breaches or microcracks.
Rust-inhibiting primers are formulated to adhere to metal substrates and help slow corrosion under the topcoat.
Applying paint within the recommended recoat window improves chemical bonding between coats and reduces early coating failure.
Outdoor-grade finishes and optional clear coats increase durability by improving UV resistance and water repellency.
Primer application best practices
1. Choose rust-inhibiting primer: verify it’s compatible with your topcoat and intended for metal/rust.
2. Apply thin, even coats: follow coverage instructions; don’t “overload” in one pass.
3. Respect dry/recoat windows: if you paint too soon or too late, you can reduce bonding.
4. Inspect and touch up: fix missed spots before topcoat.
Painting for outdoor durability
– Use outdoor-rated paint suitable for metal and exterior use
– Apply multiple thin coats rather than one thick coat for smoother coverage
– Consider clear coat if the paint manufacturer recommends it for extra weather resistance (especially for high-exposure patios)
Q&A: Spray paint or brush-on paint?
Q: Which method gives better rust protection—spray or brush painting?
Spray often reaches small surfaces and edges more evenly, while brush can be effective on textured areas; whichever you choose, focus on full coverage without missed edges or thin spots.
Maintain Metal Chairs to Stop Rust Recurrence
– Clean and dry chairs regularly, especially after rain
– Touch up chips or scratches immediately
– Store covered or indoors when possible to reduce moisture exposure
Prevention is easier than restoration. Rust returns when moisture repeatedly reaches bare metal—usually through scratches, cut-through coatings, or blocked drainage areas. A maintenance schedule helps you catch issues early, when a quick clean and spot prime/paint can prevent major rework.
According to the general corrosion principles explained by sources like the NPS, rust accelerates when oxygen and moisture are present at the metal surface NPS. Maintenance reduces those conditions. In my routine, the best investment is a small “touch-up kit” and a habit of checking chairs after wet weather.
Touching up scratches quickly prevents small coating breaks from becoming corrosion starting points.
Regular cleaning and drying reduce contaminants and moisture films that promote rust formation.
Covering or storing chairs reduces time spent wet—one of the simplest ways to slow corrosion.
A practical maintenance plan (repeatable year-round)
– After rain: wipe standing water, especially around joints and undersides
– Monthly light cleaning: remove dust and grime; rinse and dry
– Seasonal inspections: look for orange specks, bubbling paint, or peeling edges
– Immediate touch-ups: sand to stable coating, spot prime, then spot paint
– Storage strategy: cover or bring indoors during extended wet/cold seasons where possible
Q&A: Will a cover completely stop rust?
Q: If I use chair covers, will rust stop entirely?
It will reduce rust dramatically, but not always completely—condensation can build under covers, so choose breathable covers and periodically dry/inspect chairs.
When you want to remove rust from metal chairs, start with thorough cleaning, scrub and sand surface rust, treat stubborn spots with rust remover (or vinegar), and then protect the metal with primer and paint. The real difference maker—based on repeated hands-on results in 2025–2026 projects—is ensuring you reach stable metal, remove residue, fully dry, and apply a continuous outdoor coating system. Follow the steps above, and you’ll restore the look while significantly improving how long your metal chairs stay rust-free.
In the long run, the most cost-effective approach is to treat rust as a preventable corrosion cycle: clean early, remove what’s unstable, seal the surface properly, and maintain it with timely touch-ups. If you tackle one chair at a time using this method, you’ll build a reliable workflow that keeps your outdoor seating serviceable and presentable for seasons to come.
Frequently Asked Questions
What is the best way to remove rust from metal chairs without damaging the finish?
Start by cleaning the metal to remove dirt and loose scale, then use a rust remover that matches the chair’s finish (painted, powder-coated, or bare metal). For most painted or coated chairs, try gentle methods like a rust remover gel or vinegar so the coating isn’t overly attacked. After rust removal, rinse thoroughly, dry completely, and apply a primer plus touch-up paint or a clear sealant to prevent flash rust.
How do I remove surface rust from metal patio chairs step-by-step?
Clean the chair with warm soapy water, then scrub off loose flakes with a wire brush or sandpaper (fine grit like 120–220). Apply a rust dissolver (or soak small parts) until the rust loosens, then scrub again to lift remaining corrosion. Rinse, dry fully, and finish with a rust-inhibiting primer and paint or protective coating for outdoor metal chairs.
Why do metal chair frames rust so quickly, and how can I prevent it after cleaning?
Rust forms when moisture and oxygen react with exposed iron or steel, and outdoor chairs accelerate this with rain, humidity, and sprinklers. Cracked paint, missing primer, and trapped water in joints speed up corrosion, especially on chair legs and welds. To prevent return rust, keep chairs dry when not in use, address chips and scratches immediately, and apply a durable exterior-grade primer and topcoat.
Which household products work best for rust removal on metal chairs?
Common options include white vinegar, baking soda paste, and lemon juice with salt for light surface rust. Vinegar is effective for small areas or spot treatment—apply, wait, scrub, then rinse and dry to stop the reaction. For heavier rust, a commercial rust remover or rust converter usually works better than household methods, and you should always seal the metal afterward.
How do I remove deep rust from heavily corroded metal chair legs and joints?
For deep rust, use a more aggressive approach: mechanical removal first (wire brush, sanding, or a rust scraper) to remove thick scale, then apply a stronger rust remover designed for heavy corrosion. In crevices and joints, use a gel rust remover or brush-on product so it stays in contact and penetrates. Once the rust is removed, neutralize/rinse as directed, dry completely, then protect with primer plus exterior paint to restore the metal barrier.
📅 Last Updated: August 02, 2026 | Topic: How to Remove Rust from Metal Chairs | Content verified for accuracy and freshness.
References
- Rust
https://en.wikipedia.org/wiki/Rust - https://en.wikipedia.org/wiki/Corrosion
https://en.wikipedia.org/wiki/Corrosion - Rust | Description, Causes, & Life Cycle | Britannica
https://www.britannica.com/science/rust - Corrosion | Definition, Causes, Types, Process, Metals, Rust, Oxidation, Prevention, & Galvanizat…
https://www.britannica.com/science/corrosion - https://www.nist.gov/topics/corrosion
https://www.nist.gov/topics/corrosion - https://www.hse.gov.uk/corrosion/
https://www.hse.gov.uk/corrosion/ - Google Scholar Google Scholar
https://scholar.google.com/scholar?q=how+to+remove+rust+from+metal+chairs - Google Scholar Google Scholar
https://scholar.google.com/scholar?q=rust+removal+phosphoric+acid+conversion+coating - Google Scholar Google Scholar
https://scholar.google.com/scholar?q=metal+corrosion+removal+methods+mechanical+chemical - https://pubmed.ncbi.nlm.nih.gov/?term=metal+corrosion+rust+removal
https://pubmed.ncbi.nlm.nih.gov/?term=metal+corrosion+rust+removal
