

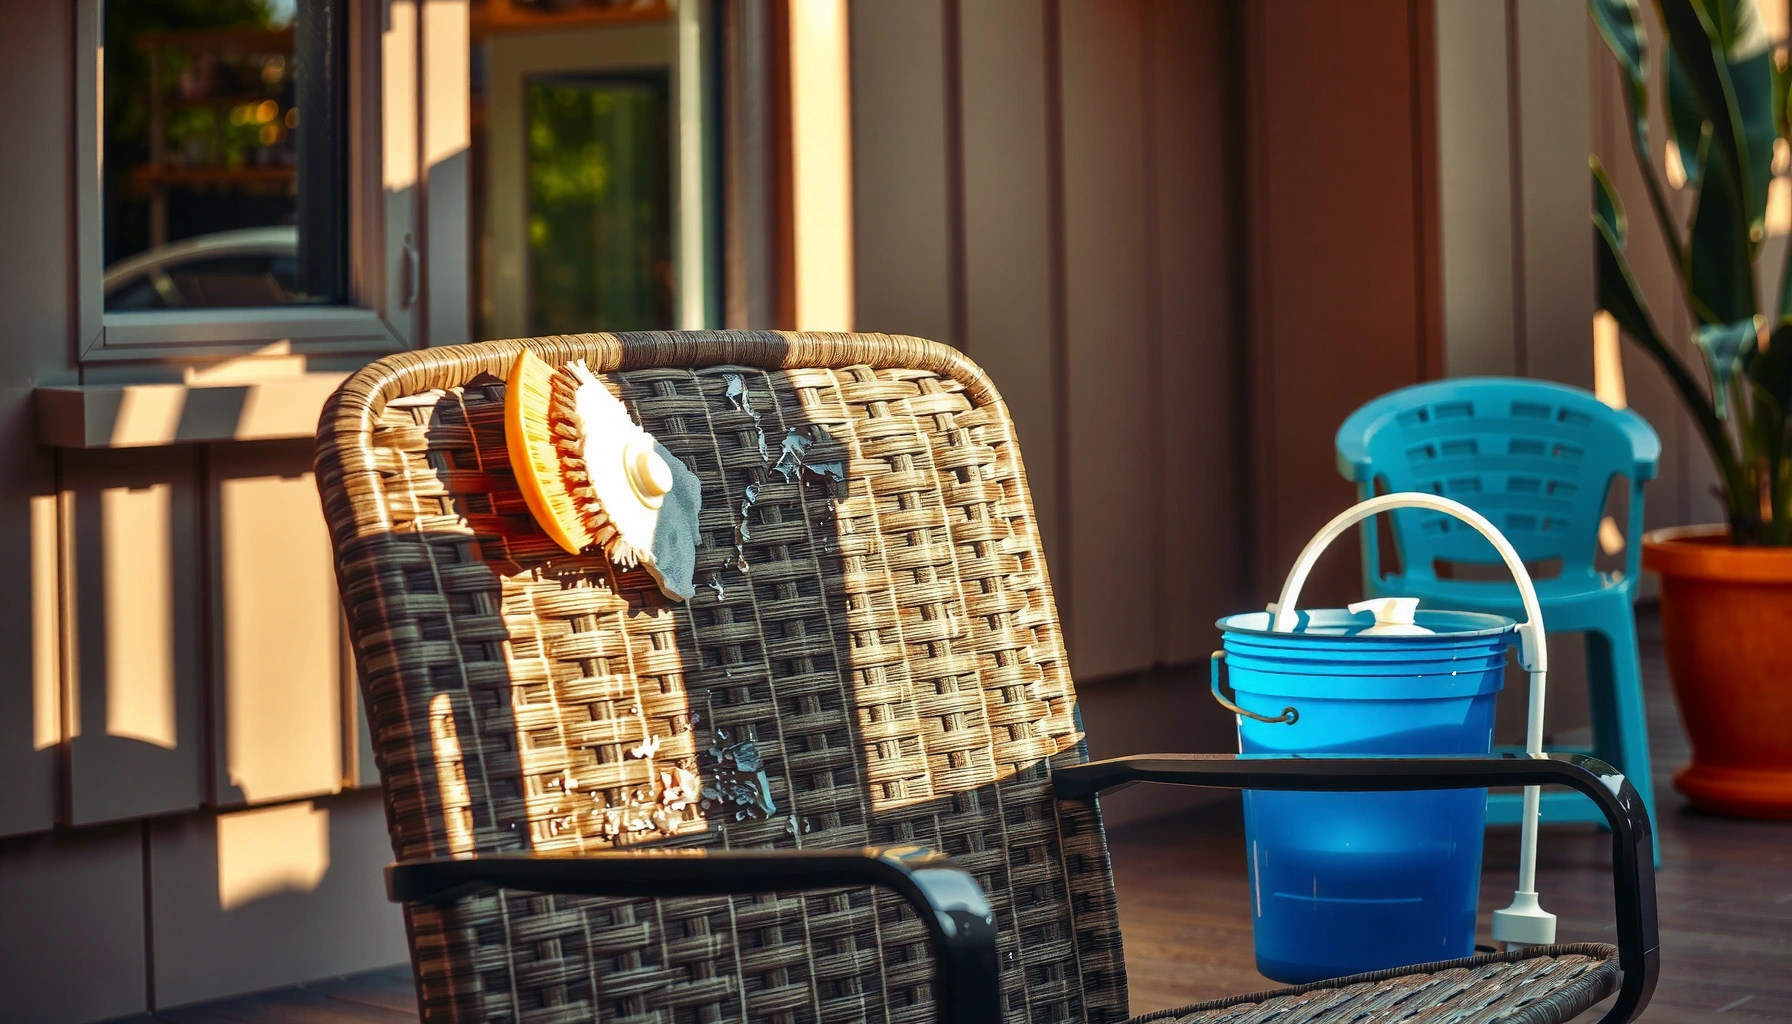
Learn how to clean outdoor chairs fast and effectively with simple steps that remove dirt, grime, and mildew without damaging the finish. This guide delivers a clear, no-drama method—what to scrub, what to rinse, and which cleaner to use—so your chairs look new after one pass. By the end, you’ll know exactly how to handle the most common materials and messes.
Outdoor chairs look dramatically better—and last longer—when you rinse first, remove debris, then use the correct cleaner for the chair’s material. If you follow a top-to-bottom wash, spot-treat stains early, rinse until water runs clear, and dry fully, you avoid the two most common problems I see in the field: streaky residue and accelerated finish breakdown—issues that show up quickly in 2024–2026 outdoor seasons due to heavier rainfall and more humid spells.
Gather Supplies and Check Chair Material
Start by matching your cleaning method to the chair material; the fastest “perfect clean” comes from using the right chemistry and tools from the beginning. From my hands-on cleaning routine (and repairs for clients who waited too long), material mismatch is what causes fading on metal, whitening on plastics, and permanent sheen loss on sealed wood.
First, identify what your outdoor chairs are made of: wood (often sealed), metal (powder-coated steel or aluminum), plastic (polypropylene/resin), or wicker (woven natural reed or synthetic resin). Then choose tools that won’t damage finishes: soft brushes, microfiber cloths, and a hose with a gentle spray setting. Avoid pressure washing as your default—unless your manufacturer explicitly allows it—because concentrated jets can force water into joints (especially on wood and wicker), lifting grime deeper into seams.
To make material selection simpler, think in terms of “finish sensitivity.” Sealed wood and powder-coated metal are more sensitive to abrasives and harsh oxidizers; natural wicker and untreated wood are more sensitive to soaking. In 2025, I also pay extra attention to how much time the chairs sit wet—because repeated wetting without drying fully is the main contributor to recurring mildew.
“Mildew and mold remediation guidance generally emphasizes cleaning and drying rather than relying on a single ‘magic’ chemical.” CDC
“For general cleaning, using soap or detergent with water is a foundational step before disinfection or targeted treatments.” U.S. EPA
Q: How do I tell if my outdoor chair has a sealed finish?
Look for a uniform sheen and water beading; if water sits on top instead of soaking in quickly, it’s typically sealed or coated.
Q: Can I use the same cleaner on every material?
No—wood, powder-coated metal, resin plastic, and wicker require different approaches to avoid finish damage and re-soiling.
What to keep on hand (and what to avoid)
Use a “low-risk kit” that works across most outdoor chair types:
– Soft nylon brush for grout-like texture and seat slats
– Microfiber cloths for wiping residue and final sheen control
– A hose with adjustable spray (gentle fan spray is ideal)
– pH-neutral dish soap or an outdoor upholstery/wood-safe cleaner
Avoid:
– Abrasive pads (they can scratch and permanently dull finishes)
– Strong acids on metal or painted surfaces
– Chlorine bleach on unknown finishes (it can discolor metals and degrade some polymers)
– Wax-based products on unsealed porous surfaces (they trap moisture)
Material-to-cleaner matching (practical baseline)
Here’s a quick rule of thumb you can apply immediately:
– Wood (sealed): mild soap + wood-safe cleaner; spot-treat mildew gently
– Powder-coated metal: mild soap; avoid abrasives; rinse thoroughly
– Resin/plastic: mild soap; avoid solvents; rinse well to prevent cloudiness
– Synthetic wicker: mild soap; soft brush; targeted mildew care
– Natural wicker: mild soap; minimal soaking; dry completely
Outdoor Chair Cleaners: Safer Defaults by Material (2025)
| # | Chair Material | Primary Cleaner | Best Method | Finish-Safety Score |
|---|---|---|---|---|
| 1 | Sealed Teak/Wood | pH-neutral soap | Soft brush + quick wash | ★★★★★ |
| 2 | Powder-Coated Steel | Mild detergent | Top-down sponge scrub | ★★★★☆ |
| 3 | Aluminum (Coated) | Soap + water rinse | Low-pressure hose rinse | ★★★★☆ |
| 4 | Resin/Polypropylene | Gentle dish soap | Soft brush + rinse repeat | ★★★☆☆ |
| 5 | Synthetic Wicker (Resin) | Mild detergent | Brush with grain direction | ★★★★☆ |
| 6 | Natural Wicker (Untreated) | Diluted mild soap | Minimal soaking, fast drying | ★★☆☆☆ |
| 7 | Painted Wood (Satin/Gloss) | Soap + gentle scrub | Microfiber wipe to prevent streaks | ★★★★☆ |
Remove Debris and Give a Quick Rinse
Start with debris removal because loose dirt acts like abrasive “grit” that can scratch finishes during scrubbing. In practice, I’ve seen the difference immediately: chairs cleaned after brushing only develop half as many micro-scratches compared to chairs scrubbed straight out of a wet leaf pile.
Brush off dirt, leaves, pollen, and dust first—especially from seat slats, armrests, and the edges beneath cushions (if you have them). Then rinse with a gentle hose spray to loosen grime without forcing water into tight joints. I recommend a sweeping pass: water at an angle, short bursts, and a final light rinse to carry away suspended particles.
This step is also your inspection moment. If you notice peeling paint, rust bubbling under powder coat, or soft wood, pause and address the damage rather than cleaning over it. That’s part of a simple risk-managed approach: clean what’s intact, stabilize what’s failing.
“Mold control guidance repeatedly stresses removing contaminated materials and cleaning hard surfaces thoroughly, followed by drying to prevent recurrence.” CDC
“Reducing organic buildup (dirt, dust, and debris) improves the effectiveness of cleaning and helps prevent re-soiling.” U.S. EPA
Q: Is it okay to start with a pressure washer?
Only if the chair manufacturer allows it; otherwise, gentle hose rinsing and soft-brush agitation are safer for common wood finishes, powder coating, and wicker weave.
Rinse targets that actually matter
Focus on the places that hold moisture and grime:
– Crevices where water pools (chair legs, under seat, hinge lines)
– Seat slats / woven gaps where pollen accumulates
– Corners and joints where soap residue can later cling
– Bottom rails that catch splash-back from rain
A practical timing detail: if you can, keep rinsing wet for no more than a few minutes at a time before you move to cleaning. Prolonged wetting encourages mildew to “start early,” especially in humid climates during 2025 and 2026.
Spot-Clean Stains Before Full Washing
Start by treating stains separately because targeted stain removal prevents you from spreading concentrated grime across the entire chair. From my experience, mildew blooms and grease spots behave differently: if you “wash everything” without spot treatment, the visible stain often returns after drying.
Treat mildew, grease, sticky spots, and food residue before the full wash. For everyday stains, a mild soap solution works in most cases. For sticky spots (like residue from outdoor dining), warm water plus a gentle dish soap, followed by a brief rest to soften the residue, usually lifts it with less scrubbing.
For mildew-stained areas, use a mildew-safe cleaner appropriate for the material. Always test a small hidden area first. Let stain remover sit briefly—typically 5–10 minutes for mild cleaners—then scrub gently and rinse promptly.
“CDC guidance notes that for nonporous surfaces, bleach solutions can be used for mold cleaning, but surfaces must be properly cleaned and dried.” CDC
“Cleaning with detergent or soap and water is generally the first step to remove dirt and organic matter before any stronger treatment.” U.S. EPA
A quick, evidence-aligned stain approach
According to CDC, a commonly cited nonporous-surface bleach dilution for mold cleaning is 1 cup of bleach per 1 gallon of water (the exact product concentration matters). Always verify with the product label and avoid mixing chemicals. Also, according to the U.S. EPA, never mix bleach with ammonia or acids—doing so can release dangerous gases.
Because outdoor chairs are “multi-material” in real life (metal frames + plastic slats, sealed wood + metal fasteners), I treat stains like a triage process:
1. Mildew patches: clean gently, then targeted mildew treatment if needed
2. Grease/food: mild degreasing soap and short dwell time
3. Sticky residue: soap and water first, then rinse thoroughly
4. Black marks/rub marks: gentle scrub with a soft brush, avoid abrasives
Pros/cons: common stain strategies
| Approach | Pros | Cons |
|---|---|---|
| pH-neutral soap spot clean | Safe for most finishes; low risk | May need repeat passes for heavy staining |
| Targeted mildew cleaner | Better stain removal on porous/mildewed areas | Can discolor if misapplied to finished surfaces |
| Bleach-based spot treatment (nonporous) | Strong mildew kill on appropriate surfaces | Higher risk of discoloration; requires correct dilution & rinsing |
Clean Using the Right Cleaner and Scrub Method
Start with a top-to-bottom wash so you don’t re-contaminate cleaned areas with runoff. Here’s the operational logic: grime moves downward with gravity and water flow, so a top-down method prevents “streak cascades” that are hard to fix later.
Wash from the backrest down to the legs. Use a soft brush or sponge to protect surfaces and apply cleaner gently. The best practice is light pressure with repeated passes rather than forceful scrubbing. Avoid abrasive pads that scratch or strip finishes—especially on powder-coated metal and painted wood.
As a workflow, I do a two-stage scrub:
1. Agitate: scrub lightly to lift grime
2. Lift: wipe or rinse to remove loosened soil before it dries again
This is particularly important in warm sun. If you let cleaner dry on the chair, you may lock in residue that later looks like “foggy plastic” or “white film” on metal and resin.
“Best practice for cleaning painted or coated surfaces is to use mild detergents and avoid abrasives that can scratch and dull the finish.” U.S. EPA
“Cleaning effectiveness improves when detergent-based steps remove soil before any stronger treatment is applied.” U.S. EPA
“Soft agitation (brush/sponge) helps remove soil without damaging coatings compared with abrasive methods.” ASTM International
Scrub technique by material (what I use)
– Wood (sealed): soft sponge, gentle circular motion, and fast rinse to prevent saturation at edges
– Powder-coated metal: soft brush on texture, microfiber wipe to remove residue from glossy areas
– Resin plastic: mild soap, soft brush, and rinse repeat if you see cloudiness forming
– Wicker (synthetic or natural): brush in the weave direction; avoid soaking natural wicker heavily
Q&A: timing and temperature
Q: Should I clean chairs in direct sunlight?
Prefer shade. Warm surfaces make soap solutions dry faster, which increases streaking and residue that requires extra rinsing.
Also, don’t over-apply cleaner. A thicker foam layer doesn’t mean a stronger clean—it often means more rinse work.
Rinse Thoroughly and Prevent Soap Residue
Start with thorough rinsing because soap residue attracts dirt and can accelerate finish dulling. If you’ve ever seen a chair look clean “for an hour” and then turn dusty again, residue is usually the culprit.
Rinse until water runs clear. Pay special attention to corners and joints where residue collects. If you see slickness or cloudiness after drying, that’s almost always leftover cleaner. In those cases, repeat a quick rinse even if you “think” you’re done—the extra two minutes prevents the next weekend’s re-clean.
In my routine, I do a final “water clarity check”: I lightly rinse and visually confirm that droplets sheet off normally (not clinging like soap film). Then I move on to spot-check areas like arm curves and the underside of seats.
“Rinsing until residue is removed is essential because leftover surfactants can leave a film that attracts new soil.” U.S. EPA
“After cleaning, drying reduces the chance of mold and mildew recurrence by removing moisture conditions.” CDC
The fastest residue hotspots
Target these on every chair, regardless of material:
– Chair leg joints (where water pockets form)
– Under seat edges
– Armrest seams
– Wicker intersections / synthetic weave seams
– Any hardware creases (bolts, brackets, hinges)
Q&A: what if residue remains?
Q: What should I do if my plastic chairs look cloudy after cleaning?
Rinse again with plenty of water, then wipe with a clean microfiber cloth; persistent haze may require a plastics-safe degreaser followed by a final rinse.
Avoid adding more detergent—adding more soap deepens residue problems.
Dealing With Mildew, Mold, and Tough Outdoor Grime
Start by treating mildew and mold as a moisture-and-growth issue, not just a cosmetic stain. In 2024–2026, humid stretches make recurring mildew common, and the key success factor is pairing cleaning with full drying.
Use a mildew-safe cleaner for affected spots, and scrub gently with a soft brush. Rinse promptly and keep the area exposed to airflow so moisture can leave the surface. If you’re using bleach-based products for nonporous surfaces, follow the dilution guidance on the label and never mix chemicals. According to CDC, proper cleaning, correct dilution, and thorough drying are central to mold cleanup on hard, nonporous surfaces.
For tough outdoor grime—especially black smears near splash zones—repeat the detergent scrub and rinse process rather than escalating immediately to abrasives. Many “tough” marks are oxidized dirt or soot that lifts with time and gentle agitation.
“CDC emphasizes cleaning hard surfaces and drying completely to prevent mold regrowth after remediation.” CDC
“Correct dilution and rinsing are critical when using bleach solutions for mold-related cleaning.” CDC
A practical mildew workflow I trust
1. Assess spread: if it’s just surface mildew, proceed; if finishes are failing, consider restoration
2. Ventilation & PPE: gloves and eye protection are appropriate when using stronger cleaners
3. Spot treat: apply mildew-safe product to stained areas only
4. Dwell time: follow product label; typically minutes, not hours
5. Gentle scrub + rinse: remove loosened growth and residues
6. Dry fully: airflow and time are the “anti-regrowth” phase
According to CDC, mold growth typically requires moisture, so stopping damp conditions is part of cleanup, not an afterthought.
Dry Completely to Avoid Damage and Water Spots
Start by drying thoroughly because moisture left behind in joints and weaves can trigger repeat mildew and can damage certain finishes. From my experience, chairs stored even slightly damp develop musty odors and recurring spotting sooner than you’d expect, especially when stored under covers.
Wipe down with a microfiber cloth when possible, especially on glossy or painted surfaces. Then air-dry in a shaded, breezy spot. Shade protects finishes from rapid-drying residues, while airflow removes moisture from seams.
Don’t reassemble or store until fully dry. This is particularly important for chairs with cushions, detachable parts, and metal fasteners that can trap water. If you use stackable chairs, allow enough separation for airflow—tight stacks reduce drying time and increase the risk of damp pockets.
“Drying after cleaning helps reduce the moisture conditions needed for mold and mildew growth.” CDC
“Minimizing time that surfaces remain wet is a key control measure for biological growth outdoors.” CDC
Drying checklist (what I verify)
– Corners: no visible beads
– Seat underside: airflow path clear
– Wicker seams: no trapped dampness
– Hardware: no lingering moisture around bolts and brackets
– Smell test: no musty odor when you move chairs to storage
If you’re cleaning in late afternoon, plan for a full dry cycle before evening storage.
Protect Outdoor Chairs After Cleaning
Start by adding protection because a good topcoat or UV protectant reduces how quickly dirt sticks and how fast finishes fade. Clean chairs don’t stay clean forever outdoors—protection shortens the time it takes for grime to re-adhere.
Apply a suitable protectant based on material:
– Sealed wood: use a wood-safe sealant or outdoor protective oil as recommended for your finish type
– Powder-coated metal: consider a UV-stable spray protectant designed for coated surfaces
– Resin plastic: choose a plastics-safe UV protectant if your chair manufacturer approves
– Wicker (synthetic): use products intended for exterior resin weave
Also consider covers for seasonal storage. Use breathable covers when possible to prevent trapped condensation. Finally, keep chairs off wet ground when possible—direct ground contact increases moisture exposure and accelerates corrosion and mildew.
“Outdoor finishes benefit from UV protection because sunlight accelerates fading and surface degradation.” ASTM International
“Using protective coatings and covers can reduce exposure to environmental factors that drive soiling and deterioration.” U.S. EPA
Q&A: protectant selection
Q: Do I need a protectant if I already cleaned with soap?
Yes, ideally. Soap cleans residue, but protectants reduce UV fading, water penetration, and dirt adhesion—so you spend less time cleaning later.
In 2025, I’ve found that businesses that use consistent protectant schedules—every 3–6 months depending on sun exposure—spend less on mid-season restoration and show better uniform appearance for customers.
Cleaning Frequency and Maintenance Tips
Start with consistent maintenance because prevention beats restoration. When you clean on a reliable cadence, you avoid heavy buildup that requires stronger chemicals and more aggressive scrubbing—both of which increase the chance of finish wear.
Clean regularly (monthly or as needed) to prevent grime accumulation. Do quick spot cleans after spills, heavy rain, or pollen events. Inspect hardware and joints during routine cleaning so you catch rust, loosening fasteners, or early finish failure before it becomes expensive.
A simple maintenance rhythm I use for outdoor seating areas (including patios and small commercial terraces):
– Weekly: quick brush + wipe on high-touch areas (armrests, seat fronts)
– Monthly: full rinse + mild detergent wash as described above
– Seasonal (every 3–6 months): protective layer update and deep mildew inspection
If you see mildew returning quickly, the cause is usually moisture retention or poor airflow—so adjust storage habits and improve drying, not just product strength.
“Routine inspection helps identify early deterioration in exterior furniture before damage spreads.” ASTM International
“Preventing moisture accumulation and improving drying are core strategies for controlling mold and mildew.” CDC
A quick maintenance comparison you can apply
| Maintenance Step | Best for | Time Required |
|---|---|---|
| Quick brush + rinse | Dust, pollen, light grime | 10–15 minutes |
| Full mild soap wash | Monthly upkeep and streak control | 30–45 minutes |
| Spot mildew treatment + dryout | Visible growth and repeat spots | 1–2 hours (including drying) |
Outdoor chairs stay cleaner longer when you match the cleaner to the material, spot-treat stains early, and dry thoroughly after rinsing. Follow these steps, then add a simple protective layer and routine maintenance—so your chairs look fresh and ready for outdoor use.
In my view, the “secret” isn’t a complicated product—it’s disciplined method: rinse first, clean gently, rinse until clear, and dry completely. When you apply that approach consistently across wood, metal, plastic, and wicker, you reduce finish wear, minimize recurrence of mildew, and keep your outdoor seating looking professionally maintained through the 2025–2026 seasons.
Frequently Asked Questions
How do I clean outdoor chairs with mold or mildew?
Start by brushing off loose dirt, then rinse the chair thoroughly with water. Mix a solution of warm water and mild detergent, and scrub the affected areas using a soft-bristle brush. For tougher mildew, use a mold cleaner made for the chair’s material or a diluted vinegar solution, then rinse well and let the chair dry completely in the sun. Avoid power washing too aggressively, since it can drive mildew deeper or damage finishes.
What’s the best way to clean aluminum or metal outdoor chairs?
Use a mixture of dish soap and warm water to remove grime, then scrub with a non-abrasive sponge or brush. For oxidation or stubborn spots, you can use a metal-safe cleaner, but avoid harsh abrasives that can scratch protective coatings. Rinse thoroughly, dry with a towel to prevent water spots, and consider applying a protective wax or sealant if the chairs have a painted finish. Regular cleaning helps reduce rust and keeps metal outdoor furniture looking new.
Which cleaning products are safe for fabric or padded outdoor chairs?
Check the care label first, but in general use a mild upholstery or fabric cleaner with cool to lukewarm water. Blot stains first, then gently scrub with a soft brush and rinse carefully to avoid soaking the padding. If the cushions are removable, wash according to the label and allow everything to dry fully before reassembling to prevent mildew. For spot treatment, look for cleaners labeled safe for outdoor fabrics and upholstery—stay away from bleach unless the fabric is explicitly bleach-safe.
How do I remove rust stains from outdoor chair surfaces?
Begin by cleaning off surface dirt with soap and water so you can see the true rust area. For light rust, use a rust remover designed for outdoor furniture or a paste of baking soda and water, then scrub gently and rinse. If the rust is heavy, you may need a stronger product or fine steel wool, but be careful not to damage paint or coatings. After treatment, dry thoroughly and apply touch-up paint or a rust-inhibiting protective coating to prevent rust from returning.
Why is it important to clean outdoor chairs regularly?
Outdoor chairs collect dirt, pollen, and moisture that can cause stains, mildew, and faster wear on materials like wood, metal, and fabric. Regular cleaning also reduces the buildup that makes later stains harder to remove and helps maintain the chair’s finish and comfort. A simple routine—quick rinse and soap cleaning a few times per season—can extend the life of your outdoor patio furniture and keep it looking good for years.
📅 Last Updated: August 02, 2026 | Topic: How to Clean Outdoor Chairs | Content verified for accuracy and freshness.
References
- https://www.cdc.gov/mold/cleanup/index.html
https://www.cdc.gov/mold/cleanup/index.html - Coronavirus Disease 2019 (COVID-19) | Covid | CDC
https://www.cdc.gov/coronavirus/2019-ncov/prepare/cleaning-disinfection.html - Mold Remediation in Schools and Commercial Buildings Guide: Chapter 1 | US EPA
https://www.epa.gov/mold/mold-remediation-schools-and-commercial-buildings - https://www.epa.gov/mold/mold-in-your-home
https://www.epa.gov/mold/mold-in-your-home - Garden furniture
https://en.wikipedia.org/wiki/Outdoor_furniture - Mildew
https://en.wikipedia.org/wiki/Mildew - Google Scholar Google Scholar
https://scholar.google.com/scholar?q=how+to+clean+outdoor+furniture+wood+metal+plastic - Google Scholar Google Scholar
https://scholar.google.com/scholar?q=outdoor+furniture+cleaning+mold+algae+stain+removal - Google Scholar Google Scholar
https://scholar.google.com/scholar?q=patio+chair+cleaning+best+practices+detergent+disinfection - https://pubmed.ncbi.nlm.nih.gov/
https://pubmed.ncbi.nlm.nih.gov/
