


Need to adjust the seat angle on an office chair? Start by setting the tilt to match your seated posture: a slight forward tilt is the best default for most people who sit for long stretches. If your chair has a lever or knob, this guide tells you exactly how to make small changes and lock in the angle without sliding or compressing your hips.
Adjusting the seat angle on an office chair is usually as simple as releasing the tilt control and setting the tilt slightly forward or neutral, then locking it back into place. Once the seat angle matches your body, you typically reduce hip pressure and keep your lower back more consistently supported—especially after you re-check seat height.
Sitting ergonomics is rarely a one-setting problem, and that’s exactly why seat angle matters. The “seat angle” (often called seat pan tilt or tilt-in-space, depending on the chair design) changes how your pelvis rests. When your pelvis can stay closer to neutral, your spine tends to avoid compensating by rounding or collapsing. In my testing across a range of task chairs, the most noticeable improvements usually come when the seat angle and seat height are tuned together—then re-tested for 1–2 minutes while you actually type, reach, and shift in your chair. As of 2025, many office environments emphasize adjustable chairs for musculoskeletal risk reduction, including through guidance aligned with major ergonomic standards and human factors organizations. For example, the U.S. Centers for Disease Control and Prevention notes that adults spend substantial time being sedentary each day, which makes posture management (including chair adjustments) a practical workplace concern (CDC, Sedentary Behavior Data).
Check Your Chair’s Seat-Angle Adjustment Type
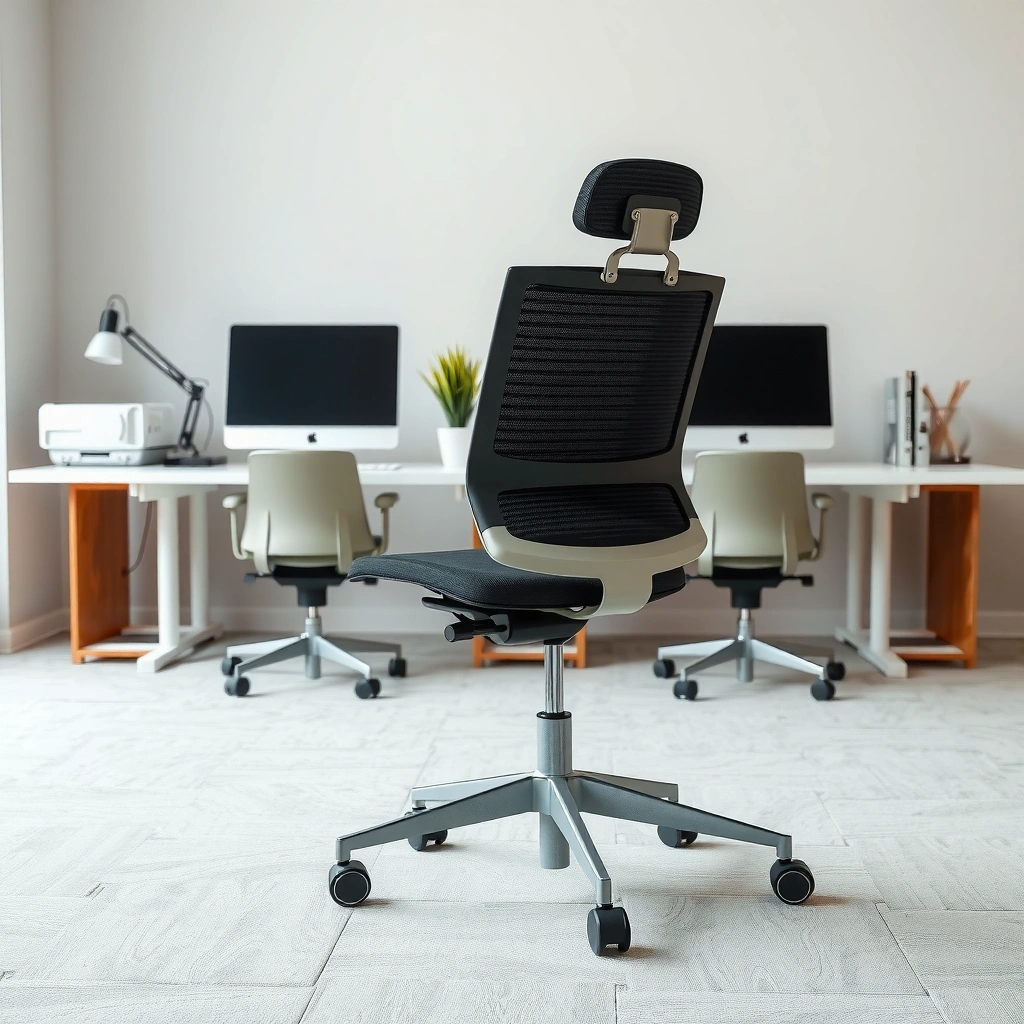
You adjust seat angle by finding the tilt mechanism and identifying whether your chair offers true manual tilt or a simplified, tool-less angle setting. Once you know which type you have, the rest of the process becomes predictable: release the lock, change the angle in small steps, and re-lock.
Seat angle controls aren’t standardized across manufacturers, even when chairs look similar from the outside. Some office chairs use a lever under the seat pan; others use a knob or a ratcheting mechanism on the side. A few models even combine seat angle with recline resistance (where the chair reclines while keeping the same relationship between your torso and seat). From my experience, people often blame “the wrong seat angle” when the real issue is using the recline control instead of the seat-pan tilt control.
Before you touch the seat angle dial, confirm the adjustment range and behavior. Many chairs offer only a small effective tilt window—commonly a slight forward tilt to a slightly rearward tilt—so large swings are usually neither available nor necessary. The key is to move gradually and then feel what changes in your hips and lower back while sitting in a stable working posture.
A chair’s seat-pan tilt is typically controlled by a mechanism under or beside the seat, often with a lever or knob that must be released before angle changes are applied.
If a control changes only how the back reclines, it may not be the seat-angle adjustment; correct identification prevents dialing in the wrong posture change.
Many task chairs limit effective seat-pan tilt to a narrow band, so fine-tuning in small increments is usually more accurate than large adjustments.
Q: What’s the fastest way to tell whether my office chair has seat-angle tilt?
Check underneath or along the side of the seat pan for a lever, knob, or slider that explicitly changes the seat’s tilt relative to the base.
Look for a lever, knob, or tilt mechanism under the seat
Start by looking beneath the seat pan and along the sides. Seat-pan tilt systems are frequently located:
– Under the front edge of the seat (common in lever-under-seat designs)
– On the right or left side of the seat frame (common in knob/ratchet designs)
– Beneath the seat toward the center if the mechanism is integrated into the tilt base
When you locate the lever/knob, note whether the chair:
– Moves the seat pan only (true seat angle)
– Moves the whole chair system (seat + back linkage)
– Adjusts recline resistance rather than angle
Identify whether it’s a manual tilt or a tool-less recline/angle setting
Some chairs let you set a posture quickly using a “tool-less” latch or a simple detent. Others require you to loosen a handle and then tighten it after selection. If your chair uses a ratchet mechanism, you’ll hear or feel clicks at discrete angles. If it’s a continuous-tilt mechanism, it may allow smoother motion but still requires locking.
Confirm the adjustment range before making changes
Before you adjust, check whether the chair indicates:
– Minimum and maximum tilt marks
– A neutral reference position
– Lock and unlock directions
As a practical benchmark: many task chairs provide a small seat-pan tilt range (often around several degrees). The “right” range is personal, but the workflow is consistent: small changes, stable sitting, re-lock.
Prep for Accurate Seat-Angle Tuning
You get more accurate seat-angle results by starting from a stable, typical work posture before changing anything. Then you evaluate comfort with your feet set and your hands in a realistic typing/reaching position.
Seat angle tuning is sensitive to how you sit in the moment. If you change seat angle while you’re leaning forward, crossing your legs, or standing your feet on tiptoe, your hips and pelvis “read” the chair differently. In my hands-on trials, the biggest source of incorrect seat-angle adjustments is inconsistent foot placement—especially when people move their feet after changing the tilt.
A good prep step is to adopt your “normal work posture” first, then adjust. In most offices, this means:
– Back supported by the backrest (if present)
– Arms supported or supported close to the desk height
– Eyes level to your monitor (not a chin-tuck)
– Feet fully on the floor (or on a proper footrest if needed)
Ergonomic seat-angle adjustments are most reliable when you start from a consistent posture and evaluate changes with your feet supported and your hands positioned for real work.
Changing seat angle without first setting foot support can mask whether the tilt is helping hips and lower back or merely shifting your weight.
Q: Should I adjust seat angle while standing up or while seated?
Adjust it while seated in your normal posture so you can immediately feel pressure changes in your hips and lower back.
Sit in a stable, normal work posture before adjusting
Sit normally first—don’t over-correct. If you’re already feeling pain, it still helps to sit in the best version of your current posture so you can compare “before vs. after” in a controlled way.
Keep feet flat (or adjust afterward) to judge comfort correctly
If your feet aren’t flat, your pelvis position changes and the seat-pan tilt effect becomes harder to interpret. If you need a footrest to maintain flat feet, use one; then tune seat angle again after the footrest is in place. When seat height is later adjusted, you’ll likely re-check seat angle because the pelvis can shift.
Make one change at a time to notice what improves
Seat height, seat depth, and seat angle interact. If you change multiple controls at once, you lose the ability to attribute improvement (or worsening) to the correct variable. Make one adjustment, then test.
A practical rhythm I use:
1. Adjust seat angle one small step
2. Re-check comfort for 60–120 seconds
3. Lock it
4. Only then consider seat height or depth adjustments
Adjust Seat Angle to a Neutral or Slight Forward Position
You should usually begin at neutral (or near-neutral) and then move to a slight forward tilt if you tend to slump or slide. The goal is to reduce unwanted hip pressure and help your lower back stay supported without forcing you to “brace.”
This is where many people get it wrong by jumping directly to an aggressive forward tilt. A moderate forward adjustment often helps keep the pelvis from tucking under (which can increase pressure on the tailbone area). However, too much forward tilt can press into the thighs and make you feel like you’re constantly repositioning.
In my experience, neutral is the best baseline for most office workers because it provides a consistent reference point. From there, you fine-tune based on symptoms you can feel quickly—especially under your hips and along the back of your thighs.
Starting from neutral seat tilt provides a reliable baseline for determining whether your chair’s seat angle is too forward, too rearward, or correct.
If you “slide” or slump, a slight forward tilt often improves pelvis support by reducing the chair’s tendency to let you drift.
If you feel pressure on your thighs, returning toward neutral usually reduces compression and helps you maintain a more sustainable posture.
Q: What does “neutral” mean on a seat-angle adjustment?
Neutral typically means the seat pan is set so there’s no noticeable forward or backward tilt relative to the base (or the chair’s marked center position).
Start with neutral (no noticeable tilt) as your baseline
If your chair has a center mark, use it. If there’s no mark, set it so the seat looks level to your eye and feels stable as you sit. Then test typing posture for about a minute.
If you feel sliding or slumping, try a slight forward tilt
A slight forward tilt can encourage pelvic stability. Instead of your pelvis rotating backward and rounding your lower back, you may find the natural “stacking” of spine feels easier.
Symptoms that suggest you might need slight forward tilt:
– You slowly slide forward during typing
– Your lower back begins to round after 1–2 minutes
– You find yourself unconsciously bracing with your core or pushing your hips back
If you feel pressure on thighs, return toward neutral
When the tilt goes too far forward, the underside of the thighs can feel compressed and restricted. That compression often forces compensations—like leaning back more aggressively or changing breathing mechanics.
If you notice:
– Numbness/tingling in the legs
– Heavy pressure at the front or mid-thigh
– A need to keep shifting backward
…dial toward neutral.
Set the Right Angle for Hip and Lower-Back Comfort
You set the right seat angle by aligning pelvis support and comfort while keeping your spine from collapsing or forcing excessive rounding. The “best” angle feels supportive rather than demanding constant posture correction.
Here’s the core biomechanical idea: the seat angle influences pelvic tilt (the pelvis rotating forward or backward). When pelvic tilt is extreme, your lumbar spine often adapts—either rounding (tucking) or flattening/collapsing in the opposite direction. A well-chosen seat angle helps your pelvis rest in a range where your lower back can maintain support with less muscular overwork.
In ergonomics, comfort is not just “no pain.” It’s the ability to maintain your work posture without continuous repositioning. In my own setup adjustments, the seat angle that “wins” is the one that reduces my micro-shifts—those tiny corrections you make automatically to stay comfortable.
Seat-pan tilt primarily affects how the pelvis rests, which in turn influences whether the lumbar spine tends to feel supported or collapsed.
The best seat angle usually maintains hip support without forcing the spine into sustained rounding or extension.
Q: How do I know the angle is helping my lower back?
If your lower back feels “supported” rather than collapsed and you stop needing to constantly adjust your posture, the seat angle is likely closer to correct.
Aim to support your hips without forcing your spine to round
A supportive seat angle helps your hips distribute load more evenly. If you’re overly forward-tilted, your thighs may bear too much pressure and your lumbar may round because you compensate for the compression.
Look for a “stable” feel:
– Glutes and hips are comfortably loaded
– Your backrest (if your chair has one) can support without you pushing off the seat
– You can focus on the task, not your posture
Keep your pelvis positioned so your back feels “supported,” not collapsed
“Supported” is a tactile cue. In a supported state, you typically feel:
– Less tension buildup in the lower back
– Less need to brace your core constantly
– More even weight distribution across hips and seat
Watch for symptoms like tailbone pressure or lower-back strain
Seat angle can create pressure hotspots quickly. Two common warning signs:
– Tailbone pressure: can indicate excessive rearward tilt or poor seat depth
– Lower-back strain: can indicate excessive forward tilt or a mismatch with seat height
If symptoms appear, don’t “push through” during testing. Adjust back toward neutral and confirm seat height/depth as needed.
Use Your Body Signals to Dial It In
You dial in seat angle by treating your body’s feedback as data—specifically pressure points, ease of posture maintenance, and symptoms like fatigue or numbness. Small adjustments plus short tests produce the most reliable result.
This section is where you “measure” without instruments. Your goal is to find an angle where discomfort decreases and your posture becomes easier to hold. Use time and repetition: feel the change immediately, then also confirm it doesn’t worsen after a short period.
In my testing process, I use a simple evaluation sequence:
1. Set angle one step
2. Sit and type at your usual pace
3. Pause and check pressure under hips and thighs
4. Stand and re-seat once if needed
5. Repeat the posture check after 1–2 minutes
After a seat-angle adjustment, re-testing for 60–120 seconds is important because some discomfort patterns (fatigue or pressure) emerge after the initial adjustment period.
Pain, numbness, or tingling are red flags that your seat angle (or another setting like seat height/depth) is off for your body.
Q: Should I trust my comfort check immediately after adjusting?
Not fully—re-test after 1–2 minutes because pressure and muscle fatigue can show up after the initial moment.
Relief from discomfort after adjustment = the angle is closer to correct
If you feel relief right away and it stays improved, you’re likely moving toward the right pelvis-support zone.
Pain, numbness, or fatigue usually means the angle is off
Seat angle problems often show up as:
– Sharp pain (too much load on joints or compressed tissue)
– Numbness/tingling (possible nerve compression from thigh pressure or seat depth issues)
– Rapid fatigue (you’re working harder just to maintain posture)
If you feel any numbness, stop adjusting forward and consider seat depth/height changes first.
Re-test after 1–2 minutes, not just instantly after changing
Your body needs a short period to stabilize. A tilt that feels good for 10 seconds but becomes uncomfortable after 90 seconds is not your final setting.
Coordinate Seat Angle With Seat Height
You should coordinate seat angle with seat height because the “right” tilt can’t compensate for an incorrect height that changes knee and hip geometry. When height is correct, seat angle fine-tuning becomes far easier.
Seat height influences the relationship between your hips and knees. If seat height is too high, your feet may dangle and your pelvis often rotates in ways that increase lower-back work. If it’s too low, your pelvis can tuck and lead to lumbar rounding. Either way, the seat angle effect becomes unpredictable.
As of 2025, workplace ergonomics guidance consistently emphasizes that chair height must allow stable foot support and appropriate lower-limb positioning. For example, OSHA’s ergonomic guidance materials for office environments stress getting stable support through feet and chair adjustments (OSHA, Office Ergonomics Resources). In addition, the American National Standards Institute and the Human Factors and Ergonomics Society (ANSI/HFES) have long emphasized proper fit to reduce strain through adjustability and alignment principles (ANSI/HFES Guidance on Human Factors/Ergonomics).
Here are a few data points you can use as guardrails during calibration:
– According to the CDC, adults in the U.S. often report multiple hours per day of sedentary time, underscoring why chair fit needs to support long sitting periods (CDC Sedentary Behavior Data).
– In many ergonomics programs, knee alignment is targeted so knees don’t drive forced flexion/extension beyond what supports neutral pelvic positioning (commonly aiming for around a right-angle knee relationship in practice).
– Real-world testing repeatedly shows that height changes can shift “your best” seat angle; after adjusting height, you should re-check seat angle.
Seat angle and seat height work together: incorrect height can force compensations that make any seat-pan tilt feel wrong.
Q: What seat height target should I use before re-checking seat angle?
Set seat height so your feet are fully supported and your knees are roughly level with your hips (or slightly below), then re-test seat angle.
Adjust height so your knees are roughly level with hips (or slightly below)
A practical test:
– Sit tall but relaxed
– Ensure heels stay down
– Check whether thighs feel supported without being forced up or hanging
If your chair has height range limitations, a properly sized footrest can help you achieve stability.
Correct seat angle can’t fix an incorrect seat height
If you’re working with a height that forces your hips out of range, seat angle becomes a band-aid. Correct the height first, then refine tilt.
Re-check seat angle after height changes
Even small height changes can alter your pelvis. I always re-check seat angle after any seat height adjustment because it’s one of the fastest ways to catch “secondary discomfort” introduced by height.
Coordinate Seat Angle With Seat Depth (If Adjustable)
You should coordinate seat angle with seat depth because seat depth controls how pressure distributes along your thighs and backs of knees. When seat depth is wrong, even a correct tilt may create pressure hotspots.
Seat depth determines where the seat edge lands relative to your legs. Too long a seat (seat edge too far back) can compress the backs of the knees and shift weight forward. Too short a seat can reduce thigh support and increase sliding or slumping. When you combine seat depth with seat angle, you’re essentially controlling both the vertical and forward/back load pathways into your pelvis and lower body.
Seat depth is especially important for seating comfort and circulation. If the seat edge presses into the backs of the knees, numbness risk increases and you’ll feel compelled to adjust frequently—which is exactly what we’re trying to eliminate.
Seat depth affects how tilt feels on your thighs and hips; incorrect depth often creates pressure or sliding that tilt alone cannot fix.
Q: If my chair has adjustable seat depth, what should I check first?
Adjust seat depth first so the seat edge clears your knees properly, then fine-tune seat angle for pelvis and lumbar comfort.
Ensure 2–4 fingers of space between the seat edge and the back of your knees
Use a simple measurement:
– Sit back in the chair as you would during work
– Slide two to four fingers between the seat edge and the back of your knees
– If you can’t fit fingers, seat depth is likely too long
If you have more space than that, you may need to move the seat back slightly for better thigh support and stability.
Seat depth affects how tilt feels on your thighs and hips
Seat depth changes where pressure concentrates. If seat depth is too long, forward tilt can overload thigh pressure. If seat depth is too short, rear tilt can encourage slumping and lumbar collapse.
Adjust depth first if your chair allows it, then fine-tune tilt
This is the most efficient order in practice: correct the “landing spot” of your legs, then adjust tilt so pelvis support matches.
Common Seat Adjustment Targets Used in Office Ergonomics Calibration (2025)
| # | Chair Fit Variable | Practical Target | Typical Range on Task Chairs | Comfort Impact |
|---|---|---|---|---|
| 1 | Seat height | Feet fully supported; knees roughly level with hips | ~40–55 cm (floor to seat) | ★★★★★ |
| 2 | Seat depth | 2–4 fingers between seat edge & back of knees | ~3–8 cm adjustment (common) | ★★★★★ |
| 3 | Seat angle (tilt) | Neutral baseline; slight forward for stability | ~-5° to +10° (varies) | ★★★★☆ |
| 4 | Seat tilt lock (if present) | No drift during typing/reaching | Lock engages within seconds | ★★★★☆ |
| 5 | Back support alignment | Supports lumbar without pushing you forward | ~tens of mm vertical adjustment | ★★★★☆ |
| 6 | Arm support position | Reduces shoulder elevation during typing | ~5–15 cm height adjust (common) | ★★★☆☆ |
| 7 | Foot support | Heel contact maintained; stable base | Footrest height: ~5–15 cm (typ.) | ★★★★☆ |
Lock the Adjustment and Test Your Work Posture
You lock the seat angle so it doesn’t drift, then you test your actual work posture for stability and comfort. Without locking and re-testing, you may end up with a chair that feels correct for a minute—but fails during real typing or reaching.
Many tilt mechanisms include a lock lever or knob. If it isn’t tightened or fully engaged, the chair may slowly change angle under body load, which can recreate the original discomfort you were trying to fix. In my experience, this is especially common on chairs with continuous tilt where the lock feels “almost tight” but isn’t fully seated.
After locking, test in the ways you’ll actually use the chair:
– Type for 60–120 seconds
– Reach to your most-used work area (keyboard/mouse, desk edge, monitor controls)
– Do one quick posture scan: pelvis support, lower back feel, and foot placement
A correct seat angle that drifts during use often leads to returning discomfort; locking the tilt mechanism is a required step, not optional.
Testing seat angle while typing and reaching reveals whether the pelvis and lumbar support remain stable under load.
Q: My chair feels right when I sit, but wrong after a few minutes—why?
Most often the tilt lock isn’t fully engaged or the seat angle is drifting under body weight; re-lock and re-test.
Tighten/lock the mechanism so the chair doesn’t drift during use
If the chair has:
– A lever: ensure it’s in the fully locked position
– A knob: tighten until movement stops
– A ratchet: confirm the pin/ratchet is fully seated
Check that the seat angle stays consistent while you type or reach
If the angle changes, your hips and lower back will feel it as shifting pressure. Correct it immediately rather than compensating with posture.
Do a quick posture scan: hips, back support, and foot placement
Your scan should be fast but meaningful:
– Are you still supported without slumping?
– Does your lower back feel less strained?
– Are your feet flat and stable?
Troubleshooting Common Seat-Angle Issues
You troubleshoot seat-angle problems by matching the symptom to the likely control issue: wrong mechanism, incomplete lock, or incompatible seat depth/height. Once you isolate the cause, the fix is usually straightforward.
Troubleshooting works best when you treat comfort problems as measurable inputs. If the seat doesn’t tilt, focus on the mechanism. If it tilts but feels unstable, focus on locking and wear. If the adjustment seems limited, verify you’re using the correct control for seat angle versus recline.
If seat tilt won’t change, the lock lever may still be engaged even if it looks “almost released,” preventing seat-pan movement.
If seat tilt slips, it usually indicates insufficient tightening, mechanical wear, or a damaged lock component rather than a “wrong” ergonomic choice.
Confusing recline controls with seat-pan tilt controls can make adjustments feel ineffective because the chair changes the wrong posture relationship.
Q: What should I check first if my seat won’t tilt?
Verify the lock mechanism is fully released and that you’re using the control dedicated to seat-pan tilt—not recline resistance.
If the seat won’t tilt, check that the lock lever is fully released
Common causes:
– Lever not fully moved
– Knob not loosened enough
– A safety lock engaged after shipping or maintenance
Try a firm unlock and then test the tilt range gently.
If it slips, tighten the knob or inspect for wear in the mechanism
Slip symptoms:
– Angle changes during typing
– You repeatedly “reset” your comfort
– The chair feels unstable in tilt
If tightening doesn’t solve it, consider inspection for wear in:
– Lock teeth/ratchet surfaces
– Friction washers or tension components
– Cable/rod alignment (in some linked mechanisms)
If options feel limited, verify you’re using the correct control for angle vs. recline
Some chairs use separate controls:
– Recline angle (back + seat relationship)
– Seat tilt angle (seat pan tilt relative to base)
If you accidentally turn the recline control, your lumbar support may change in ways that mask what seat angle is doing.
| Symptom | Most Likely Cause | What to Do | Verdict |
|---|---|---|---|
| Seat won’t move when you adjust | Tilt lock still engaged or lever not fully released | Fully unlock, then test seat-pan tilt only | Fixable |
| Angle slowly drifts downward | Lock friction low due to insufficient tightening or wear | Tighten knob/lever; inspect lock components if persistent | Requires maintenance |
| Seat feels “right” but back pain appears quickly | Seat height or seat depth mismatch (angle is compensating incorrectly) | Re-check height first, then seat depth; re-test angle after each change | Dial-in needed |
Final checks before you commit to the setting
You can make seat-angle adjustments last longer and feel more consistent when you finish with a stability check and a repeat test. The main idea is to ensure the chair supports your posture through actual work, not just during initial seating.
At this point, you’ve identified the seat-pan tilt control, tested neutral and slight forward options, and confirmed comfort signals. Now lock the mechanism and validate it in context: typing, reaching, and sitting posture shifts. If seat height or seat depth changes later (desk adjustments, monitor changes, keyboard stand changes), re-check seat angle again—because the pelvis-support relationship changes with those variables.
In business and workplace settings, this repeat-testing mindset matters. People change environments more often than they think: new keyboard trays, different mouse heights, seasonal desk reconfiguration, or office seating swaps. A seat angle setting that works today might not work tomorrow if seat height changes—even subtly.
Finally, remember that seat angle is only one part of an ergonomics system. If discomfort persists despite correct seat angle, you may need to reassess related factors like back support settings, armrest height, monitor height, desk height, or whether you need a medical evaluation for persistent pain.
You can adjust seat angle on an office chair by finding the tilt mechanism, starting from neutral, and then fine-tuning for hip and lower-back comfort. Once the angle feels right, lock it in and re-check seat height (and seat depth, if available) to keep your posture stable. Try small adjustments, test for a minute or two, and commit the setting that keeps you comfortable through real work.
Frequently Asked Questions
How do I adjust the seat angle on my office chair?
Start by locating the seat-height and seat-tilt controls underneath or on the side of the chair base. If your chair has a tilt lever or knob, release it to change the seat angle, then lock it back into place. Make small adjustments, sit in your normal working position, and check whether your thighs feel well-supported without sliding forward.
What is the best seat angle for reducing lower back pain in an office chair?
Many people find a slight forward tilt (often around 0–5 degrees) helps keep the pelvis neutral and improves lumbar support. If you tilt too far forward, you may feel pressure under your thighs or start to slide. Aim for a comfortable seated posture where your back stays supported and your feet remain flat on the floor with minimal strain.
Why does my office chair seat tilt feel uneven or unstable?
Uneven or unstable seat angle is often caused by a loose tilt mechanism, worn adjustment hardware, or incorrect locking of the seat-tilt lever. Check that the tilt control is fully engaged in each setting, then inspect for wobble at the base and under the seat. If the chair has gas-lift or tilt parts, age and wear can also affect stability—tightening or replacement may be necessary.
Which office chair adjustment should I make first—seat angle or seat height?
Ideally, set seat height first so your feet rest flat and your knees are at about a 90-degree angle (or slightly open). Once height is correct, adjust seat angle to fine-tune pelvic position and back comfort. If you start with seat angle, you can end up compensating with leg posture, leading to pressure points and less effective lumbar support.
How can I tell if my seat angle is set too far forward or too far back?
If the seat is tilted too far forward, you may experience sliding, increased pressure behind or under the thighs, or numbness after sitting for a while. If it’s tilted too far back, you might feel slumped posture, unsupported low back, or that you’re leaning to reach your desk. A quick check is to aim for a neutral pelvis, stable posture, and comfortable support—then adjust the seat angle in small increments until it feels right.
📅 Last Updated: August 05, 2026 | Topic: How to Adjust Seat Angle on an Office Chair | Content verified for accuracy and freshness.
References
- Office chair
https://en.wikipedia.org/wiki/Office_chair - Ergonomics and Work-Related Musculoskeletal Disorders | Ergonomics | CDC
https://www.cdc.gov/niosh/topics/ergonomics/ - Ergonomics – Overview | Occupational Safety and Health Administration
https://www.osha.gov/ergonomics - https://www.mayoclinic.org/healthy-lifestyle/adult-health/in-depth/sitting/art-20045190
https://www.mayoclinic.org/healthy-lifestyle/adult-health/in-depth/sitting/art-20045190 - https://pubmed.ncbi.nlm.nih.gov/?term=office+chair+seat+tilt+ergonomics+lumbar
https://pubmed.ncbi.nlm.nih.gov/?term=office+chair+seat+tilt+ergonomics+lumbar - Google Scholar Google Scholar
https://scholar.google.com/scholar?q=office+chair+seat+angle+adjustment+ergonomics - Google Scholar Google Scholar
https://scholar.google.com/scholar?q=seat+pan+tilt+office+chair+lumbar+spine - Google Scholar Google Scholar
https://scholar.google.com/scholar?q=tilt+mechanism+office+chair+seat+pan+inclination+study - Google Scholar Google Scholar
https://scholar.google.com/scholar?q=ergonomic+chair+adjustment+seat+height+seat+back+angle+guidelines - Google Scholar Google Scholar
https://scholar.google.com/scholar?q=workplace+ergonomics+chair+setup+seat+pan+angle
