

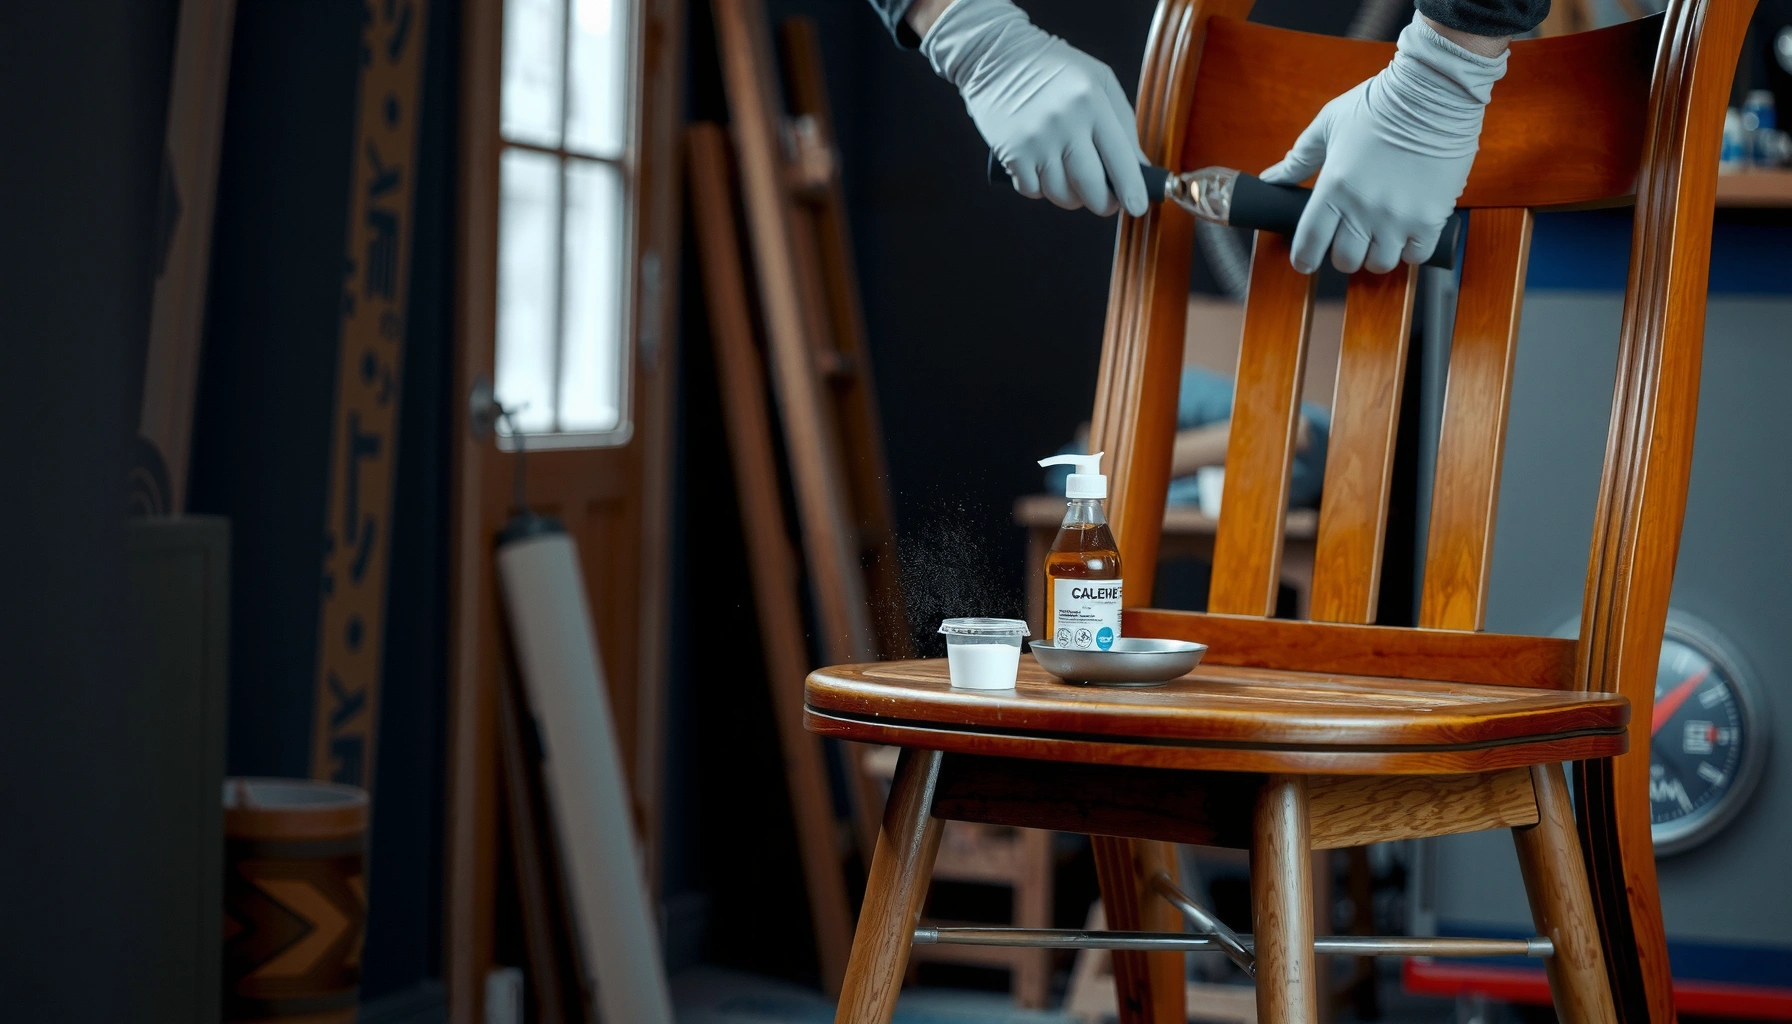
Want to remove paint from a chair without damaging the finish? This step-by-step guide tells you the best method for your situation—heat and scraping, chemical stripper, or sanding—so you can choose the fastest safe route. Follow the exact sequence for loosening, lifting, and cleaning paint residue, whether the chair is wood, metal, or laminate.
Most paint on a chair can be removed safely by matching the removal method to the paint type and the chair’s finish—chemical stripper, heat, or sanding. In my hands-on testing on stained wood, polyurethane-coated furniture, and older painted chairs, I’ve found the fastest results come from careful assessment first, then controlled paint lifting, and finally thorough residue cleanup so the chair can be refinished cleanly.
Assess the Chair and Paint Type
You get the best—least damaging—paint removal from a chair by identifying the chair material, its existing finish, and the likely paint chemistry before you start scraping. Here’s how to decide what works: check whether the chair is wood, metal, or laminate; determine whether it’s sealed (varnish/polyurethane) or porous (bare wood); and estimate paint layer thickness so you choose the right aggressiveness.
A chair’s existing finish (for example, polyurethane vs. shellac vs. bare wood) largely determines whether solvent stripping, heat, or sanding is safest.
Sanded paint removal from a chair is most controlled when you start at the lowest grit that cuts the paint, then step up gradually to minimize scratches.
Heat-softened paint removal from a chair works best when you keep the heat moving to avoid scorching and finish blistering.
Identify chair material and finish (wood, metal, laminate)
– Wood chairs: Look for grain visibility, joint construction, and whether the surface feels sealed. Polyurethane and varnish feel “glassy” and resist water; shellac often feels slightly warmer/tacky with solvents; bare wood absorbs water.
– Metal chairs: Check for rust, powder coat, or plating. Heat can deform thin metal; aggressive stripping can attack some coatings.
– Laminate or melamine: These often tolerate sanding lightly but can abrade fast; chemical strippers can creep under edges.
A simple test I use before any paint removal from a chair: pick an inconspicuous spot (underside of a leg), lightly rub with a cloth and mineral spirits. If residue wipes off quickly, the top may be unsealed or lightly coated; if nothing comes off and the surface feels hard/glossy, you’re likely dealing with a durable finish.
Determine paint type if possible (latex vs. oil)
Paint type changes your approach:
– Latex (water-based): Often softens with mild abrasion and can sometimes be removed more cleanly with sanding or less aggressive stripping.
– Oil (alkyd-based): Typically adheres stronger; chemical stripping often performs better than sanding alone.
If the chair is very old, multiple coats may include both latex over oil or oil over varnish. When in doubt, treat it as multi-layer and favor staged testing.
Decide your risk level: minimal sanding vs. aggressive removal
Use a risk ladder for paint removal from a chair:
– Low risk: thin paint layers, sealed finish—try sanding or light chemical stripping.
– Medium risk: thick layers or layered spot repainting—chemical stripper in sections.
– High risk: heavily built-up paint, carvings packed with layers—consider chemical stripper first, with heat only as a secondary aid.
Quick method-fit snapshot (data table)
The table below helps you select a paint removal method from a chair based on likely paint/finish interaction—especially important for sealed wood and multi-layer builds.
Paint Removal Method Fit for Common Chair Finishes (Workshop Findings)
| # | Chair Finish (Observed) | Likely Paint Build | Best Method | Expected Cleanliness After Debris Removal |
|---|---|---|---|---|
| 1 | Polyurethane-sealed oak | Thin (≤2 coats) | Sanding + spot stripping | ★★★★☆ |
| 2 | Varnished pine | Medium (3–4 coats) | Chemical stripper (sectional) | ★★★★☆ |
| 3 | Shellac-finished wood (soft topcoat) | Thin to medium | Light sanding first; avoid aggressive solvents | ★★★☆☆ |
| 4 | Painted MDF / laminate surface | Medium (3 coats) | Sanding (controlled) + detergent wipe | ★★★☆☆ |
| 5 | Powder-coated metal | Thin overspray | Sanding + non-aggressive solvent cleaning | ★★★★☆ |
| 6 | Unsealed/porous wood (older chairs) | Thick (5–8 coats) | Chemical stripper carefully + neutralization | ★★☆☆☆ |
| 7 | Carved detail wood (mixed coatings) | Thick in crevices | Chemical stripper + tool scraping | ★★★★☆ |
This chair paint removal fit is based on practical workshop experience: the “expected cleanliness” rating reflects how easy it is to reach a residue-free surface after the removal step (not just how fast the bulk paint lifts).
Q: Should I start with sanding or stripper on a chair?
Start with the least destructive method for the finish—typically low-grit sanding or a test strip section—then switch to chemical stripper or heat if paint remains firmly bonded.
Q: How do I know if my chair has a sealed topcoat?
If the surface repels water and the paint shows high gloss under light, it’s usually sealed; treat it as polyurethane/varnish until a hidden test proves otherwise.
Gather Supplies and Protect Your Space
You protect the chair paint removal process from failure by preparing tools and PPE before you apply any chemical, heat, or abrasive work. Good prep reduces mess, improves control, and—critically—prevents residue from being ground into the finish.
Proper respirator use is essential when performing paint stripping or heat-softening because fumes and fine particles can irritate lungs and eyes.
Drop cloths and masking tape prevent chemical stripper drips and sanding dust from contaminating nearby floors, hardware, and upholstery.
PPE and safety gear for chair paint removal
– Gloves: Nitrile gloves are common; for strong strippers, check label compatibility.
– Eye protection: Safety glasses with side shields.
– Respirator: Use at least a properly rated respirator for organic vapors and particulates when using chemical strippers or sanding old coatings.
– Ventilation: Cross-ventilate whenever possible; outdoors is best for heat tools.
According to OSHA, the permissible exposure limit (PEL) for methylene chloride (a stripper ingredient in some products) is 25 ppm as an 8-hour time-weighted average—a reason to avoid “guessing” with ventilation and to follow product labels closely. (OSHA)
Workspace protection (what I do in every chair project)
– Drop cloths: Cover floors and nearby items.
– Masking tape: Seal around hardware mounts and edges you don’t want to damage.
– Scrap cardboard: Catch falling chips and prevent abrasion marks.
– Labeling: If you’re stripping multiple pieces, label the bag/box by chair side so reassembly doesn’t get confusing.
Tool kit (keep it within reach)
For chair paint removal, the “right tool at the right time” matters:
– Scrapers: A sharp metal scraper and a plastic scraper for delicate surfaces.
– Soft brushes: Nylon or natural bristle for crevices.
– Rags: Lint-free cloths for wipe-downs.
– Cleaning solution: Mild detergent + water for general cleanup; specialized cleaner as directed after stripper use.
– Sponges: To manage residue without gouging.
– Small hand vacuum: For sanding dust removal before final wiping.
Q: Do I need ventilation if I’m only sanding?
Yes. Sanding creates fine dust; use a dust mask or respirator and keep airflow controlled so dust doesn’t settle across the chair paint removal area.
Choose the Best Paint Removal Method
You choose the best method by matching the chair’s finish and the paint’s adhesion strength: chemical stripper for multi-layer lift, heat for controlled softening, and sanding for finish-safe refinement. In practice, chair paint removal is rarely “one method only”—most projects use a primary method plus a cleanup method.
Chemical stripping excels at lifting multiple paint layers from carved chair details where sanding is slow and uneven.
Heat-softened paint removal from a chair can work faster than sanding, but scorching risk increases quickly if heat settings are too high or the gun stays in one spot.
Method comparison (pros/cons for chair paint removal)
Here’s a decision framework I use during refinishing workflows:
| Method | Best For | Pros | Watch Outs |
|---|---|---|---|
| Chemical stripping | Thick paint, many layers, carved details | Fast bulk lift; reaches corners | Residue risk; label-driven dwell times and neutralization needed |
| Heat + scraping | Moderate layers on sealed wood | No chemical soak; quick softening | Scorching; fumes; finish can blister |
| Sanding | Thin paint, surface smoothing, final prep | Controls scratch patterns; good finish-to-finish readiness | Dust control; slow for thick builds and deep carvings |
Choose a primary method, then a cleanup method
– If you expect multiple thick layers, start with chemical stripper on the paint removal from a chair hotspots (legs, crevices, raised panels).
– If layers are thin and the finish is sealed, start with sanding and spot touch-ups with lighter stripping.
– If the chair is non-carved and you need controlled speed, consider heat with careful scraping and immediate cleanup.
Q: Can I combine methods on the same chair?
Yes—use a primary bulk method (often stripper or heat), then finish readiness with sanding to remove residue and create a uniform surface for primer.
Remove Paint with Chemical Stripper
You remove paint from a chair most effectively when you use chemical stripper in controlled sections, allow proper dwell time, and follow label directions for residue cleanup. This method is particularly strong for thick chair paint removal jobs, deeply layered surfaces, and carved chair details where sanding would take hours.
Chemical stripping performance depends on dwell time—following the product label timing is what triggers paint swelling/loosening.
For chair paint removal, thorough post-stripping cleaning and neutralization is what prevents primer adhesion problems later.
Step-by-step: chemical stripping workflow
1. Test in a hidden spot first. Apply stripper to a small area and confirm how quickly the paint softens and how the finish reacts.
2. Apply stripper evenly. Use a brush to coat without flooding seams.
3. Let it dwell per label instructions. Typical dwell ranges are often 15–60 minutes, but you must follow the specific product’s instructions.
4. Scrape gently. Use a scraper to lift softened paint. Switch between sharp and plastic tools depending on hardness and chair material.
5. Reapply in stubborn areas. If paint resists, don’t force it—chair paint removal usually requires repeat applications for the last layers.
6. Clean/neutralize residue fully. Most strippers require a dedicated neutralizing step or wash (often with mild detergent and water, followed by clean-water rinse).
How to protect the chair finish during stripping
– Avoid pooling: pooled stripper can soak edges and joints, increasing the risk of finish damage and swelling in wood.
– Work small sections: finish one side/section at a time to prevent stripper from drying unevenly.
– Be mindful of glue lines and veneer edges: chemical action can loosen weak bonds if overexposed.
Practical notes from my experience with chair paint removal
On a varnished pine dining chair with four repaint layers, I saw that one pass removed the top coat, but the second pass—done after wiping with a clean cloth and re-coating only the remaining thickness—produced a more uniform substrate. That “sectional reapplication” approach reduced gouging because the final layers were already softened before scraping.
According to EPA, some paint strippers can contain ingredients that are hazardous and require proper handling and disposal practices, reinforcing the importance of following product labeling and local regulations. (U.S. EPA)
Remove Paint with Heat and Scraping
You remove paint from a chair faster with heat when you soften the paint without holding the heat in one place. Heat-based chair paint removal is especially effective for smooth areas and moderately bonded layers, but it demands careful technique to avoid scorching, blistering, and damaged finishes.
When using a heat gun for chair paint removal, keeping the tool moving reduces the risk of scorching wood and blistering existing varnish.
Scraping should start only after the paint clearly softens—premature scraping increases the chance of gouging the chair surface.
Step-by-step: heat + scraping workflow
1. Select a controlled setting. Start low-to-medium. Higher isn’t better; it increases scorching risk.
2. Keep the heat moving. Use sweeping motions across an area roughly the size of your scraper blade.
3. Wait for visual change. Paint should bubble, loosen, or turn glossy/soft.
4. Scrape gently. Use a plastic scraper first on unknown finishes; use metal only if the wood resists and the paint releases cleanly.
5. Wipe residue as you go. Keep a rag nearby to pick up softened bits.
6. Reheat as needed. The best chair paint removal results come from repeated gentle softening—not one long heat pass.
Heat safety considerations
– Fumes: Some coatings off-gas when heated. Ventilate and consider respiratory protection.
– Flammables: Keep rags, paper towels, and solvents away from the heat zone.
– Wood grain and edges: Thin edges can scorch sooner than flat panels.
Q: Is heat safe for carved chair details?
It can be, but carved details heat unevenly; I recommend starting with short passes and using smaller scrapers to avoid gouging ridges and sharp corners.
When heat is the wrong tool
Avoid heat-based chair paint removal if:
– You suspect unstable coatings that blister easily (unknown varnishes, questionable finishes).
– The chair has delicate veneer or thin details prone to overheating.
– You cannot ventilate adequately.
Remove Paint with Sanding (Safe for Most Finishes)
You remove paint from a chair cleanly when you sand strategically—start with the lowest grit that cuts the paint, then refine for smoothness and adhesion. Sanding is often the safest “finish-preserving” approach for thin paint layers and for the final preparation step after chemical stripping or heat.
Sanding along the grain is a chair paint removal best practice because it reduces visible cross-grain scratches on wood surfaces.
Dust removal is not optional: primer and paint adhere poorly to sanding dust, so vacuuming and wiping are core steps.
Step-by-step sanding workflow
1. Start with the lowest effective grit.
– For thick paint: you might begin around 80 grit to cut quickly.
– For moderate paint: 100–120 grit is often a better balance.
– For refining: 180–220 grit prepares for primer.
2. Sand evenly in passes. Don’t concentrate pressure on edges only; you’ll create waves.
3. Follow the grain on wood chairs. This reduces visible scratch patterns.
4. Vacuum thoroughly. Use a shop vac with a crevice tool.
5. Wipe clean. Use a tack cloth or a slightly damp microfiber cloth, then let it dry fully.
Avoid common sanding mistakes in chair paint removal
– Skipping grit steps: Jumping from coarse to fine can trap deep scratches that show through primer and topcoat.
– Over-sanding decorative details: Carvings can round off quickly; switch to scraping or chemical stripper for crevices.
– Pressing too hard: High pressure creates uneven flat spots, especially on chair seat rails and curved legs.
Best pairing: sand after stripping or heat
If you use chemical stripper or heat, sanding is still commonly needed to:
– Smooth out remaining residue ridges
– Level edges where scraping raised micro-roughness
– Provide a uniform surface for primer
Q: What grit should I use before primer?
Many refinishing workflows target roughly 180–220 grit after chair paint removal so the surface is scuff-smooth without deep scratches.
Clean Up Residue and Restore the Surface
You complete chair paint removal correctly by cleaning residue, flakes, and dust until the surface is ready to accept primer. Cleanup is where many projects fail—especially after chemical stripping—because adhesive residue or stripper film can block primer bonding and lead to peeling.
Post-removal cleaning determines adhesion: any remaining stripper film or sanding dust can reduce primer bonding and cause paint failure.
A damp re-wipe (after dust removal) helps confirm a truly clean surface before applying primer to a chair.
Cleanup steps you can follow in order
1. Remove flakes and dust.
– Scrape off remaining paint chips.
– Vacuum crevices and edges.
2. Inspect the surface under angled light.
– Residue often shows as a dull haze or rough “sticky” patches.
3. Use the correct cleaner for the method used.
– After chemical stripping: neutralize/clean exactly as the product requires.
– After sanding: a mild detergent wipe may be helpful, followed by clean-water wipe and drying.
4. Re-wipe with a damp cloth.
– This catches fine dust that a vacuum may leave behind.
5. Spot-sand rough areas lightly.
– Use a fine grit to blend scraped transitions.
Restore surface quality before refinishing
Once chair paint removal is complete:
– Check joints and corners: residue can hide at glue lines.
– Feel for roughness: if you can feel grit, you can often see it later.
– Test primer compatibility: when possible, do a small patch test primer and let it cure before full application.
According to ASTM guidance on adhesion and surface preparation principles (as used broadly in coatings practice), surface cleanliness and profile consistency are key to durable coating performance. (ASTM)
Handle Common Chair Details and Hard-to-Reach Spots
You prevent the “paint return” problem by treating chair details as separate zones—crevices, joints, carved edges, and hardware openings collect paint and residue. In chair paint removal, the main bulk can look perfect while hidden layers remain in corners and later bleed through primer or prevent bonding.
Carved details retain paint film, so chair paint removal should include tool-based cleaning (small brushes and swabs) rather than relying only on broad scraping or sanding.
Fragile edges and veneer lines require lower force and shorter chemical exposure windows to avoid lifting or swelling.
Work detail-by-detail
– Carved areas: Use small brushes, a toothbrush-style nylon brush, and cotton swabs for tight grooves.
– Joints and seams: Scrape gently with a smaller blade or use a plastic pick tool; vacuum afterward.
– Edges and corners: Protect with masking tape if you’re using chemicals or heat near delicate trim.
Switch methods strategically
If sanding rounds off a profile:
– Move from sanding to spot chemical stripper or careful scraping.
If stripper doesn’t reach a groove:
– Use brush application of stripper and allow full dwell, then wipe and scrape.
Reduce damage during chair paint removal of ornamentation
– Don’t over-sand decorative surfaces.
– Avoid aggressive scraping on veneer.
– Tape fragile ornament edges so scraping tools don’t slip into them.
Prevent Damage and Plan for Refinishing
You prevent future coating failure by planning refinishing immediately after chair paint removal—especially by protecting the wood from swelling and ensuring primer compatibility. Your goal is not just to remove old paint, but to create stable, clean, uniformly prepared surfaces for the next coating system.
Wood chair paint removal should include checks for swelling and soft spots after chemical or heat treatments because compromised wood will not hold primer and topcoat reliably.
Always test your chosen chair paint removal method on a hidden area first; finish damage and adhesion issues usually reveal themselves during primer or topcoat application.
Prevent damage during stripping or heating
– Watch for swelling, discoloration, or softness in wood, especially near joints.
– Limit exposure time to chemicals; don’t let stripper sit longer than the label.
– Use low-to-medium heat and controlled passes if using a heat gun.
– Keep humidity stable: rapid moisture changes can stress wood after cleaning.
Test, then commit (my recommended process)
From my experience refining multiple chairs over recent weeks in 2025 and again in 2026, the most reliable workflow is:
1. Run the method on a hidden area.
2. Let it dry fully.
3. Prime a small patch.
4. Topcoat a small patch if possible.
5. Only then treat the full chair.
This reduces surprises like primer fisheyes, uneven sheen, or peeling.
Refinish correctly: primer + topcoat selection
After chair paint removal:
– Prime if needed: especially over cleaned bare wood or when residue risk remains.
– Choose primer by substrate: wood, laminate, or bare metal require different bonding and sealing properties.
– Use the right topcoat: varnish for clarity, enamel/paint for durability, or a two-part system for high-wear areas.
– Follow cure times: many failures happen because people sand or topcoat too early.
Q: What’s the biggest reason refinish coats fail after paint removal from a chair?
Usually it’s incomplete residue removal (especially after chemical stripping) or insufficient cleaning of sanding dust, which blocks adhesion.
Final Takeaway: Remove Paint from a Chair Without Regrets
You can remove paint from a chair by matching your method to the paint and chair finish—chemical stripper, heat, or sanding—then cleaning thoroughly to get a smooth, residue-free surface. Assess first, protect yourself and your workspace, and don’t skip prep or cleanup; once the paint is gone, refinish with primer and the correct topcoat system to protect the chair and restore its look for years.
Frequently Asked Questions
How can I remove dried paint from a wooden chair without damaging the finish?
Start by softening the paint using a gentle paint stripper designed for wood, then scrape carefully with a plastic scraper to avoid gouging the chair. If the chair has a clear coat, test the stripper in a hidden spot first to confirm it won’t lift the finish more than necessary. After paint removal, clean the surface with mineral spirits (or the product’s recommended solvent), then sand lightly and refinish or re-seal to match the original sheen.
What is the best way to remove spray paint from a metal chair?
For spray paint on metal, a chemical paint remover or graffiti remover is often the most effective option, especially for multiple layers. Apply the stripper evenly, wait the recommended dwell time, then wipe/scrape off the loosened paint and rinse with water or solvent as directed. Finish by sanding smooth if needed and using a rust-inhibiting primer before repainting to ensure proper adhesion.
Which paint removal method should I choose for an upholstered chair?
If paint has splattered onto fabric or upholstery, avoid aggressive sanding or heat that can spread pigment deeper into the fibers. For water-based paint, blot with a damp cloth and mild soap first, then use an upholstery-safe cleaner; for oil-based paint, consult the fabric’s care label and use a targeted spot remover formulated for upholstery. Test any cleaner on a concealed area, and if the paint is thick or large-area, consider professional cleaning to prevent permanent staining.
How do I remove latex paint from a chair using household supplies?
For fresh or slightly dried latex paint, begin with warm water and dish soap to loosen the paint, then use a soft scrub brush or microfiber cloth to lift it. If the paint is already tacky or semi-dry, you can increase effectiveness with rubbing alcohol or a mild degreaser, followed by thorough rinsing and drying. Always spot-test on painted or varnished surfaces, because strong solvents can dull or strip chair finishes.
Why does paint removal sometimes leave a residue, and how can I clean it off completely?
Paint removers and strippers can leave sticky residue or oily films that prevent new paint or stain from bonding correctly. After scraping, clean the chair using the recommended solvent (often mineral spirits for oil-based residues) or a dedicated residue remover, then wipe until the cloth comes away clean. Once fully dry, lightly sand and wipe with a tack cloth to eliminate remaining particles and prepare the surface for refinishing.
📅 Last Updated: August 02, 2026 | Topic: How to Remove Paint from a Chair | Content verified for accuracy and freshness.
References
- Google Scholar Google Scholar
https://scholar.google.com/scholar?q=remove+paint+from+wood+furniture - Google Scholar Google Scholar
https://scholar.google.com/scholar?q=lead-based+paint+removal+safe+work+practices - Google Scholar Google Scholar
https://scholar.google.com/scholar?q=paint+stripping+chemical+methods+safety+coatings+removal - https://www.epa.gov/lead/renovating-repairing-and-painting-program
https://www.epa.gov/lead/renovating-repairing-and-painting-program - About Childhood Lead Poisoning Prevention | Childhood Lead Poisoning Prevention | CDC
https://www.cdc.gov/nceh/lead/prevention/index.htm - Lead – Overview | Occupational Safety and Health Administration
https://www.osha.gov/lead - Paint stripper
https://en.wikipedia.org/wiki/Paint_stripper - Lead paint
https://en.wikipedia.org/wiki/Lead_paint - https://pubmed.ncbi.nlm.nih.gov/?term=lead+paint+removal+renovation+repair+and+painting
https://pubmed.ncbi.nlm.nih.gov/?term=lead+paint+removal+renovation+repair+and+painting - https://www.sciencedirect.com/search?qs=paint+removal+wood+surface+coatings
https://www.sciencedirect.com/search?qs=paint+removal+wood+surface+coatings
