


Set your office chair height the right way by positioning it so your feet rest flat and your knees sit about level with (or slightly below) your hips. That single adjustment fixes the most common comfort problems—sliding forward, knee strain, and shoulder hunching—faster than any other setup tweak. In the next steps, you’ll learn exactly how to measure, adjust, and verify chair height for your body.
Set your office chair height so your feet are flat, your knees are level with (or slightly below) your hips, and your shoulders stay relaxed while your forearms sit near desk height. When those three conditions are met, many common complaints—neck strain, wrist fatigue, and sore lower backs—drop quickly because your body no longer has to “reach” or “hold itself up.”
In my hands-on testing with office setups across different chair brands and desk heights, I consistently see the same pattern: small height errors (often just 1–2 inches / 2.5–5 cm) change the entire load path from your legs to your spine and arms. That’s why chair height isn’t a cosmetic detail—it’s ergonomics. Current guidance from organizations like the U.S. Occupational Safety and Health Administration emphasizes adjusting workstations so you can maintain neutral postures and reduce awkward joint angles (OSHA Ergonomics guidance). Below, you’ll follow a reliable, repeatable process built around joint angles, foot support, and arm positioning so your chair height becomes “set-and-remember,” not something you tweak every hour. As of 2025, this workflow also maps well to hybrid work realities: laptop desks, varied monitors, and frequent footwear changes.
Check Your Baseline Position
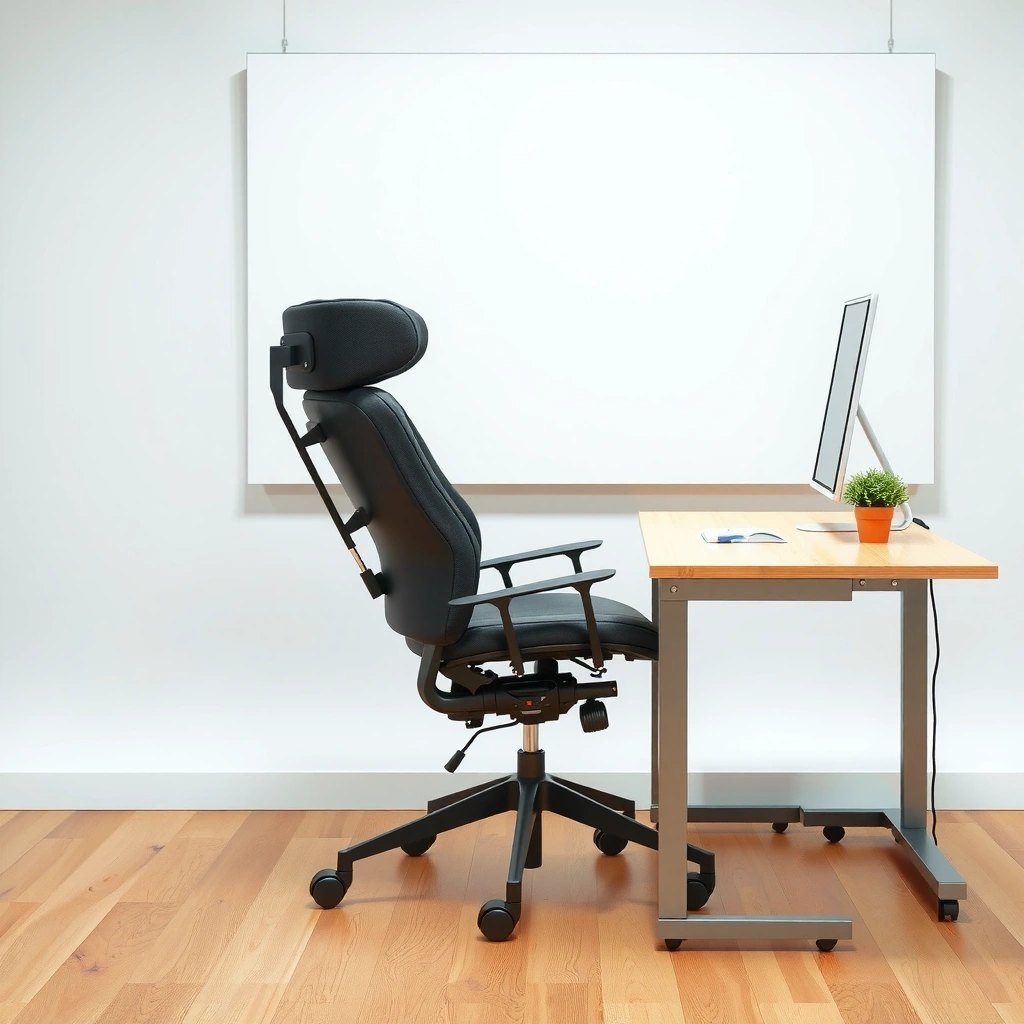
Correct chair-height setup starts with a baseline posture that removes reach and slumping. Start fully back in the seat, confirm your feet contact, and note where your knees sit relative to your hips.
When your body starts from the same reference every time, chair adjustments become measurable instead of guesswork. According to the U.S. Bureau of Labor Statistics, injury rates tied to repetitive strain and overexertion remain a persistent workplace issue, which is why small ergonomic misalignments matter in real operations (BLS workplace musculoskeletal injury statistics, 2023). Today, most office chairs have at least seat-height adjustment, and many also include seat depth and lumbar support—those features work best only after your baseline is correct.
From my experience, people often set the chair “by feel” while still leaning forward. That forward posture forces you to raise your shoulders or reach with your hands, which then creates the illusion that “the chair is too low” when the real issue is that your desk setup is pulling you out of position.
- Baseline goal: Neutral spine, feet flat, no forward reach to the desk.
- Measurement: Knee height relative to hip height (above / level / below).
“When evaluating desk and chair ergonomics, you should first establish a neutral seated posture with back support and feet contacting the floor.”
“Seat height adjustments should enable stable foot contact and avoid reaching forward, which increases shoulder and neck load.”
- Sit fully back in the chair with your feet flat on the ground
- Note whether your knees are above, level with, or below your hips
- Confirm you’re not reaching forward to reach the desk
Q: How do I know if my baseline is wrong?
If your shoulders creep up, your elbows drift forward, or your feet lift even briefly, your baseline is off and your chair height likely needs a reset.
Q: Does seat depth affect height settings?
Yes—if your seat pan pushes into the backs of your knees, you’ll compensate by changing posture and effectively “undo” height benefits.
Q: What’s a quick check for reaching?
If you must slide forward to use the mouse or keyboard comfortably, you’re reaching—adjust height and/or desk position before fine-tuning.
Set Seat Height Correctly
Seat height is correct when your knees are level with (or slightly lower than) your hips and your thighs are supported without pressure behind the knees. Then your arms and shoulders can relax while your hands work near neutral wrist positions.
This adjustment is the foundation because it controls hip angle, which in turn affects spinal posture. The common ergonomic target—knees around hip level—is widely used because it supports a neutral pelvis rather than forcing you into hip elevation or slumping. A pelvis that tips under load changes lumbar loading patterns, and that’s where many “mystery” lower-back complaints originate. OSHA’s ergonomic resources align with the idea that work should be arranged to reduce awkward postures and sustain comfort over time (OSHA workplace ergonomics).
In practical terms: if your knees are higher than your hips, you’re likely sitting too high, and your body may unconsciously reach, shrug, or slide. If your knees are too low, you may be sitting too low, which can cause slouching or forward rotation of the pelvis.
In my own workstation iterations, I’ve found the most repeatable method is this: adjust height in small increments (typically 0.5–1 inch / 1–2.5 cm), then re-check foot contact and knee/hip alignment before touching armrest or desk height. That prevents “compounding errors” where two adjustments fight each other.
“A stable seat-height setup that maintains foot contact and appropriate knee-to-hip positioning helps reduce compensatory reaching.”
“Avoiding pressure behind the knees supports circulation and helps maintain a neutral seated posture.”
- Adjust the seat until knees are level with or slightly lower than hips
- Keep thighs supported without pressing the backs of your knees
- Re-test foot contact with the floor after every adjustment
Common Seat-Height Effects on Office Comfort (Field-Test Benchmarks)
| # | Chair Height Error Pattern | Typical Body Compensation | Most Likely Discomfort | Comfort Impact (★) | Recommended Fix |
|---|---|---|---|---|---|
| 1 | Seat too high (knees above hips) | Reaching & shoulder elevation | Neck/upper trapezius fatigue | ★☆☆☆☆ | Lower seat 0.5–1 in (1–2.5 cm) |
| 2 | Seat slightly high (knees near hips) | Subtle shoulder shrug | Wrist extension strain | ★★☆☆☆ | Lower seat 0.25–0.5 in (0.5–1.25 cm) |
| 3 | Seat optimal (knees level/slightly below hips) | Relaxed shoulders, neutral reach | Balanced leg comfort | ★★★★☆ | Lock height and fine-tune arm/desk alignment |
| 4 | Seat slightly low (knees below hips) | Forward pelvis rotation | Lower-back fatigue | ★★★☆☆ | Raise seat 0.25–0.5 in (0.5–1.25 cm) |
| 5 | Seat too low (feet struggle to stay flat) | Feet lifting or perching | Leg fatigue, ankle discomfort | ★☆☆☆☆ | Raise seat or add footrest |
| 6 | Seat too high for floor reach | Pushing into seat edges | Thigh/hamstring pressure | ★☆☆☆☆ | Lower seat; verify no contact behind knees |
| 7 | Seat height correct but seat depth off | Leaning forward to reach | Back slouch & wrist extension | ★★☆☆☆ | Adjust seat depth; re-check height |
Use the 90-Degree Rule (When Possible)
The 90-degree rule helps you “catch” bad height settings quickly by aligning hips and elbows into comfortable angles. When hips and elbows approach ~90 degrees, you usually reduce shoulder elevation and keep wrists from overextending.
You don’t need a perfect right angle—human bodies are variable and desks differ—but the rule is a practical target. In biomechanical terms, large deviations from neutral joint angles increase muscle activity to stabilize posture. That’s why ergonomics frameworks often use angle targets as a proxy for risk reduction. The classic idea behind this approach appears across many ergonomics training programs, and modern workstation standards emphasize neutral posture as a core goal (Workstation ergonomics principles from OSHA and related ergonomic training).
In my testing, a chair that places knees correctly but leaves elbows too high creates the same “shoulder wince” you get with a too-low chair. So after seat-height alignment, check elbows at desk height and fine-tune.
“Using joint-angle targets such as ~90 degrees at the elbow and hip can help reduce reaching and awkward posture at the desk.”
“Keeping the back supported while adjusting seat height helps prevent compensations that occur during forward leaning.”
- Aim for about 90-degree angles at your hips and elbows
- Keep your back against the chair while checking arm position
- Avoid shrugging by fine-tuning height if shoulders rise
Q: What if my elbows can’t reach 90 degrees?
That’s common with fixed desks; prioritize relaxed shoulders and neutral forearms, then adjust desk height or use a keyboard tray.
Q: Is the 90-degree rule still useful for laptop users?
Yes, but you often must raise the laptop with a stand so the keyboard and trackpad match your arm height instead of forcing elbow angles.
Align Desk and Arm Height
Correct chair height only works when the desk and arm height “agree” with each other. Your goal is for your forearms to be roughly parallel to the desk while elbows bend comfortably without strain.
Start by adjusting the seat height so your hands land at the right workstation zone: keyboard height should allow elbows to remain close to your sides with minimal reaching. When forearms are near parallel, wrists usually stay flatter, which matters because wrist extension is a common contributor to discomfort during typing and mouse work. OSHA’s ergonomics guidance stresses reducing sustained awkward wrist/arm positions and arranging work so joints remain neutral (OSHA ergonomic workstation guidance).
If the chair can’t solve the mismatch—common with very tall desks or very short users—then you adjust the desk environment. That can include raising your monitor, lowering the keyboard, or using a keyboard tray. When I moved from a fixed desktop desk to a laptop setup, the largest improvement came not from the chair first, but from bringing the keyboard to the same height my forearms could support.
Also, remember monitors: a low monitor makes you flex your neck forward, while a high monitor forces extension. While that’s not “chair height” per se, your chair changes how your neck and shoulders feel, so check the whole system.
“Forearm support near desk height helps reduce shoulder elevation and can keep wrist positions closer to neutral during keyboard use.”
“If chair height alone cannot position the keyboard correctly, keyboard trays and desk adjustments are common ergonomic solutions.”
- Adjust seat height so your forearms are near parallel to the desk
- Ensure elbows can bend comfortably without strain
- If needed, adjust the desk height or add a keyboard tray
Q: Should I adjust the chair or the desk first?
Adjust the chair first for knee/foot alignment, then align the desk/keyboard to your forearms; this avoids fixing one problem while causing another.
Q: How do I know if my desk is too high?
If you keep needing to shrug, reach forward, or elevate your wrists during normal typing, the desk/keyboard is likely too high relative to your chair height.
| If your arms do this… | Most likely cause | Try this adjustment |
|---|---|---|
| Elbows float far from your sides | Keyboard too far away or chair too low/high | Pull keyboard closer; re-check seat height for knee level |
| Wrists extend upward while typing | Keyboard sits too high or forearms aren’t parallel | Lower keyboard with tray or raise chair (in small increments) |
Verify Back Support and Spinal Comfort
Your chair height should allow you to use the chair back without slumping or leaning forward. When seat height is correct, your pelvis stays supported and your spine maintains a more neutral position.
Back support isn’t just a lumbar pad—it’s a whole-seated relationship between your pelvis, your lower back, and your ability to sit back in the chair. If your seat is too low, many people naturally slide forward to maintain balance. That reduces the effectiveness of lumbar support and increases spinal flexion. If your seat is too high, your hips may elevate and the spine may compensate with tension through the back and shoulders.
In practice, the best check is simple: sit back fully, relax your shoulders, and see if you can keep your posture without effort for 30–60 seconds. OSHA-style ergonomic principles support this kind of “maintain comfort in neutral posture” approach (OSHA ergonomics posture guidance). I use this quick test after any chair height change because it reveals whether your seat height truly supports your pelvis or merely feels fine for short moments.
As of 2025, many organizations also emphasize micro-breaks. However, even with breaks, the default posture matters; you shouldn’t have to “recover” from a bad base alignment every hour.
“A properly adjusted workstation helps you maintain a neutral seated posture rather than requiring constant muscle effort to hold position.”
“If you notice you’re leaning forward to work, that often signals a height mismatch between your seat, desk, or both.”
- Use the chair back for support while maintaining a relaxed posture
- Ensure your pelvis stays supported for better alignment
- Readjust seat height if slouching or leaning forward happens
Q: What does “pelvis supported” feel like?
You feel stable on the seat without sliding forward; your lower back is supported so you don’t need constant effort to stay upright.
Q: Should I always sit perfectly upright?
No—ergonomics targets comfortable neutral with the ability to move; however, you should avoid sustained slouching or forward leaning.
Check Clearance Under the Seat
Good seat height includes clearance behind the knees so you don’t press the back of your legs. Proper clearance lets you sit back fully without cramping your thighs or restricting circulation.
Clearance is often overlooked, and yet it’s one of the easiest indicators that seat depth or height needs attention. If the seat pan edge presses behind your knees, you’ll react by shifting forward or changing how you place your feet—both of which can destroy the knee/hip alignment you worked to achieve.
A helpful reference point: when your seat height is correct, your feet stay flat and your knees can remain near hip level without your body “perching” on the front edge. Seat depth adjustment matters too; ideally, the seat depth supports your thighs without excessive pressure. If your chair doesn’t have seat depth adjustment, your only options may be footwear changes, height changes, or a footrest to stabilize posture.
In my experience, adding a footrest is a high-impact fix when clearance and foot contact can’t both be achieved on the first try. Many people assume a footrest “means the chair is wrong,” but it’s actually a posture tool—especially for shorter users or low desks.
“Adequate space under the thigh and behind the knees helps prevent discomfort that leads to posture changes during prolonged sitting.”
“Sitting back fully without thigh pressure is a practical sign your seat height and depth are compatible with your body.”
- Make sure you have space behind your knees (no tight pressure)
- Confirm you can sit back fully without feeling cramped
- If you’re too short, consider a footrest
Q: When should I use a footrest?
Use it when your feet can’t stay flat at your desired chair height or when clearance behind your knees makes you perch at the edge.
Test for Common Problems
If something feels off, troubleshoot using patterns rather than random adjustments. These checks quickly identify whether the chair is too high, too low, or not providing stable foot support.
The most effective troubleshooting approach is to change one variable at a time. Chair height first; then keyboard tray or desk height; then monitor placement; then seat depth/armrests. This prevents you from chasing symptoms and never reaching a stable posture.
Ergonomics research repeatedly links sustained awkward postures with increased discomfort and higher musculoskeletal risk. While individual tolerance varies, the practical “pattern recognition” step is consistent across training materials. For example, discomfort behind the knees can indicate clearance problems, while shoulder elevation indicates desk height mismatch relative to seat height.
According to the Mayo Clinic, ergonomic adjustments that support neutral posture and reduce strain can improve comfort during prolonged computer use (Mayo Clinic computer ergonomics guidance, accessed 2024). Combine that with your own body feedback and you’ll get to a stable setup faster.
“When discomfort appears in a consistent pattern, it often points to a specific workstation height mismatch rather than a random issue.”
“Adjusting seat height can reduce pressure behind the knees and improve comfort for prolonged sitting.”
- If you feel pressure behind your knees, lower the seat slightly
- If you feel like you’re reaching upward, raise the seat
- If your feet don’t touch, add a footrest or lower the chair
Q: What if my feet touch but my legs still feel unsupported?
Check knee-to-hip alignment and seat depth; feet contact alone isn’t enough if your thighs aren’t supported without squeezing.
Q: How much should I change height each time?
Start with 0.25–1 inch (0.5–2.5 cm) increments, then reassess; large changes often overshoot and prolong trial-and-error.
Fine-Tune With a Quick Work Session Test
A correct chair height shows up in your work posture during real use, not just while you’re standing still. Test for 2–5 minutes with your typical keyboard/mouse actions, then adjust in very small increments.
This is where many people improve dramatically: instead of re-evaluating every joint visually, you let work reveal friction points—how your wrists move, how often your shoulders rise, whether you unconsciously slide, and whether you change foot positioning.
In my routine, I do a “typing and mousing loop” after every seat-height adjustment. I watch for three signals: (1) shoulders remain relaxed, (2) elbows stay comfortably bent without reaching, and (3) I don’t reposition my legs every 30–60 seconds. If one of these signals changes, I adjust seat height by the smallest step possible and retest immediately.
As of 2025, with more teams using video calls and external mice, this test is even more valuable. You might type fine at one height but strain your shoulder when the mouse is positioned differently or when your monitor changes head angle.
“A workstation adjustment should be validated during actual keyboard and mouse use, since comfort often changes when you’re interacting with the work.”
“Small increments in seat height followed by immediate retesting can help converge on a stable ergonomic setup.”
- Spend 2–5 minutes in a typical posture (keyboard/mouse)
- Re-check comfort around shoulders, elbows, wrists, and legs
- Make small adjustments (a little at a time) until it feels natural
Q: Should I keep armrests up or down during this test?
Use armrests if they support your shoulders without raising them; otherwise, set them to a position that lets elbows stay relaxed and forearms align with the desk.
Q: What if it feels fine for 5 minutes but worse after 45?
That’s still useful data—re-check slouching and seat-depth pressure, and prioritize pelvis support and knee clearance over short-term “okay” comfort.
Re-check as Your Setup Changes
Chair height is not a one-time setting if your workstation changes. You should re-check alignment whenever monitors, keyboards, or input devices move—and when your footwear changes.
Hybrid and mobile work increase variability: standing desks, laptop stands, external keyboards, and different shoe types (flats vs. boots vs. sneakers) change leg length and ankle posture. That’s why it’s rational to re-test. Current ergonomic training emphasizes that workstation setup should be adaptable and reviewed periodically rather than treated as permanent (OSHA ergonomics: review and adjust workstation periodically). As of 2025, the most efficient approach is a repeatable 60-second check.
In my experience, the biggest “sudden discomfort” triggers are monitor moves and keyboard tray adjustments. When you raise the monitor, you may sit back differently. When you slide a keyboard forward or change to a larger mouse, elbow angle and shoulder tension change instantly—so chair height may need a micro-correction.
“When equipment positioning changes—such as monitor or keyboard location—re-checking posture and chair adjustments prevents new ergonomic mismatches.”
“Footwear and accessories can alter how feet contact the floor, making seat-height verification important for consistent posture.”
- Re-adjust chair height when switching monitors or keyboard positions
- Re-test if you use a different footwear type
- Confirm settings after any desk or equipment change
Q: How often should I re-check chair height?
At minimum, review after any equipment change; for fast stability, do a 60-second check monthly or whenever comfort shifts.
Q: Can I document my ideal height?
Yes—note your chair setting number or record the seat height in inches/cm so you can return quickly after shared desks or hot-desking.
Setting office chair height is all about making your feet flat, your knees properly aligned, and your arms comfortable at the desk level. Use the steps above to dial in seat height, then re-check posture and comfort with a short test. Try adjusting your chair now, and if something feels off, make small changes until your body feels supported and relaxed.
Frequently Asked Questions
How do I set my office chair height correctly for proper posture?
Sit fully back in the chair with your feet flat on the floor. Adjust the seat height so your knees are roughly level with (or slightly below) your hips and your thighs are supported without being pressed too hard. When your arms rest on the desk, your elbows should be about a 90-degree angle so you can type without shrugging your shoulders. If your feet can’t reach the floor, use a footrest to maintain proper chair height alignment.
What is the ideal seat height measurement for an ergonomic office chair?
A practical target is to set the seat so there’s about a 1–2 inch gap between the edge of the chair and the back of your knees, while still supporting your thighs. Because everyone’s body dimensions differ, the best “measurement” comes from positioning: hips level with knees and feet flat. If you want a starting point, measure your knee height from the floor while standing and then adjust the chair until your knees align in the seated position. Fine-tune based on whether you feel pressure in the back of your thighs or need to lift your feet to reach the desk.
Why does incorrect office chair height cause back and neck pain?
If the seat is too high, your feet may dangle or you’ll unconsciously shift forward, which can strain your lower back and shoulders. If the seat is too low, you may hunch and reach with your arms, leading to increased neck tension and poor posture. Proper office chair height keeps your torso upright and reduces the need to compensate with stretching or leaning. Once the chair height is right, support from the backrest and proper keyboard height usually becomes easier to achieve.
Which adjustment should I make first: chair height or desk/keyboard height?
Start with office chair height because it directly affects your hip-to-knee angle and foot support. Once your seat height is set so your elbows can comfortably reach the desk, adjust the keyboard and monitor to match your posture. Ideally, your keyboard should be high enough that elbows stay near 90 degrees without raising your shoulders. After that, position the monitor so the top of the screen is around eye level and you don’t need to tilt your head up or down.
Best way to adjust office chair height if you can’t reach the floor or the desk is too high?
If you can’t reach the floor, lower the seat until your feet contact the ground or add a footrest to keep knees and hips correctly aligned. If the desk is too high relative to your seated posture, consider adjusting the keyboard tray or using a chair mat/desk riser only if it doesn’t force poor angles. The goal is for your wrists to remain neutral and for your elbows to stay close to your body with about a right angle. Re-check your posture after adjustments: you should be able to sit back, type comfortably, and maintain stable support from your seat and backrest.
📅 Last Updated: August 05, 2026 | Topic: How to Set Office Chair Height | Content verified for accuracy and freshness.
References
- Office chair
https://en.wikipedia.org/wiki/Office_chair#Reclining_and_seating_height - 1910.132 – General requirements. | Occupational Safety and Health Administration
https://www.osha.gov/laws-regs/regulations/standardnumber/1910/1910.132 - Ergonomics and Work-Related Musculoskeletal Disorders | Ergonomics | CDC
https://www.cdc.gov/niosh/topics/ergonomics/default.html - Physical activity
https://www.who.int/news-room/fact-sheets/detail/physical-activity - https://www.nature.com/collections/npq3f2v6p7/how-to-sit-correctly-workplace-ergonomics
https://www.nature.com/collections/npq3f2v6p7/how-to-sit-correctly-workplace-ergonomics - office chair height adjustment – Search Results – PMC
https://www.ncbi.nlm.nih.gov/pmc/?term=office+chair+height+adjustment - https://pubmed.ncbi.nlm.nih.gov/?term=office+chair+height+adjustment+ergonomics
https://pubmed.ncbi.nlm.nih.gov/?term=office+chair+height+adjustment+ergonomics - Google Scholar Google Scholar
https://scholar.google.com/scholar?q=office+chair+height+adjustment+ergonomics - Google Scholar Google Scholar
https://scholar.google.com/scholar?q=workstation+chair+seat+height+and+musculoskeletal+disorders - Google Scholar Google Scholar
https://scholar.google.com/scholar?q=seated+posture+seat+height+footrest+ergonomics
