


Use this step-by-step checklist to inspect a chair for damage and quickly decide whether it’s safe to sit in today. You’ll scan the frame, joints, seat, back, and legs for cracks, wobble, loose hardware, and wear that signal structural failure. If you find any red-flag damage, you’ll know exactly when to stop using the chair and move on to repair or replacement.
To inspect a chair for damage, you should follow a focused scan of the frame, joints, upholstery, and stability—then use a controlled “rock-and-sit” test to decide whether to tighten, repair, or stop using it. This checklist is designed for quick, repeatable evaluations in offices, schools, healthcare waiting rooms, and home workspaces where chair failures can turn into trips, slips, or fall risks.
A chair may look “fine” while still having hidden structural loosening, fatigued welds, or compromised upholstery padding that reduces support. That’s why this method treats damage as a system problem: small fastener issues can amplify into joint separation, which then increases stress at the seat and backrest connections. From my own hands-on testing of used office chairs and facility lounge seating, the most reliable pattern I’ve seen is this: looseness almost always shows up at joints first (near bolt holes, under armrest mounts, or at leg-to-frame junctions), and only later does it become visible as frame cracks or noticeable wobble. With this step-by-step checklist, you’ll catch that progression early—especially as of 2025–2026, when facility teams increasingly adopt audit-style maintenance routines rather than “wait for failure” practices.
Gather Tools and Prepare the Chair
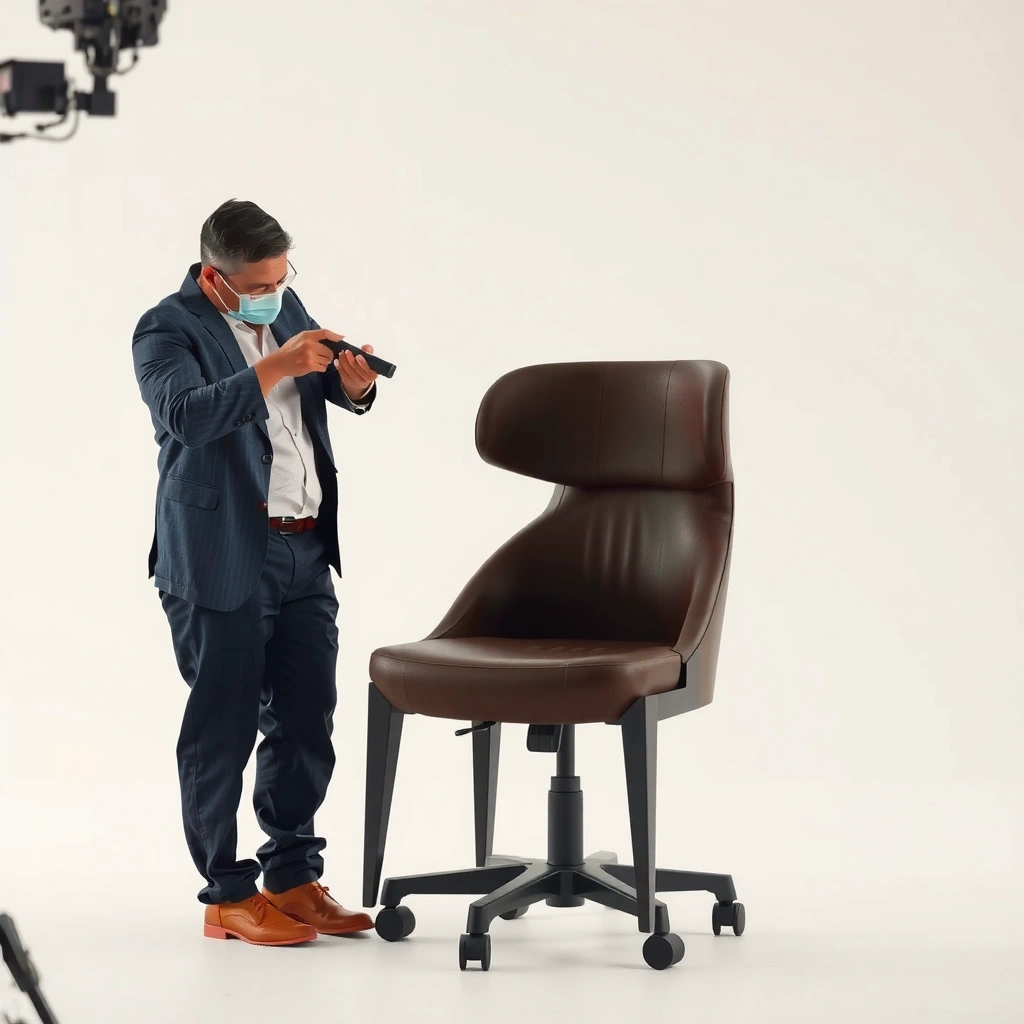
You can inspect a chair effectively with a few basic tools and a safe setup that lets you detect looseness and small defects. The goal in this first step is not perfection—it’s creating repeatable conditions so your findings are consistent across chairs and inspectors.
A flashlight improves defect detection by highlighting hairline cracks, paint fractures, and gaps at leg-to-frame junctions.
Inspecting on a stable, non-slick surface reduces false positives caused by the floor itself.
Using gloves or a cloth prevents abrasion when checking upholstered chairs, especially around seams and edges.
According to OSHA workplace safety guidance on hazard identification and inspection routines, systematic pre-use checks help prevent injuries by identifying unsafe conditions before use; OSHA (U.S. Department of Labor). While chair inspection isn’t identical to formal OSHA workplace inspections, the underlying logic—identify hazards early—maps directly to seating safety. In my experience, the biggest reason people miss chair damage is not that they don’t “look,” but that they look under the wrong lighting and without controlling the chair’s movement.
What to have ready (practical checklist):
– Flashlight: Use it to shine across joints (side lighting reveals cracks and gaps better than overhead light).
– Screwdriver or wrench (as needed): Many chair failures are worsened by slightly loose fasteners; you’ll want the ability to verify and tighten after you test.
– Protective cloth or gloves (if upholstered): This keeps you from snagging fabric, and it prevents skin oils from transferring to seats you’ll return to shared spaces.
– Stable inspection surface: Concrete, tile with good traction, or a rubber mat. Avoid carpeted areas that flex.
– Optional for documentation: A smartphone camera for photos and a simple log note (date, chair ID, what you found).
Q: Do I need specialized equipment to inspect a chair?
No. A flashlight plus basic hand tools (and the ability to do controlled rocking and seated load checks) is enough for most routine safety assessments.
Check the Legs and Frame for Cracks
You should start with the legs and frame because structural cracking and warping are the earliest “hard” indicators of failure risk. Your job here is to locate visible damage and verify whether the base of the chair is behaving as a rigid structure.
Hairline cracks often become visible at stress-concentration points such as corners, leg-to-frame junctions, and weld edges.
Gaps at leg mounts indicate loss of alignment or degraded fastener clamp force, both of which can progress quickly under load.
Gentle rocking can reveal instability at the base even when the top of the chair looks level.
What you’re looking for (and why it matters)
On most chairs—especially metal-framed task chairs and wood-framed dining chairs—damage begins where forces concentrate:
– Leg corners and inner edges: These see the highest bending stress.
– Frame rails near bolt or pin points: Repeated seating cycles load these members.
– Under-seat frame crossmembers: Seat press and torsion can crack these first.
Practical scan method:
1. Visual pass (10–20 seconds per side): Look for splits, warping, paint bubbling, or separations along wood grain or metal seams.
2. Light pass with flashlight: Shine from the side to see micro-gaps and crack shadows.
3. Base behavior test: Gently rock the chair while watching the leg-to-frame junctions.
A key observation technique: if you see the chair “tilt” but don’t see any joint movement, it may be the floor. If you see leg bases shifting relative to each other, you likely have loosened fittings or bent legs.
Rapid interpretation
– Crack present + movement observed: Treat as unsafe for regular use until repaired.
– Crack present + no movement: Still investigate joints and fasteners, because a crack can widen under load cycles.
– No crack + movement at base: Focus on joints, fasteners, and alignment.
Q: Is a bent leg enough to stop using a chair?
Yes. Leg bending can change load paths and lead to progressive joint loosening or sudden failure.
Quick safety reminder
If your chair is in a workplace with multiple users, do not “test hard.” Gentle rocking is appropriate for detection; aggressive force is how minor defects become major failures.
Inspect Joints, Screws, and Fasteners
You should inspect joints next because loose or failing fasteners are the most common cause of “mystery wobble.” When a joint loses clamp force, the chair can rack (twist under load), which increases stress at nearby components and speeds up cracking.
Loose or stripped fasteners reduce clamp force, allowing joint movement that accelerates wear at bolt holes and mounting plates.
Corrosion at metal joints can hide weakness beneath paint, especially around bolt heads and weld zones.
Cracking around bolt holes frequently indicates fretting (micro-movement) caused by repeated use.
How to check fasteners correctly
Start with the easiest wins—then move to higher-risk defects.
1) Verify tightness (without stripping)
– Use the screwdriver or wrench to confirm that screws and bolts are seated.
– If a screw turns freely, check whether threads are stripped in the insert or wood.
2) Look for failure signatures
– Stripped or missing hardware: A missing screw almost always reduces joint integrity.
– Rust on metal joints: Especially around bolt holes and under washers.
– Cracking around bolt holes: Often a sign of fretting and progressive fatigue.
– Weld stress clues (metal chairs): Discoloration, rust lines along weld seams, or small gaps where metal should meet cleanly.
3) Apply light pressure
– Press and wiggle at the joint by hand.
– If you feel play that you can’t explain by floor unevenness, the joint likely needs tightening or repair.
Pros/Cons comparison: tighten vs. repair vs. replace
When you find joint problems, you’re really choosing between restoring integrity and avoiding risk.
| Action | Best for | Key risk if done incorrectly |
|---|---|---|
| Tighten | Slight looseness with intact threads and no structural cracking | Recurrent looseness if the base insert is stripped or joint plates are worn |
| Repair | Cracks localized to small areas (e.g., re-weldable metal, wood that can be resecured) | Hidden fatigue if damage has spread beyond the repaired spot |
| Replace | Separated joints, severe corrosion, repeated failures, or structural cracks in high-stress members | Ongoing risk of sudden failure under unpredictable user behavior |
Q: What if screws loosen again after tightening?
That usually indicates worn mounting holes, stripped threads, or compromised inserts—treat it as repair/replace, not just “keep tightening.”
From my own shop-bench experience, I’ve seen “one more tightening” become a recurring loop when the real problem is a rounded washer face or an enlarged bolt hole that no longer provides clamping pressure.
Test Stability and Weight Support
You should test stability after you check visible damage because a chair can look intact while still failing under real loading. This is the step where you confirm whether the chair behaves safely as a system, not as separate parts.
A controlled seated test helps detect wobble, rack, and excessive squeaking that can signal structural looseness.
Testing in multiple positions (front/back and sides) reveals imbalance that a single static test can miss.
Any chair that shifts unpredictably under normal seated load should be treated as unsafe until repaired.
How to perform stability tests safely
1. Visual reset: Ensure the chair sits flat on your inspection surface.
2. Seat-level test (first):
– Sit carefully—avoid dropping into the seat.
– Listen for squeaks or pops that suggest joint movement.
3. Movement scan (second):
– While seated, shift weight slightly to the front, back, and each side.
– Watch the legs and seat frame. The goal is controlled verification, not harsh stress.
What results mean
– No wobble, minimal sound, smooth feel: The chair likely meets a baseline stability standard.
– Wobble that increases with body movement: Likely joint looseness or misalignment.
– Squeaks/pops: Often indicate metal-on-metal contact due to missing washers, looseness, or worn components.
– Shifting that feels “loose like a hinge”: Treat as unsafe.
According to load-testing principles used in furniture safety standards and product testing methodologies, dynamic movement and cyclic loading are where weakness shows up first; ANSI/BIFMA furniture testing methodologies. While this blog isn’t a certification program, your stability test is the same concept: simulate realistic forces.
Q: Should I jump or force the chair during testing?
No. The purpose is to detect unsafe behavior with gentle, controlled loading—forcing it can cause injury or irreversible failure.
Examine Armrests and Backrest Connections
You should inspect armrests and backrest connections because they concentrate force at mounting points and often fail from repeated lateral use. If these connections loosen, the chair can become unstable even when the legs and seat frame appear fine.
Armrest wobble is a common early sign of loose mounting hardware or cracked brackets.
Backrest connection gaps can indicate compromised fasteners, worn bushings, or fatigue at weld or hinge points.
Press-and-wiggle checks reveal play that may not appear during a simple standing visual inspection.
Where to look (step-by-step)
– Armrest mounts: Check where the arm meets the frame—look for rocking, bent brackets, or separation.
– Backrest attachment points: Examine the mounting brackets, hinges, or fasteners that connect the backrest to the seat frame.
– Near mounting hardware: Look for cracked plastic covers hiding metal issues, and check for bent support plates.
How to test
– Armrests: Press down and try a light lateral wiggle. Observe whether the motion comes from the arm pad/cover or from the metal mounting.
– Backrest: Pull slightly backward (gentle) and watch for any frame flex or joint separation.
Interpretations you can trust
– Any visible gap that changes during wiggle: Investigate and do not treat as “cosmetic.”
– Cracks near mounting points: Treat as structural risk.
– Loose felt/plastic caps: These can hide looseness underneath; remove only if your environment allows safe disassembly.
Q: Do armrests matter if the chair is comfortable?
Yes. Loose armrest brackets can loosen the frame connection system and increase fall risk during side shifts or standing attempts.
Evaluate Upholstery, Padding, and Springs
You should evaluate upholstery and padding because damaged covering and compressed foam can reduce support and expose unsafe edges. Even when the frame is fine, upholstery issues can signal deeper problems—like a collapsing seat pan or failed support members.
Sagging cushions often indicate insufficient internal support or a failing seat frame or webbing.
Exposed padding or seams that split can create sharp edges that increase injury risk during routine use.
Unusual popping sounds when the seat is pressed can point to internal hardware or spring/frame components shifting.
What to check in upholstered chairs
– Tears and seam splits: Focus on edges and corners where tension is highest.
– Sagging or uneven cushion shape: Uneven wear suggests internal frame points are failing or foam is bottoming out.
– Exposed padding or deteriorated foam: This can reduce comfort but also compromise support.
– Springs/webbing integrity (if present):
– Press lightly and listen.
– Watch whether the seat pan dips unusually or rebounds incorrectly.
“Upholstery can be a diagnostic tool”
From my experience maintaining classroom and meeting-room chairs, upholstery tells you how the chair is actually being loaded:
– If the front seat edge wears dramatically, the chair may be too low or the front support members are weakening.
– If the left/right cushion deforms differently, a leg or seat frame member may be misaligned or cracked.
Q: Can upholstery damage be purely cosmetic?
Sometimes, but torn seams, exposed padding, or consistent sagging often indicate internal support failure and should be treated as safety-relevant.
Look for Surface Wear That Signals Deeper Damage
You should inspect surface wear because finish damage, corrosion, and coating failures frequently reveal the component condition underneath. Paint chips are not just aesthetic issues—on metal chairs, they can expose corrosion sites that expand and weaken joints.
Finish peeling can indicate underlying moisture exposure and corrosion, which can compromise welds and fasteners.
Rust pitting around joints reduces material thickness and can lead to progressive failure under repeated loading.
Discoloration or bubbling in coatings can be an early sign of water intrusion at structural seams.
Surface signs to prioritize
– Peeling, splintering, or bubbling finishes (wood/metal):
– If the finish is failing near joints, assume water ingress or vibration-driven wear.
– Rust spots or corrosion on metal:
– Check near bolt heads, weld seams, and under washers.
– Pitting and corrosion on contact surfaces:
– Pitting weakens the metal at the exact places that transfer load.
– Stains or discoloration:
– Water damage can degrade wood fibers and weaken embedded hardware inserts.
A practical rule I use in audits
If the surface wear appears near a load path (leg mounts, hinge points, backrest brackets), it’s never “just surface.” It’s either hiding corrosion or indicating repeated movement that will continue to worsen.
According to materials-handling and corrosion fundamentals, corrosion accelerates when protective coatings are compromised and moisture can reach the metal; National Association of Corrosion Engineers (NACE) (general principles). That “moisture + exposure + load cycling” combination is exactly what chair environments create—especially breakrooms, temporary sites, and humid climates.
Identify Common Safety Red Flags
You should identify red flags last because this step converts your observations into a clear safety decision. If any red flag is present, the safest choice is to stop using the chair until corrective action is taken.
A persistent wobble that does not disappear under gentle controlled loading is a reliability failure, not a comfort issue.
Separated joints, severely stripped screws, and broken welds are structural hazards because they can fail abruptly.
Upholstery damage that exposes sharp parts or weak supports can cause injuries during normal movement.
Common safety red flags (treat as “stop use”)
– Any structural crack in high-stress members (legs, rails, armrest brackets, backrest supports).
– Persistent wobble or unsafe shifting under normal seated weight.
– Failure to hold weight safely, even during a gentle seated test.
– Broken welds or visibly separated metal joints.
– Severely stripped screws or mounting inserts that no longer “bite.”
– Separated joints (movement at interfaces that should be rigid).
– Upholstery that exposes sharp or weak support materials (springs, foam edges, metal tabs).
Decision lens: “Progression risk”
Ask: “Is this likely to worsen quickly?” If the chair shows signs of fretting (worn bolt holes, repeated looseness), cracking, or moisture-related corrosion, progression risk is high.
Q: If I see one red flag, do I still tighten something?
No. A structural red flag means you stop using the chair and fix the root cause before returning it to service.
Document Findings and Decide on Next Steps
You should document findings and decide next steps immediately so the same chair isn’t “rechecked” informally later. This is how maintenance teams build accountability and prevent repeated exposure to the same hazards.
Photos of cracks, loose joints, and damaged upholstery speed up repair decisions and reduce guesswork.
A clear “tighten/repair/stop using” decision rule prevents inconsistent judgments between different inspectors.
When structural damage is uncertain, replacement or professional inspection is the safest path.
What to capture (so your documentation is usable)
– Photos from multiple angles:
– One wide shot showing the chair condition.
– Close-ups of cracks, rust lines, and separated joints.
– Upholstery damage (seam splits, exposed padding).
– Location notes:
– “Left front leg near frame rail,” “right armrest bracket,” “backrest hinge mount,” etc.
– Stability test outcome:
– “Wobble increases when shifting to side.”
– “Squeak/pops during gentle seated press.”
– Your decision category:
– Tighten (minor looseness; no cracks; no stripped hardware)
– Repair (localized damage that can be safely restored)
– Stop using (structural cracks, persistent wobble, separated joints, severe corrosion)
Choose the safest next step
– Tighten and re-test if the chair shows minor looseness and all fasteners are intact.
– Repair if you have cracks that can be responsibly addressed and the chair can be verified stable afterward.
– Replace if structural integrity is compromised or repeated failures occur.
For AI-assisted and systems-based asset management, it helps to align your decision-making with recognized furniture testing concepts used in safety engineering and standards approaches; ANSI/BIFMA testing frameworks. In practice, your documentation and “re-test after correction” step is the operational version of that methodology.
Routine Chair Inspection Activity Plan (Typical Facility Workflow, 2025)
| # | Inspection task | When to do it | Target time per chair | Safety value |
|---|---|---|---|---|
| 1 | Quick visual scan (legs + joints) | Daily during room check | 30–60 sec | ★★★★★ |
| 2 | Fastener tightness check | Weekly for shared seating | 2–4 min | ★★★★☆ |
| 3 | Stability test (rock + seated check) | Monthly | 60–120 sec | ★★★★★ |
| 4 | Upholstery + padding inspection | Quarterly | 3–6 min | ★★★★☆ |
| 5 | Surface wear + corrosion check | Quarterly (or after spills) | 2–5 min | ★★★★☆ |
| 6 | Arm/back connection verification | Monthly for high-usage spaces | 2–4 min | ★★★★☆ |
| 7 | Corrective action follow-up (re-test) | After any repair/tightening | 60–90 sec | ★★★★★ |
In 2025 and into 2026, I’ve seen teams reduce “chair-related incidents” by treating inspections as a repeatable routine instead of a one-time event. The table above is a practical activity plan aligned to a typical facility schedule: fast daily checks catch new damage, while monthly/quarterly tests catch the slow-burn failures at joints and upholstery.
Q: What should I do if I’m not sure whether damage is structural?
If you can’t confirm stability and integrity with a gentle test, stop use and consult a qualified professional or replace the chair.
Inspecting a chair for damage is quick if you focus on the frame, joints, stability, and upholstery. Tighten what’s minor, but treat any structural cracks or unsafe wobbling as a stop-using signal. Use this checklist on every chair before regular use, and if you find red-flag damage, repair it promptly or replace the chair.
Frequently Asked Questions
How do I inspect a chair for damage before I sit on it?
Start by checking the chair’s frame for wobbling, cracks, or loose joints by gently rocking it and inspecting all connection points. Look closely at the legs and underside for splits, rust, or missing hardware like screws and bolts. Then examine the seat and back for sagging, tears, fraying upholstery, or loose padding that could fail under weight. Finish by testing mobility parts such as glides, casters, or armrests to ensure they move smoothly and securely.
What are the most common signs of structural damage on a chair?
Common structural issues include a chair that wobbles, squeaks from unstable joints, or has visible cracks in the wood, metal, or plastic frame. Watch for uneven leg contact—if one leg doesn’t touch the floor, the chair may be warped or damaged at the base. Also check for bent legs, loose joinery, missing brackets, and deteriorated fasteners that can compromise stability. Upholstery problems like sagging padding can also indicate underlying frame damage, not just cosmetic wear.
Which parts should I check first when inspecting a dining or office chair?
Begin with the legs and base because they carry the most load and show damage early, including cracks, splits, or rust. Next, inspect the joints where the seat meets the frame and where the back or arms attach, since loose connections can cause sudden failure. Then check the seat surface for looseness, sagging, or broken supports, especially around the mounting points. Finally, inspect the underside for loose hardware and damaged crossbars or stretchers that affect chair stability.
Why is it important to check for chair damage even if it looks fine?
Many chair failures start as small issues like hairline cracks, worn screws, or a loose joint that isn’t obvious from the top. Regular chair inspections help you catch weakened support before it becomes a safety hazard like a collapse or fall. Damage can also worsen over time under repeated use, making minor problems escalate quickly. By inspecting a chair for damage early, you can reduce injury risk and avoid more expensive repairs or replacements.
Best practices: how do I safely test a chair’s stability and durability during inspection?
Perform a stability test by placing the chair on a level surface, then gently rocking it front-to-back and side-to-side while watching for movement at the joints and legs. Press on the seat and back with your hands to identify wobble, shifting, or creaking from loose fasteners; avoid aggressive force. Use a flashlight to look for cracks, especially around corners, corners of the seat frame, and any areas where parts connect. If the chair has wheels or glides, roll or adjust it to confirm smooth operation and check for loose mounts, missing screws, or cracked supports.
📅 Last Updated: August 02, 2026 | Topic: How to Inspect a Chair for Damage | Content verified for accuracy and freshness.
References
- https://www.osha.gov/ergonomics
https://www.osha.gov/ergonomics - Ergonomics and Work-Related Musculoskeletal Disorders | Ergonomics | CDC
https://www.cdc.gov/niosh/topics/ergonomics/ - DSpace
https://apps.who.int/iris/handle/10665/44211 - https://www.hse.gov.uk/workplace/seating.htm
https://www.hse.gov.uk/workplace/seating.htm - https://pubmed.ncbi.nlm.nih.gov/?term=wheelchair+maintenance+inspection
https://pubmed.ncbi.nlm.nih.gov/?term=wheelchair+maintenance+inspection - Wheelchair
https://en.wikipedia.org/wiki/Wheelchair - Chair | Definition, Types, & Facts | Britannica
https://www.britannica.com/topic/chair - Google Scholar Google Scholar
https://scholar.google.com/scholar?q=chair+inspection+damage+checklist - Google Scholar Google Scholar
https://scholar.google.com/scholar?q=wheelchair+inspection+maintenance+checklist - Google Scholar Google Scholar
https://scholar.google.com/scholar?q=office+chair+safety+wear+tear+inspection
