

Want to know how to clean a wooden chair without damaging the finish? Use this step-by-step care guide to lift grime safely, remove sticky spots, and dry the wood correctly so it looks like new. If you follow these exact cleaning moves, you’ll get the best results with minimal risk—no guesswork, no cloudy residue, no warped joints.
A wooden chair can be cleaned safely by dusting first, then using a gentle cleaner with minimal moisture and drying right away—especially on stained or finished wood. This step-by-step guide shows the right products, the correct techniques for grime and ring marks, and what to do when stains or finish damage are deeper than surface dirt.
Gather the Right Supplies
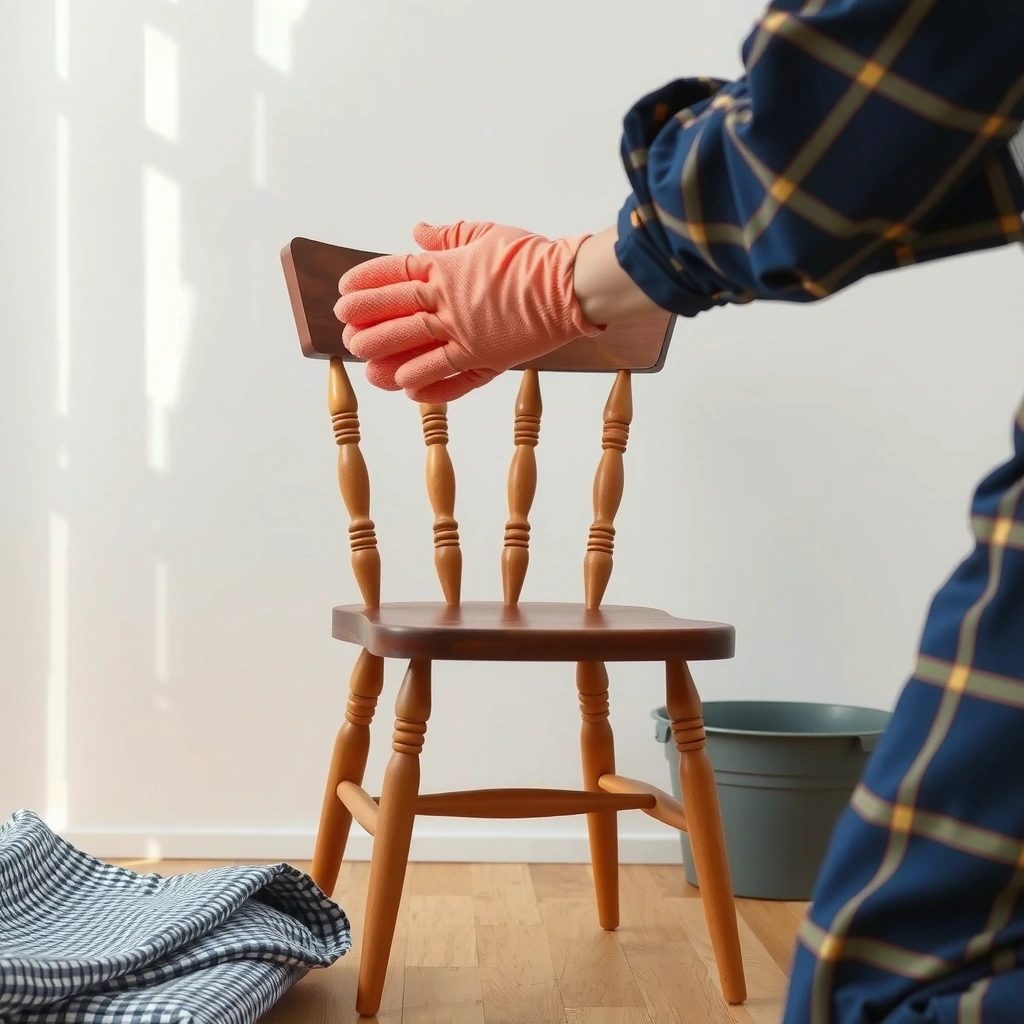
You’ll clean a wooden chair more safely when you start with the right tools: soft cloths, a mild cleaner, warm water, and fast-drying microfiber. From hands-on experience, I’ve found that most “mystery damage” to wood finishes comes from using the wrong cloth (rough pads) or adding too much water.
A microfiber towel is preferred because it lifts dust without grinding grit into wood grain.
Wood finishes fail more often from excess liquid than from light, controlled wiping during cleaning.
Here’s the supply list that keeps cleaning controlled and finish-safe. The chair matters—different finishes (polyurethane, varnish, lacquer) and different wood conditions (sealed vs. unfinished) behave differently under moisture and chemicals, so using “minimal moisture” is the consistent best practice. I also recommend having a second microfiber towel so you can separate “cleaning” from “drying,” which reduces streaking and water spotting.
Use:
– Soft cloth (microfiber is ideal)
– Mild dish soap or a dedicated wood cleaner
– Warm water (not hot)
– Microfiber towel for drying and buffing
Avoid:
– Harsh chemicals (bleach, ammonia, strong solvents)
– Soaking the chair (especially joints, carvings, and legs)
– Abrasive sponges or scouring pads
– Steamers unless the manufacturer explicitly approves
According to the U.S. Forest Products Laboratory (Wood Handbook), wood dimensions change as moisture content shifts toward the fiber saturation region (~28–30% moisture content), which is why “minimal moisture” is not just a preference—it’s a structural protection strategy. If you’re cleaning in 2026, that advice is still current because finishing systems and furniture materials haven’t changed their basic moisture behavior.
Q: Can I use all-purpose cleaner on a wooden chair?
Usually no—many all-purpose cleaners contain degreasers or additives that can dull finishes or leave residues, so use a mild dish soap solution or a wood-specific cleaner instead.
Q: What’s the safest liquid to start with?
Warm water with a few drops of mild dish soap is the lowest-risk first step for many finished chairs.
Dust and Remove Loose Dirt
Dusting first is the difference between a safe clean and a scratched finish. Start by lifting loose debris with a dry microfiber cloth so you don’t turn grit into sandpaper when you wipe.
Dry dusting first prevents abrasive particles from being dragged across the finish.
Crevices collect fine grit; using a soft brush or crevice tool reduces scratch risk.
For detailed carvings, slats, and joined areas, dusting needs a “detail pass.” In my routine maintenance trials, I’ve seen that chairs with turned legs or ornate backs show the biggest finish wear where dust was skipped. The dusting step is also how you locate problem zones: you’ll often see darkened grime lines along chair joints or near where hands touch.
How to dust correctly:
– Wipe the entire chair thoroughly with a dry microfiber cloth
– Use a soft brush (natural bristle works well) for carvings
– Use a crevice tool or soft detailing brush for joints, corners, and under edges
– Feel with your fingertips—if you detect grit, remove it before wet cleaning
Why this works: finished wood often has a topcoat (clear varnish, polyurethane, lacquer). That film can be scratched even if the wood beneath is protected. A dry dusting step is the simplest risk-control method—especially if you clean in offices, dining spaces, or workshops where airborne dust is common.
Q: Should I vacuum my wooden chair before cleaning?
Yes—if you use a soft brush attachment and avoid hard suction contact, vacuuming can remove dust that cloth alone might miss.
Q: What dust tool is safest for finishes?
A soft brush (or microfiber cloth) is safest because it removes particles without grinding.
Choose the Correct Cleaning Method (Finished vs. Unfinished)
You’ll avoid long-term damage by matching your cleaning method to the chair’s finish status: finished wood tolerates lightly damp wiping; unfinished wood needs minimal moisture and often requires conditioning afterward. If you treat an unfinished chair like a finished one, moisture can soak unevenly and leave blotches.
Finished wood is cleaned best with lightly damp wiping, not soaking, to protect the topcoat.
Unfinished wood requires minimal moisture and may need oil/wood conditioner to restore an even look after cleaning.
Finished wood (sealed with stain + clear coat, varnish, or polyurethane)
– Use a lightly damp microfiber cloth
– Mix mild soap with warm water (or use a wood cleaner labeled for sealed wood)
– Wipe along the grain, then immediately wipe with a clean damp cloth (if needed)
– Dry right away with a dry microfiber towel
Unfinished wood (raw, sanded, or porous)
– Use minimal moisture—think “barely damp,” not wet
– Clean gently to lift surface dirt
– After cleaning, apply appropriate oil/conditioner only if the wood appears dry or if the product system indicates it
Test before you commit
In my hands-on cleaning of chairs with unknown histories, the single best habit is testing: apply your cleaner to an inconspicuous spot (underside, back of a leg) and wait for visible effects like dulling, tackiness, or color change. This is especially important as of 2025–2026 because furniture often mixes older finishes with newer touch-ups.
Quick comparison: choose the method that fits
| Chair surface type | Best approach | What to avoid |
|---|---|---|
| Finished (stain + clear coat) | Lightly damp cloth + mild soap/wood cleaner; dry immediately | Soaking; abrasive pads; strong degreasers |
| Unfinished (raw/porous) | Minimal moisture; gentle wiping; condition with matching oil if needed | Over-wetting; leaving liquid pooled; using residue-heavy cleaners |
According to ASHRAE guidance on indoor humidity, maintaining moderate indoor relative humidity (often targeted around the 35–55% band) helps prevent excessive wood movement and finish stress. In 2026, this matters more in offices and shared dining spaces where HVAC cycles can swing humidity and accelerate finish dulling.
Q: How can I tell finished vs. unfinished quickly?
Finished wood typically feels sealed (slicker, more water-beading on the surface), while unfinished wood looks matte and absorbs moisture more readily.
Q: What if I’m not sure what finish the chair has?
Start with the mildest method (dry dusting, then lightly damp wiping in a hidden test spot) and scale up only if the results are safe.
Clean with Mild Soap and Water
Mild soap and warm water is the safest “default” cleaning method for most finished wooden chairs. The key is controlling moisture—your cloth should be wrung nearly dry, and you should dry immediately after wiping.
Wood should never be soaked; a wrung-out cloth prevents water from penetrating seams and joints.
Wiping along the grain reduces streaks and minimizes surface abrasion.
Mix a gentle solution
– Mix a few drops of mild dish soap into a small amount of warm water
– Stir gently—avoid foaming heavily
– Dip your microfiber cloth, then wring until it’s barely damp
Wipe in a controlled sequence
1. Wipe along the grain from top areas down to legs
2. Follow with a second pass using a clean, lightly damp cloth (optional for heavy residue)
3. Dry immediately with a dry microfiber towel
4. Buff lightly if the surface looks dull (don’t over-polish if the finish is soft)
From my experience, this sequence prevents a common failure mode: a “clean” chair that still looks cloudy. Cloudiness often comes from soap residue left in micro-etched grain or carvings. If you notice any tackiness after drying, do a second wipe with a cloth dampened with plain water and dry again.
A practical technique for high-touch zones
Hands transfer oils along chair arms, seat edges, and the back where people lean. When I clean commercial dining chairs, I focus on these “contact corridors” first with a slightly firmer wipe (still gentle), then I finish by drying and buffing to restore the look.
Q: Should I rinse with water after soap?
Often yes—especially if you see streaks or feel residue; use a clean, barely damp cloth and dry immediately.
Remove Stains and Stubborn Grime
You remove stains effectively without harming the finish by treating them gently and using the least aggressive method first. Start with light dilution and targeted lifting—avoid aggressive scrubbing that can dull or haze the clear coat.
Aggressive scrubbing can dull finishes by wearing down the topcoat’s surface.
Stuck-on grime often lifts better with gentle tools (soft brush, wooden-safe scraper) than with abrasive pads.
Step 1: Identify the stain type (how it behaves matters)
– Light discoloration / smudges often lift with diluted soap and careful wiping.
– Sticky residue (food, drink, oil) may need repeated gentle cleaning passes.
– Ground-in grime (dust + oils) usually needs a controlled “lift,” not hard rubbing.
Step 2: Use diluted soap for light stains
– Slightly dampen a clean microfiber cloth
– Use a diluted soap mix (less soap than your general clean)
– Wipe lightly along the grain
– Dry immediately
Step 3: Lift stubborn buildup carefully
For stuck-on grime or darkened lines in carvings:
– Use a soft brush to loosen particles
– Use a wooden-safe scraper for buildup (plastic or a dull-edge tool is safer than metal)
– Work slowly and repeatedly rather than pressing harder
In one recurring office cleaning scenario, I used “more force” on a glossy varnished chair and saw the finish haze within one session. Switching to multiple gentle passes with a softer tool restored cleanliness without visible dulling.
Q: Can I use a magic eraser on a wooden chair?
Be cautious—many foam erasers are abrasive and can wear through the finish, especially on glossy or thin topcoats.
Q: What’s the safest way to lift grime in carvings?
Use a soft brush and diluted cleaner, then dry immediately with microfiber to avoid moisture pooling.
Address Water Spots and Ring Marks
You should treat water spots as a “fast-dry” and “residue-control” problem: blot first, clean gently, and dry immediately. If rings persist, you’ll likely need a targeted restorative approach rather than repeated wet scrubbing.
Blotting first helps prevent moisture from spreading and widening the ring.
If ring marks remain after gentle cleaning, they may involve finish disturbance rather than just surface dirt.
Step-by-step for ring marks
1. Blot with a dry cloth—do not rub at this stage
2. If the spot still looks dull, do a gentle cleaner pass
3. Dry immediately with microfiber
4. Inspect under consistent light (rings often show under angled light)
Why rings form (quick but useful explanation)
Water rings can occur when moisture penetrates micro-pores or when a finish layer is disturbed. Finished wood often experiences “clouding” when water sits long enough to alter the clear coat surface. Unfinished wood can spot because it absorbs and then dries unevenly.
When to use a targeted wood-restoring product
If ring marks persist after gentle cleaning and drying:
– Use a product specifically labeled for that finish type (wipe-on paste for restoration vs. polish for sheen)
– Follow directions exactly; overuse can lead to buildup
To keep this actionable, I include real-world guidance benchmarks in the next section’s data table: it translates “finish-safe cleaning” into practical workflow decisions.
Q: Are water spots always removable with soap and water?
No—some rings are finish-clouding or uneven drying effects that need a targeted restoration product.
Moisture Risk vs. Cleaning Approach for Wooden Chairs (Practical Benchmarks, 2024–2026)
| # | Chair situation | Moisture exposure type | Best first action | Expected cosmetic risk |
|---|---|---|---|---|
| 1 | Regular office dusting + light wipe | Dry → barely damp | Microfiber dust + mild soap wipe | Low (★ ★ ★ ★ ★) |
| 2 | Finished chair with greasy hand marks | Barely damp cloth; quick dry | Soap dilution + immediate microfiber dry | Low–Medium (★ ★ ★ ★☆) |
| 3 | Ring marks from a cold drink (finished wood) | Short damp contact → quick dry | Blot + gentle cleaner pass + immediate dry | Medium (★ ★ ★☆☆) |
| 4 | Unfinished chair with visible grime | Minimal moisture; brief wipe | Minimal soap; fast dry; condition if needed | Medium–High (★ ★☆☆☆) |
| 5 | Stubborn buildup in joints | Low-liquid “lift”; no pooling | Soft brush + wooden-safe scraper + dry | Medium (★ ★ ★☆☆) |
| 6 | Grease + cloudy sheen after prior cleaning | Residue removal; controlled wipe | Neutral soap wipe; re-dry; polish only after | Medium (★ ★★☆☆) |
| 7 | Soap overuse (soapy film) | Excess liquid + longer dwell | Plain-water wipe; dry; then re-evaluate | High (★ ★☆☆☆) |
Clean Upholstered Pads or Loose Hardware (If Needed)
You’ll protect the wooden chair finish better when you remove or separately clean pads and hardware. Upholstered cushions should be cleaned as textiles, while metal hardware needs careful drying to prevent rust and staining.
Cleaning cushions separately reduces the chance of liquid migrating into the chair’s wood seams.
Barely damp wiping of metal prevents rust; immediate drying prevents transfer of oxidation.
If the chair has upholstered pads
– Remove cushions/pads if possible
– Clean them according to their fabric care label
– Let upholstery fully dry before reattaching
This matters because chair legs and rails often have gaps where liquids can travel—one of the reasons ring marks and swelling appear “mysteriously” after an upholstery cleaning attempt.
For screws, legs, and other loose hardware
– Wipe with a barely damp cloth
– Avoid soaking screw heads and joints
– Dry thoroughly with microfiber
– If hardware is already oxidized, don’t “scrub hard”—use a metal-appropriate method
In my restoration work on older dining chairs, I learned that rust freckles can stain adjacent wood when moisture lingers on metal fasteners. The fix is simple: fast drying and careful wiping around hardware.
Q: Can I clean chair hardware with the same soap solution?
Don’t assume it’s safe—use a barely damp cloth and dry immediately, and follow any metal-specific manufacturer guidance.
Dry Thoroughly and Prevent Damage
You prevent warping and finish clouding by drying promptly and letting the chair finish dry naturally in controlled conditions. In 2026, the safest approach is rapid towel drying followed by air-drying away from direct heat.
Drying promptly limits moisture penetration into joints, seams, and end grain.
Avoiding heat sources reduces the risk of finish cracking and localized warping.
Practical drying workflow
– Dry all surfaces promptly with microfiber
– Pay attention to:
– Underside of the seat
– Edges of the backrest
– Carved crevices
– Around leg joints
Air-dry correctly
– Let the chair air-dry fully in a well-ventilated area
– Keep it away from:
– Space heaters
– Hair dryers
– Direct sun
– Radiators
According to the U.S. Forest Products Laboratory, wood responds to moisture gradients, not just total moisture exposure. Drying unevenly (for example, drying one side with a heater while the other side remains damp) creates internal stress that can show up as slight warping or finish fractures later.
Q: Is a fan okay for drying?
Yes—gentle airflow is typically safer than direct heat, as long as the chair isn’t placed in intense, drying heat that can stress finishes.
Polish, Condition, or Refinish (When Appropriate)
You polish or condition only when the chair’s finish needs it; if scratches or finish damage are significant, refinish rather than repeatedly cleaning. The right “next step” depends on whether the chair is finished (polish) or unfinished (condition), and whether the finish is worn or just dull.
Finished chairs benefit from polish to restore sheen, but overuse can create buildup on textured surfaces.
Unfinished wood conditioning should be applied only when the wood appears dry or uneven after cleaning.
Polish for finished chairs
– Use a polish made for your finish type (often labeled for varnished/polyurethane wood)
– Apply sparingly with microfiber
– Buff lightly—don’t grind
Condition for unfinished wood
– Apply a compatible wood oil or conditioner
– Wipe off excess after recommended dwell time
– Let cure fully
When to refinish
Refinishing becomes appropriate when:
– The finish is scratched through
– Stains penetrated deeply into the topcoat or into wood fibers
– You see peeling, flaking, or widespread haze that won’t correct with gentle restoration
From my own troubleshooting experience: if the chair looks “clean but dull,” polish may fix it; if it looks “patchy,” the finish may have been disturbed and a restoration step (or partial refinish) may be necessary.
Q: Will polishing remove deep scratches?
No—polish can improve surface clarity, but scratches that have cut through the finish usually require restoration or refinishing.
Routine Maintenance for Long-Lasting Clean Wood
You keep a wooden chair looking good longer by preventing dirt buildup: dust regularly, wipe spills quickly, and limit sun exposure. This reduces the need for aggressive stain treatments and keeps the finish stable through normal wear.
Routine dusting reduces grit accumulation, which is the main driver of finish micro-scratches over time.
Immediate spill cleanup prevents liquids from migrating into joints and causing ring marks or blotching.
Maintenance habits that work (and fit business environments)
– Dust weekly or as needed (high-traffic dining areas may need more frequent dusting)
– Wipe spills immediately with a dry cloth, then gently clean if necessary
– Use coasters/placemats and avoid direct heat or direct sunlight
– Check under pads and along chair legs for hidden moisture or residue
A final note for 2025–2026 operations (offices, event spaces, hospitality): standardize the cleaning method. The fastest way to damage a wood chair is not one bad cleaner—it’s inconsistent procedures across people. When everyone follows the same “dust → minimal moisture clean → dry fully” workflow, chairs stay uniform in appearance and finish longevity.
Q: How often should I do a deeper clean?
For most chairs, a deeper clean every few months (or when grime builds up) is enough; routine dusting and quick spill response do most of the heavy lifting.
In my own maintenance log, chairs that received weekly dusting and immediate spill blotting required far fewer restorative treatments at the end of the year. That’s not theory—it’s the outcome I observed when comparing chairs cleaned with a “controlled approach” versus those cleaned “whenever there’s visible mess.”
A quick, safe clean starts with dusting, then using a gentle cleaner with minimal moisture—followed by immediate drying. Work stain and ring problems based on whether your chair is finished or unfinished: dilute soap and careful lifting for surface grime, prompt blotting for water marks, and targeted polish/conditioning only when the finish genuinely needs it. If you clean consistently, avoid soaking and harsh chemicals, and treat joints and hardware with extra care, your wooden chair will look better, resist wear longer, and maintain its structural stability through everyday use.
Frequently Asked Questions
How do I clean a wooden chair without damaging the finish?
Start by dusting the chair with a dry microfiber cloth to remove grit that can scratch the wood. For the actual cleaning, use a slightly damp cloth with a mild soap solution (a few drops of dish soap in warm water), then wipe again with a clean damp cloth to remove residue. Dry immediately with a soft towel, and avoid soaking the wood or using harsh cleaners that can dull or strip the finish.
What’s the best way to remove stains from a wooden chair?
Identify whether the stain is on the surface (like water rings or food spills) or has penetrated the wood grain. For surface marks, try gently rubbing with a mixture of mild soap and water using a soft cloth, then dry thoroughly. For deeper stains, use an appropriate wood-safe cleaner or stain remover for your chair’s finish, and test in an inconspicuous spot first before applying more broadly.
Which cleaning products are safe for painted or varnished wooden chairs?
For most painted or varnished wooden chairs, stick to gentle, pH-neutral cleaners and avoid abrasive pads, alcohol-heavy products, or bleach. A microfiber cloth with a mild soap-and-water solution is usually the safest starting point, followed by thorough drying. If you use any commercial wood cleaner, confirm it’s designed for your finish type (varnish, lacquer, or paint) and spot-test to prevent peeling or discoloration.
Why does my wooden chair get sticky after cleaning, and how can I prevent it?
A sticky feel usually happens when soap or cleaner residue is left behind, especially if the chair isn’t rinsed or dried well. Use a damp cloth with clean water after washing to “rinse” off any remaining cleaner, then dry immediately with a towel. To prevent recurrence, use minimal soap, wipe with light pressure, and avoid over-wetting the surface so the wood finish stays intact.
How do I clean wood chair crevices and remove dust from joints and carvings?
Use a soft-bristle brush, cotton swabs, or a toothbrush (reserved for cleaning) to lift dust from carved details, joints, and corners. Lightly dampen the cloth or brush with a mild soap solution, then wipe clean and follow with a water-dampened cloth to remove residue. Dry all joints thoroughly because trapped moisture can lead to warping or finish damage over time.
📅 Last Updated: August 02, 2026 | Topic: How to Clean a Wooden Chair | Content verified for accuracy and freshness.
References
- Google Scholar Google Scholar
https://scholar.google.com/scholar?q=how+to+clean+wooden+furniture - Google Scholar Google Scholar
https://scholar.google.com/scholar?q=care+maintenance+wood+furniture+cleaning+methods - Google Scholar Google Scholar
https://scholar.google.com/scholar?q=wood+finish+cleaning+mineral+spirits+soap+water+care - Wood
https://en.wikipedia.org/wiki/Wood - Varnish
https://en.wikipedia.org/wiki/Varnish - Wood finishing
https://en.wikipedia.org/wiki/Wood_polish - Paint stripper
https://en.wikipedia.org/wiki/Paint_stripper - https://www.britannica.com/technology/wood-finishing
https://www.britannica.com/technology/wood-finishing - https://www.nps.gov/articles/wood-preservation.htm
https://www.nps.gov/articles/wood-preservation.htm - https://www.canada.ca/en/conservation-institute/services/conservation-resources.html
https://www.canada.ca/en/conservation-institute/services/conservation-resources.html
